Introduction: How to Drill or Bore Round Objects, Safely.
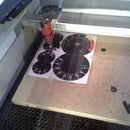
Ever want to drill out a pool ball for a paintball pump, shift knob, or door pull? Maybe just a really cool and tactically sound walking stick. We do custom laser engraved shift knobs (as seen in the first photo) and needed a repeatable way to drill out the balls for them.
Clamping down in a vice on a sphere is pretty difficult, especially when yo are trying to keep a surface finish correct. Being able to index is even more crucial, so repeated operations can happen, which is not always possible when you are wrapping things in rags and scraps of leather.
What you will need:
A block of Sculpy modeling clay
car wax
tape
Your vice
an oven
Milling is optional.
Techshop is optional, but a big help. I did this at Techshop Pittsburgh
I first got the idea from a fellow on mcarterbrown.com
Step 1: Prep Your Sculpy
for this jig, I used 1/2 a block. Take and work it a bit, until you have a few balls of material. You will need one for each side.
Step 2: Wax Time!
Take your object, in this case a pool ball, and apply a generous amount of wax. this will help it release from the sculpy.
Step 3: Prep the Vice
We want a clean surface on the vice, so we don't contaminate the sculpy, nor the vice with clay. Clean off any chips an inconsiderate user may have left, and then give both jaws and the bottom a good coating of masking tape. You can then wipe this down with a bit of wax as well if using a liquid version. Just a dab will do ya!
Step 4: Molding
Put the scuply or clay on either side of the vice, in ann L shape, and then press the ball into it. We then lightly close the vice in order to make sure the material is gripping the object with sufficient surface area.
Sculpy is good for this, being that it stays just a bit plasticy once cured. I havent had a ball slip yet.
remember, we want a bit of clay to fit over the top, and we want to keep both halves of the jig from closing in. You may want to use a bit of tape or a bit of wax in order to keep them apart, I didnt have an issue with this.
Step 5: Remove the Mold, and Bake!
Next, remove the ball (should be easy because of the wax, and take care to separate the 2 without deforming the clay. Place it onto a surface that is flat and will alow for it to be heated, I used some scrap aluminum, and placed it in a powdercoating oven.
Follow the instructions on the box. I baked mine for about an hour to be sure.
Step 6: Thats It
Let cool, remove, and test fit. You may want to chuck it back up and use an end mill to clean up the sides, but that is optional.
Good luck, and I hope this was useful!

Participated in the
Full Spectrum Laser Contest


