

Introduction: How to Fix Bad Chinese Arduino Clones


Have you ever wondered if a cheap Chinese Arduino clone will actually work?
You pay only a few bucks and get the same product. Sounds to good to be true right?
The truth is that some work and some won't. Follow the rest of this instructable and I'll explain you how to make them all work in no time.
Here is where I got my Cheap Arduino clone
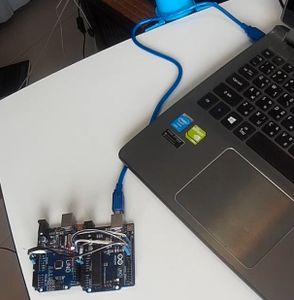
Step 1: Genuine Arduino and Chinese Clone - the CH340 Chip Problem

I use an Arduino Uno for this example but it is the same process for most Arduino models.
So here we have a genuine Arduino and a Chinese clone. Let's do the test.
My Arduino environment has been installed and is working properly. First I plug in the genuine Arduino. Everything works just fine. Now I use my cheap Chinese copy and.... the computer does not recognise the hardware.
The problem is that the clone does not use the standard serial to usb chip but a chip marked CH340. Your computer will not recognize these CH340 chips on your computer. To fix this is very easy.
Step 2: Download Software

Download the manufacturer software and istall it on your computer. This software will work for all versions of windows.
Here is the link:
http://www.wch.cn/download/CH341SER_EXE.html
This instructable is based on pc but here is a link for a solution for Mac users:
http://0xcf.com/2015/03/13/chinese-arduinos-with-...
Now plug in your Chinese clone and try again. It should work just fine.
The board should be visible now in the Arduino IDE and ready to use.
I upload the blink sketch to the board and it all works.
In some cases the board might still not work. This is because there is no bootloader installed on the Atmel microcontroller ship. To solve this problem we need a working Arduino and the clone Arduino we want to fix.
Step 3: Make an ISP Programmer From Your Working Arduino

First we connect the working Arduino to our computer and open the Arduino IDE.
We go to File -> Examples and click ArduinoISP and upload this to the Arduino. Ones uploaded disconnect the Arduino.
Step 4: Connecting the Wires

Next we connect the wires from the working Arduino to the clone as follows.
Pin 10 goes to reset pin 11 goes to 11,
pin 12 to 12,
pin 13 to pin 13.
5v to 5v and ground to ground.
Connect a 10 uF capacitor between reset and ground on the working Arduino.
Step 5: Burn the Bootloader
Next we connect the working Arduino with a usb to the computer.
Go to Tools -> Board and select the chinese board that is not working. in my case it's an Arduino Uno.
Next we go to Tools again -> Programmer and select Arduino as ISP.
Go to Tools again and select "Burn Bootloader".
Go back to Tools -> Programmer and set back to ArduinoISP.
Your clone should work just fine now.
Step 6: Contribute

Arduino is great software an completely free to use.
If you are buying Chinese copies of the Arduino controller, consider making a donation to support the Arduino software. Here is a link.
https://www.arduino.cc/en/Main/Donate
Step 7: Final
If this instructable was helpfull for you, please click the favorite button.
Comments and suggestions below.
Also check out my 2$ ARDUINO INSTRUCTABLE here.
See you in the next instructable.
Tom Heylen
Facebook: https://www.facebook.com/OfficialTomHeylen
Donate to help me keep doing this work: https://www.paypal.me/TomHeylen/2usd


