

Introduction: How to Flush Set Stones


This is how to flush set stones for jewelry or other similar items. I will show where to use this in other instructables. A sleek way of setting stones without adding components to the item as well to hold that stone.
Materials: Metal plate, or item to be set with a stone. Stone.
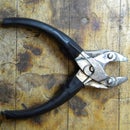
Tools: Ball bur, drill bits, setting bur, dremel/flex shaft, burnish tool, Jetset/pitch or some way of holding onto the item, bench vise.
Step 1: Gather Materials & Tools.


Gather materials & tools. I am using a 1.3mm thick plate of copper to demonstrate. I will be setting a 2mm diameter CZ. The CZ is also 1.3mm deep. You don’t want to use a stone that is deeper that the metal unless it is alright for the back of the stone to stick out the back. With enough practice you could set a stone much larger than this in a plate this thick. Too big & there won’t be enough material to hold the stone properly. Next is the tools. All of the burs, & drill bits fit into my quick change flex shaft rotary tool. The jetset is a plastic material that is used to hold onto items while you work on them. Because the piece of copper is too small to hold in my hands & work safely, or comfortably I am using that. The bench vice will hold onto the jetset so I can work with both hands, instead of holding the mounting with one & working with the other. The burnish tool is how we make secure the stone.
Step 2: Getting Started.

Heat up the jetset to make it soft so we can put our piece in. This is done with boiling water. Once the piece is in let it cool for a while till it is hard once again.
Step 3: Where Are You Going to But the Stone?

Using the ball bur make a small cut into the metal where you want to set the stone. This will be the center of that, & allows the drill bits to cut in easily with out straying off course.
Step 4: Drill Thru

Drill all the way thru with the smaller drill bit. I used a 1mm bit for this. Used for cleaning later this is important to make sure is done.
Step 5: Remove More Material

Using the larger drill bit (1.8mm) drill only a little bit down. This removes enough material to make the work done next with the setting bur much easier. Do not drill all the way thru.
Step 6: Using the Setting Bur

The setting bur is the same size as the stone to be set (2mm). Use this to make the hole the final size & depth. You need to leave enough material under the stone to hold it.
Step 7: Test Fit

Test the fit of the stone in the hole. Sometimes you have a stone that is just bigger than the settings bur & will need to adjust the hole accordingly. Do not make the hole too big. If the stone dose not have a good fit then it is going to be hard to get/keep it tight in the item.
Step 8: Burnish the Stone In.


There are 2 types of burnishers that can be used here. The first is the more traditional, the round pointed burnisher. With the tool pointed down & slightly at an angle push outward with a sweeping motion to move the top edge of the material outwards. The shape of the tool & how you push the metal causes the material just above the stone to pull in towards the stone. A very difficult means of setting. The second type of burnisher is easier to use. Laying the flat of the tool against the crown facets of the stone, push with the tip on the metals edge outward while rotating the piece. This is less likely to slip & scratch the surface. It also makes for quicker setting & a better finished setting.
A very impressive way of setting stones. It really looks like the stone is just stuck there. In actuality it has been inbeded into the metal with very little showing as to how it is held in.


