

Introduction: How to Make a Knife


I love to design and make things – it’s my passion! One day at work by boss showed me a picture of a kitchen knife he made completely from scratch and after that, I knew I had to make one. He said it was “one of the most rewarding things you can make!” – He was most definitely correct!
I had such an enjoyable time making this knife that I felt I should share it with you guys and hopefully persuade some of you to have a go yourself! Be warned, that this process is time consuming (took me about a month of on and off work)! However if you put the time in, you will most definitely see the reward!
Thanks for looking and I hope you find this useful! For further designs please check out my other Instructables and my website – www.philreillydesigns.com
I am currently working on a new minimalist ballpoint pen and stylus, check it out at: www.529studio.co.uk or follow me on instagram @529studio
All the best,
Phil
Step 1: Design the Knife (sketching)


The design of the knife is probably one of the most important stages of this process. Remember you are going to spend many many hours making this thing perfect so it is definitely worth spending some time planning what you are going to make! It is a lot easier to change the design on the paper as opposed to altering the steel! The better you plan and decide what direction you are going to go from the beginning, the better your knife will be! For my first knife, I decided to design and make a pretty standard hunting knife. I didn’t want to try anything too elaborate at this stage as I wanted to make sure I could master the basics first! I believe that a ‘simple’ knife made to a high standard is a lot better than an over-ambitious knife done to a medium standard but this is personal preference (being a perfectionist!). Design for whatever interests you; whether it is cooking, hunting or fantasy (as you are going to be the one making it)!
At this stage, as well as designing how the knife will look, one of the main decisions that you need to make is how you are going to attach the handles to the knife. There are three main ways of accomplishing this; a full tang, a partial tang and a through tang. The knife that I decided to make has a full tang – the handle has the same profile as the tang, with ‘slabs’ fastened to each side by means of pins, screws, metal tubing, bolts, epoxy etc. A partial tang extends partially from the blade and is completely hidden within the handle body. A through tang is similar to a partial tang but extends all the way through the handle and is secured on the other end of the knife by a nut or rivet. You can decide which one you wish to make although this set of instructions will be covering the full tang method.
Once you have decided what design you wish to make, draw a 1:1 scale side profile on paper and cut it out, ready to be traced onto the steel. I have attached my drawing if anyone fancies having a go at that!
Step 2: Design the Knife (CAD - Optional)


This step is most definitely optional and not necessary, but something I wished to complete to visually see how the project might look upon completion. I quickly modelled the design I wished to create, and generated a few renders to see how it would look.
Step 3: What You Will Need


• 4mm 01 Carbon Steel sheet
• Sketched side profile of design
• A pair of Handle Scales (I used walnut)
• Brass block (for the bolsters)
• 4mm Brass Bar (for peening the bolsers to the blade)
• 2 x Corby Rivets
• A selection of sandpaper from coarse grit to as fine as you can get
• Hacksaw
• File
• Drill
• Rasp (for shaping the wooden handles)
• 4mm Drill bit for brass bar
• Appropriate drill bits for Corby Rivets (measure rivets with callipers)
• CCL wood finishing oil and wood sealant
• Rubbing compound (optional)
• Epoxy (I used Araldite)
• 2 sided sharpening stone
• Kitchen steel
There are lots of different steels that a knife can be made from. After doing lots of research I decided to make this one using 01 carbon steel. There are other steels such as stainless, D2 and Damascus (all having slightly different properties), but I would recommend 01. I made my blade using 4mm 01 carbon steel. If you order it in sheet form, it will usually come already annealed (but check before you buy!). Annealed basically means that the carbon atoms within the steel are arranged in such a way that makes the steel workable! Later in the process once the blade is shaped we will discuss hardening and tempering (making your blade fit for use!). The steel I used was ordered from a knife website that sold sheet metal for the amateur knife maker. A quick look on the internet and I’m sure you’ll find many places that sell it.
As with the blade, there are lots of materials that the handles can be made from. I decided to use walnut slabs as I wanted a dark wood that had a nice grain pattern. You can use many materials for this including wood, bone, micarta, chord, stone and ivory. Many knife websites actually sell various knife scales already cut down to a reasonable size so it is worth having a look there for inspiration.
Step 4: Cutting and Shaping the Blade Profile


Take the drawing of the side profile of the design and cut it out. Lie it on the steel and draw around the outside leaving the profile on the steel. You can either use a sharp tool to scribe into the steel, engineers blue and then scribe, or just use a thin permanent pen. Using the hacksaw roughly cut out the knife outline leaving about 5mm of waste around the profile. The closer you get to the profile the less material you will have to remove with the file but be careful not to overdo it! With the blade firmly fixed in a vice, use the file to gradually work down the profile until you reach the line you made all the way around. This takes a little bit of time but take care when getting close to the profile line.
Step 5: Adding the Bevel


The bevel is the section of the blade where the profile thins down towards the cutting edge. As shown in the picture, draw a line down the middle of the steel where you want the edge of the blade to be. Clamp the blade horizontally to a table and use the file to slowly grind the edge to add the chamfer profile. Many people choose to make this detail using belt sanders etc. but I only had access to a file – it works great but takes a while! As you file along the edge of the blade, try to maintain the same angle between the file and the steel. Keep filing at this acute angle until you get close to the line for the edge. It is key that you don’t file past this line otherwise your blade will have a dip in the profile!! You can always take more material off but you can’t add any on so make sure you take your time and do it carefully! Once you have filed one side, turn the blade over and repeat on the other side. By hand, this part takes a couple of hours per side.
Step 6: Drilling and Finishing the Blade (first Time)

The design that I decided to make has 4 fixing points along the steel blade – 2 for the bolsters and 2 for the handle scales. The holes for these attachments need to be drilled through the steel before the blade is heat-treated. The holes for the bolster need to be exactly the same size as the brass bar that is going to be put through, in my case it was 4mm. Once finished, these brass fixings for the bolster will almost disappear so positioning is not crucial, but I would try and place them in the middle of the bolster equidistant from the edges. The Corby Rivets that hold the handle scales in place will be visible once the knife is finished. I placed mine in the middle of the handle and about the same distance in from each end. As with the bolster, the holes that are being drilled for the Corby Rivets need to be the exact same size as the thin middle part of the rivet. You can measure the rivets you have with a pair of callipers! I think mine were around 3.6mm.
Before the blade is heat treated, it will need to be finished. This involves using sand paper to gradually sand out all of the marks created by the file and create a good finish. It is important not to skimp on this step so take time to make sure it is done correctly. Start on a rough grade of sand paper and begin sanding in the same direction. Once you have removed all the scratches and grooves, swap to the next finer grade of sandpaper. Continue with this grade until all the scratches and grooves are removed from the previous grade. This process should be repeated until you reach to the finest grade you have – around 1200 grit. If you have taken your time and not rushed it, you should have a completely flat blade.
It is important to make sure that the whole blade is sanded. Although the handle won’t be seen as it will be covered by brass and wood, it is important that the areas where the blade meets the brass are completely flat. It is better to sand part of the blade that won’t be seen than miss a patch that will be!
Step 7: Heat Treating the Blade

This is one of the most technical parts of the project and actually quite hard to complete accurately. In essence, this step involves heating the steel to a temperature at which it becomes demagnetised and then quenching in oil. This hardens the blade and makes it very brittle – if it is dropped at this stage it will most probably shatter! The second stage to the process is tempering which involves steadily heating the steel to a set temperature depending on what hardness you opt for and maintaining it at that temperature for around an hour.
As this project was very important to me, I wanted to make sure that the hardening of the steel was done correctly so I sent it to a local hardening company and requested a hardening value of HRC56 Rockwell 56.
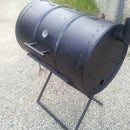
Many people choose to do this part of the process themselves and it usually requires a coal forge, a gas forge or an oxy-acetylene torch. There are lots of examples of this on the internet if you wish to have a go yourself. The picture attached is of a pizza oven I built and that a friend actually used to harden his steel knife! It was fun trying to get this thing hot enough but it worked in the end! For instructions on how to build a pizza oven, follow the link to my other Instructable – How to build a Pizza Oven.
Step 8: Finishing the Blade (second Time)

Once your blade has been tempered you will notice that the colour of the blade has completely changed to black; as a result from the quenching in oil. As with step 6, this step involves starting with a coarse grit and making sure that the entire black oil residue is removed. Gradually move up the grits until you reach around 1200. Please take your time with this step as this is going to be the finish look to the blade! Make sure you remove all the little scratches so you can have a completely smooth blade. If you have missed a few scratches then go back a few grits and work on that area until they disappear.
At this stage I used some car body rubbing compound on the blade. Follow the instructions on the bottle but it involves putting a little on a cloth and rubbing onto the blade until it has disappeared. Then use a clean cloth to rub off and buff out. This will give a nice satin finish to the blade.
Once the blade is finished, make a basic sheath from a folded piece of cardboard and tape around the blade. This will protect the blade from scratches whilst you attach the bolsters and the handle. It will also give you something safe to hold onto whilst completing the last few steps.
Step 9: Creating and Attaching the Bolsters


For my knife I decided to add some bolsters onto the handle to add a bit more class and workmanship to the knife. You will want to have two pieces of brass that are the same thickness. I placed the blade onto the piece of brass and drew around the profile of the blade with a black pen – this can be shown in the picture. Clamp both pieces of brass together and file the profile that is going to be located nearest the blade end (the ricasso area). This is done first because once the bolsters are glued and pinned you will not be able to work on that area. Once you have that same profile on both pieces of brass, write the words ‘right’ and ‘left’ on the back of the pieces of brass so you know which side they belong on. Although the profile should be the same there might be slight differences between each piece.
Take one of the bolsters and clamp it to the handle in the correct position. Using the same drill bit that was used to drill the bolster holes, drill though these as a guide and then through the brass. Put that bolster to one side and then drill through the other one. On the outside of each bolster you will want to put a small countersink in the hole. This is so that when the brass bar is peened, it has a little area to expand, thus gripping the bolster.
Cut two pieces of the 4mm brass bar so that when the bar is placed through the bolsters and the steel blade, there is about 5mm on either side.
Mix some of the epoxy and spread it on the areas where the bolster will be in contact with the blade. Try not to put too much on as when the brass is clamped together, the glue will be forced out. Place both bolsters onto the blade and push the brass bar though. It might be a little tight as the hole is exactly the same size as the bar so a little gentle encouragement with a hammer should do the trick.
When the brass bar is through both bolsters and the blade with equal distances on both side, lay the blade on its side on a hard metal surface. Ideally you would use an anvil for this but I just used the back of a metal vice instead. Take the peening hammer (with the semi-spherical dome head) and begin hitting the metal pin whilst it is supported underneath by the metal surface. Keep hitting the pin and turning the knife over so that both sides are worked equally. This will cause the end of the brass bar to mushroom and in doing so will grip the bolster. Once both sides of both brass bars are mushroomed, leave for 24 hours until the epoxy has fully cured.
Once the epoxy has cured, you can begin sanding down the brass bar until it is completely flush with the bolster. If you have done this step correctly, as shown in the picture, the brass bar should completely disappear and become invisible to the eye. If not, you will end up with a small circle on the side of the bolster but that is not the end of the world! You can use a file and begin filing to top of the brass so that it becomes flush with the blade and likewise on the bottom. I added a small radius to the edges using sandpaper. This gives a nice ergonomic look to the handle and takes away the harsh sharp edges.
Step 10: Attaching the Handles


Take the wooden handle slabs and place them onto the blade in position. I had to cut a corner off the handle slabs so that when they butted up to the back of the bolster, they would cover the whole of the handle. To get a nice tight fit between the steel, the wood and the brass, make sure that the wooden faces that come in contact with the steel and brass are completely flat.
Take one of the wooden slabs and clamp it onto the knife, making sure that it is tight up against all the metal faces. Using the same drill bit that was used to drill the hole for the middle of the Corby Rivet (the holes that you previously drilled through the handle), drill through the handle using the previous hole as a guide, and then through the wood. Repeat the exact same process for the other side of the handle. If you look at the side profile of the Corby Rivet, you will notice that it is shaped like an ‘I’. The top and bottom of the rivet is actually wider than the middle. This means that another drill bit, larger than the last, but the same size as the top and bottom of the rivet needs to be used. This drill bit is used to form a shelf in the previous hole through the wood. This enables the rivets, when screwed in, to sit on the shelf and use that as a means of clamping the slabs together. There is a lot more detailed information out there on the internet about Corby Rivets if you fancy having a more detailed look!
Once the wooden slabs have been drilled so that they have a little shelf, you can screw in the rivets and just check that they fit ok. Once you are happy that they are good to go, apply some epoxy onto the steel handle and the side of the wood that is being glued. Place the wooden slabs in position and attach the rivets. You will notice that as you tighten the rivets, the slabs become compressed against the steel and begin forcing some glue out of the gaps. Do not over tighten the rivets as you could damage the wooden shelf but tighten them enough so that everything is tight. As the excess glue begins to seep out, wipe it away using a damp cloth.
As with the bolsters, allow for 24 hours or until the epoxy is completely dry before starting work on the shaping.
Step 11: Shaping the Handles


The first step is to remove as much of the excess wood as you can. For this I used a wood saw, but you could also use a belt sander or band saw.
To shape the wood you can use any wood carving tool or file that you can find. I started with a normal file but quickly swapped to a rasp because it is a lot quicker to remove material! It is also quite good at removing the material from the brass rivets as well, so you can work both the wood and the brass simultaneously.
Keep removing material and shaping the handle to taste. As you begin to get close to the level of the brass bolster and steel handle, swap to a coarse piece of sand paper. This will help make sure that you get a nice even transition between the brass and the wood. I added a small radius to the edge of the wood to match the same radius that was on the brass bolsters. This creates continuity between the various components on the blade.
To finish the wood, complete the same steps as you did for finishing the blade. Start with coarse sand paper and begin working down the grades until you have created a nice smooth finish. It shouldn’t take that long as wood is quite an easy material to work with!
Step 12: Finishing the Wooden Handle


To add the finishing touches to the handle I used CCL wood finishing oil and wood sealant. You can use many different types of finishing oil but I used this as it was made and marketed for knife making. Although it may seem quite expensive (£25 for both bottles), it goes a long way and definitely makes the knife look good!
Firstly take an old cloth and apply a little of the wood sealant. Carefully rub into the wood until all areas are covered. Leave the sealant to dry, roughly about 40 mins, and then sand back using a piece of 1000 grit. Repeat this process three times.
When applying the finishing oil, apply a little onto your index finger and gently rub it in circular motions into the wood. Once the entire wooden handle is covered, leave to dry – about 30 mins. Rub off the excess oil using your clean finger and then palm the wood. This involves rubbing the wood for about 20 seconds with your palm quite quickly so that it becomes warm. This helps to work in the oil. Once completed, leave for 24 hours to fully harden. Repeat this process three times and then the handle is fully finished!
Step 13: Sharpening the Blade


The main function of a knife is to cut. To achieve this, you need to manipulate the edge of the blade until you form a sharp edge. There is plenty of information out there on how to sharpen a blade but here is how I accomplished it.
Firstly take the sharpening stone and place it on the table. If you have a double sided sharpening stone then one side will be coarser than the other. Place the coarser side upwards and lubricate with oil (mineral oil is usually recommended). Hold the knife at a 20 degree angle to the stone and scrape along the stone in a cutting motion making sure that no more force is applied than when you would butter a piece of bread! Keep alternating on each side of the blade until the blade begins to develop an edge. This sharpening motion will produce a nice ‘V’ shape that will enable a good sharp edge to be formed. Swap to the finer side of the stone and complete the same process, making sure you add more oil. You should be able to get the knife quite sharp by undertaking this process.
For a razor sharp edge, use the same 20 degree cutting motion on the kitchen steel. The sharpening stone shapes the edge of the blade but the kitchen steel does something a little different. Rather than removing material, it produces a very fine metal burr along the edge that will be very sharp.
To test the sharpness of the blade you can hold a piece of paper in one hand and use the blade to cut through it. If the blade is not sharp enough then the paper will just rip. If you have achieved a sharp edge then you should be able to cut the paper into fine little strips!
Step 14: Engraving / Laser Etching (Optional)

As I was making this knife as a present, I decided to get a message laser etched onto the blade. Most places will recommend laser etching for carbon steel as the majority of engraving tools are made from the same materials as the blade and will likely damage them. You could either get something etched onto the blade or engraved / etched into the handle. This step won’t be for everyone so feel free to skip if you just wish to have a functional knife!
Step 15: Knife Complete!


Congratulations your knife is complete!!
I hope you enjoyed this instructable and I hope I have helped you along the way! Feel free to post pictures of knives you have made – I would love to have a look!
Thanks for reading,
Phil

Third Prize in the
Workshop Contest

Participated in the
Manly Crafts Contest

Participated in the
Instructables Outdoor Projects Contest


