

Introduction: Ikea Besta Jagra Hack - Hiding A/V Equipment for Under $20


In this Instructable, I'll chronicle the steps my wife and I took to plug the A/V opening on the Ikea Besta Jagra. We decided we needed to do something because our 8 month old kid is into everything, including turning off my gaming consoles and messing with the settings on the stereo.
This is a simple and relatively quick hack that hides your equipment and cleans up the look of the Besta Jagra, keeps the A/V opening cool, and keeps little hands from things they should not be touching.
Step 1: Materials
The following is a list of materials that I purchased in order to complete this task, along with prices (no tax).
clear shelf pins (8 of them in a single package, normally used for holding up shelves) - $2.97
rubber bumper variety pack - $3.97
screws (6x1 1/2") - $3.54
furring strips (1x2x8, need 10 feet total) - $ 0.97 each
speaker fabric (from the fabric store, 1/4yd) - $3.25
Step 2: Cut the Wood
The Besta Jagra opening is just a bit wider than 44" and just a bit taller than 6" (about a quarter of an inch in either direction), so 44" and 6" are the final dimensions that we used. This way the fit is tight enough that it fills the hole well, but not so tight that the frame is difficult to remove.
My first step was to cut the 44" lengths. I cut two, one for the top, and one for the bottom. Once this was complete, a quick trip through the router took about 3/8" of an inch from the furring strips. I did this to make sure the corners were strong and square. This part can be omitted, but I think it makes the overall build much nicer. It does require a router (and a router table helps, too).
After that, I cut a total of four pieces for the height of the frame. The two ends, since I had taken off a total of 3/4", were cut to 5 1/4", while the two center risers were cut at 4 1/2".
Step 3: Glue and Screw (it Together)
Next I used some wood glue to glue the corners together. The end-risers were glued into the routered out sections of the length pieces. Had I had them, I would have used bar clamps to hold the pieces together while the glue dried tacky. I waited for fifteen minutes before moving onto the next step. This meant the glue had begun to set up and was tacky, but not glued hard and I would have some wiggle room. I pre-drilled the holes for the screws to avoid wood splitting, and then screwed the pieces together.
Step 4: Add the Center Risers
I added the center risers - two of them - at 14" from either end, which was approximately 1/3 of the overall length. To make sure they didn't spin, I added three screws total - two in one side, one in the other. I did not use any glue.
Step 5: Staple the Fabric to the Newly Completed Frame
Simply stretch and staple the fabric to the frame. We stapled along one side first, and were careful to keep any puckers out.
Be careful not to stretch the fabric too much, or you will see more of the frame than you really want.
Another option to help hide the frame even more would be to paint the frame black before stretching the fabric over it.
Step 6: Add Rubberized Bumpers

I added a couple of rubberized bumpers to the bottom of the new frame to hold it in snugly. I started out with foam ones, but they were quickly destroyed by taking the frame out, so I switched to the rubberized ones. The ones I used were flat discs, and I found myself having to stack them in order to get the fit I wanted, but it was nice that I was able to do that.
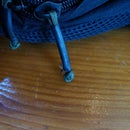
Step 7: Add the Shelf Pins in to Hold the New Frames in Place

Next, we add in pins to prevent the frame from being pushed into the opening past a certain distance. I chose to stick it right at the opening, to help prevent little fingers from getting pinched or figuring out that it could be removed.
I also used a piece of the frame to make sure the pins would be at the right depth.
Drilling the holes was a bit tricky since the pins would fit in a 5mm hole, but I only have standard drill bits. I used a 13/64" bit and slowly 'wiggled' the drill around until the pins fit. On the one hand, it means the pins fit snugly, but on the other hand, it would be nice to have the appropriate bit for the job.
Step 8: Use the Risers to Pull the Frame Out If You Need To
The speaker fabric is very soft and pliable, so there's no need to add in handles or knobs to get the frame out of the opening. Simply pinch the frame at the risers and pull, and they should come out with little resistance.
Step 9: Final Thoughts
And that's all there was to it. I might cut out the area for the rubber bumpers so the bumper attaches directly to the frame instead of the fabric, but we'll see.


