

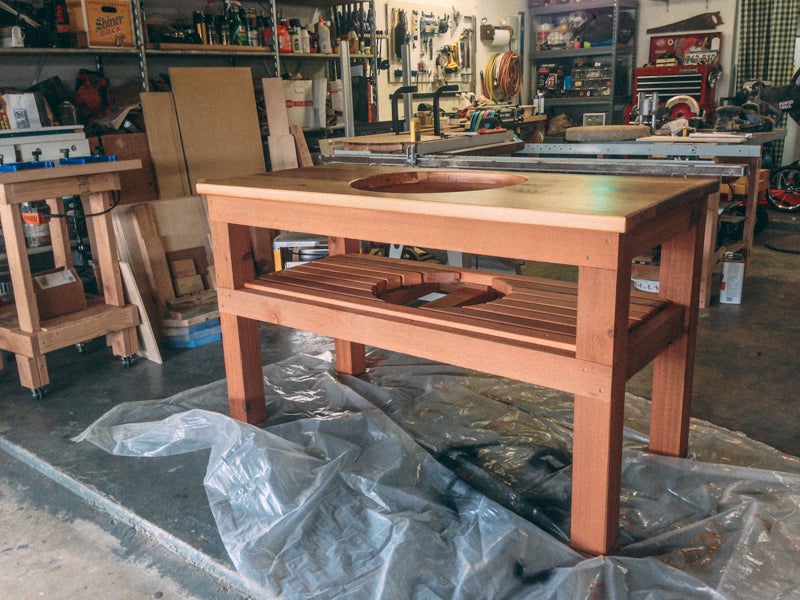
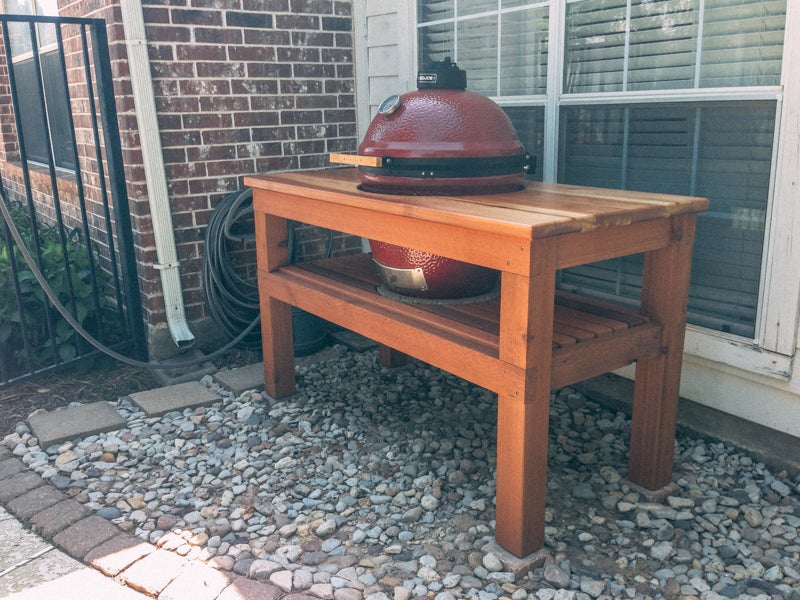
Introduction: Inexpensive, Strong Green Egg Table


Technically, the main image shows that we didn't actually use a Green Egg, but another brand like it. But all ceramic grills like this will probably be called a Green Egg no matter what, just like we'll always call all tissue paper Kleenex.
The main structure of this piece can also be used for so much more than just something to hold a grill. It can be made into a workbench, a patio counter, an island, ... the list goes on. The price of this thing was also very reasonable. I think all the materials were under $150. I mainly used cedar, which is almost 98% of the entire project, the other pieces were a few screws and some urethane to seal it up. Cedar is a really good outdoor wood. There are a number of woods that hold up really well outdoors, cedar, cypress, redwood and teak to name a few. Cedar is the most readily available since it's at most big box stores.
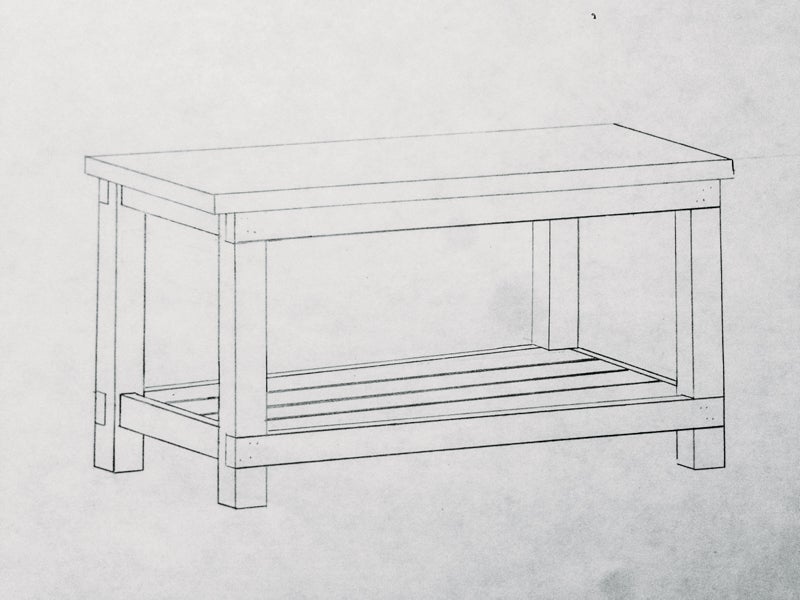
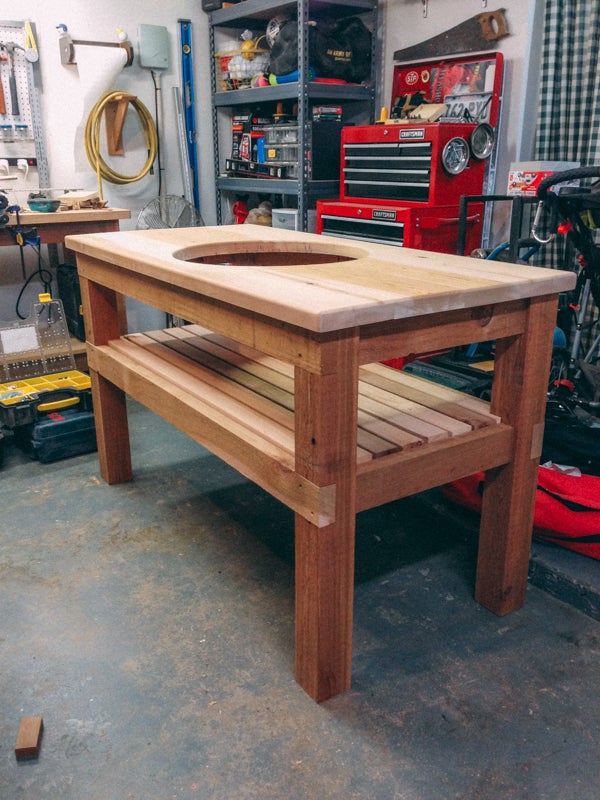
The structure is the best feature on this table. If I were to remove all the screws, this thing would still be standing because the weight is distributed to itself. Meaning, all the weight, and Green Eggs weight a lot, rests on other wood, not screws. I've seen a lot of structures like this where people screw a bunch of 2x4's together and when you really look at it, you're depending way too much on the screws to hold your project together rather than simple joinery that takes a load off everything... and your pride 10 years down the road when your screws rusted through and your table is loose and rickety. But enough of my long sentence, let's get to building.
Step 1: The Main Legs

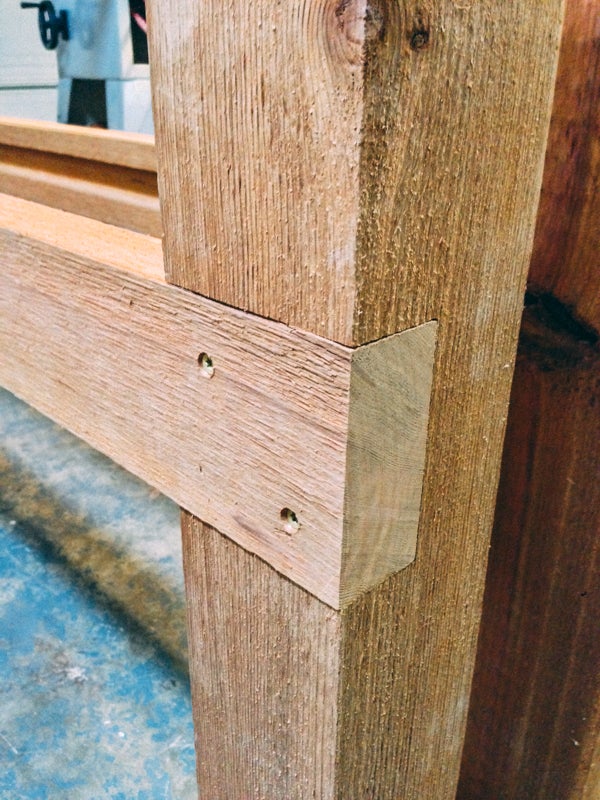
We'll start with the main upright legs. I dadoed out sections for the lateral pieces to fit into. I did this using my radial arm saw and a dado stack, but you can even use a handsaw and a chisel. Once everything was cut, I applied glue and popped in the lateral pieces. I drilled pilot holes with a countersink and drilled in a couple rust resistant screws to hold in the pieces to the dados. You can really see that the upright pieces are doing most of the work by holding up the future weight.
In the picture above, you'll notice that I cut grooves on the insides of the lateral pieces. This will come into play later on the bottom shelf.
Step 2: The Top

To make the top, I ran all the rough cedar pieces through the thickness planer to make them smooth as well as the same thickness. It's common for pieces to be all different thicknesses. Usually, you're only talking about a difference of 1/8 of an inch, but if I was already running them through to make them smooth, I might as well make them exactly the same thickness.
To glue up the top, I used a biscuit jointer to help with alignment. I knew I was going to cut out a giant hole in the middle of the top, so I went ahead and drew a circle so I didn't put a biscuit in the middle of the cut.
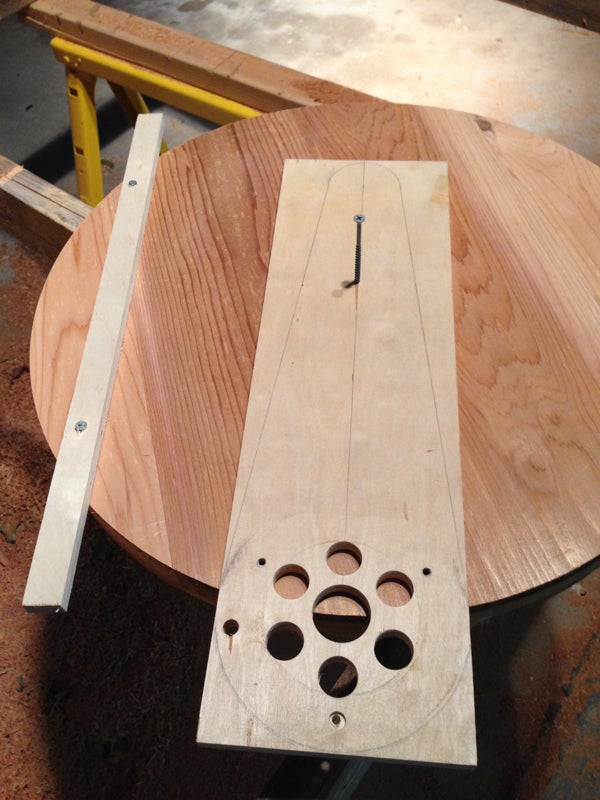
Here's my circle cutting jig. First, I found the center of my hole and drilled in a screw. Then set the distance on the jig and mounted my router with a straight cutting bit. I circled in multiple passes gradually lowering the bit. It worked well. I screwed the small sticker on the left so the center piece wouldn't fall down before I completed the cut.
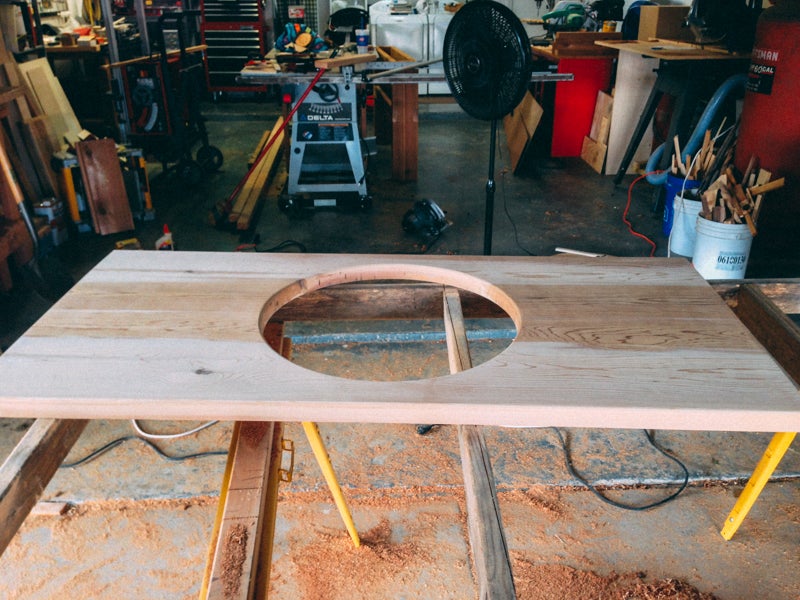
Once the piece was cut, I hit all the edges with a 1/2" round-over bit.
Step 3: The Bottom Shelf

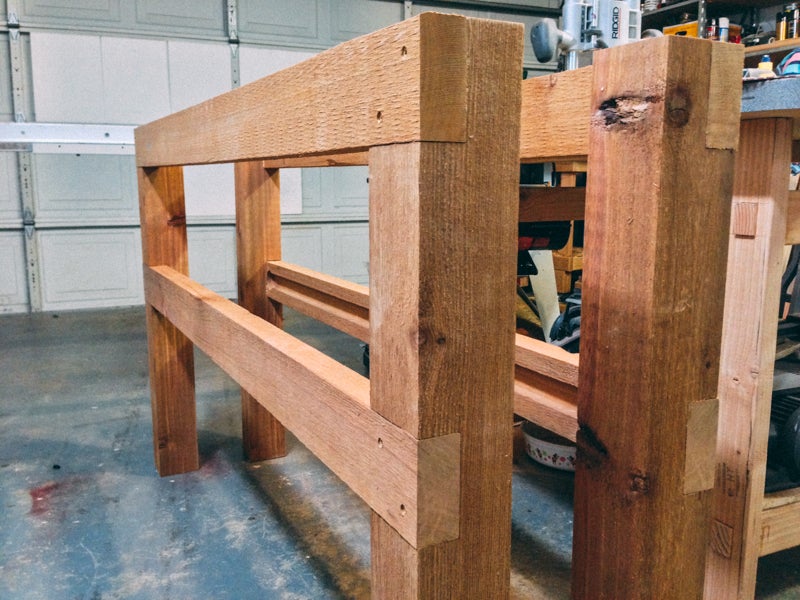
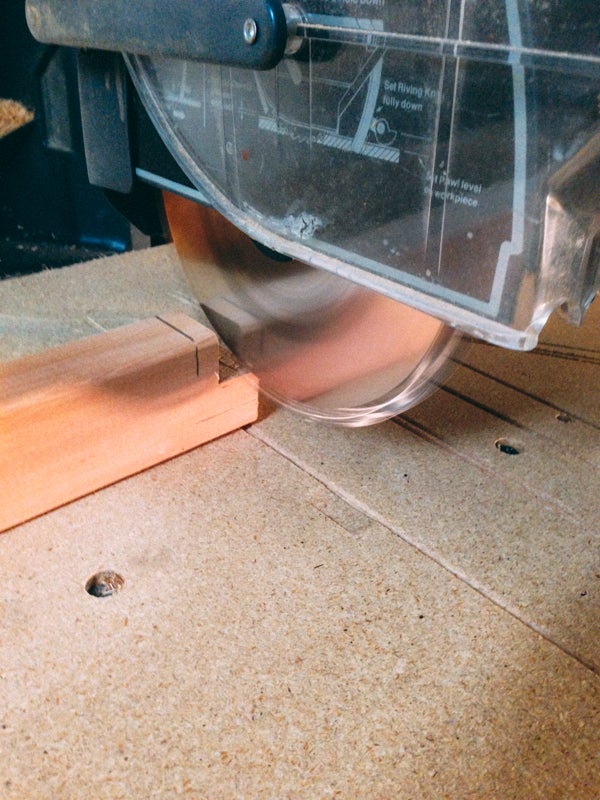
Knowing that all the weight of the Green Egg would be on this second shelf, I made sure this part was the strongest. Before I glued the legs together in Step 1, I routed in a groove down the lower lateral pieces to accept the cross pieces. You can see why in the image above. I did 5 cross pieces to hold slats. The cross pieces had tenons cut on both ends to fit into the grooves.
Here it is with the slats installed.
Knowing that a lot of heat will be coming off the Green Egg, I thought that something needed to go under the grill that would take heat better than the wood. I didn't want to be lazy and throw something under it, I wanted to look like it was meant to be there. I found a round patio stone that fit perfect. I used my same circle jig to cut out the slats to accept the stone so it could sit flush.
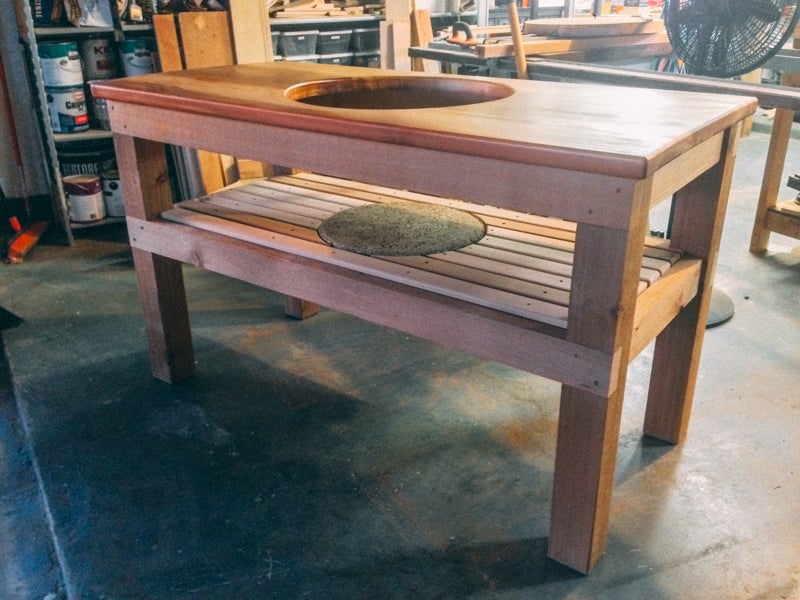
Step 4: The Finish

For outdoor projects, you don't want to use polyurethane. You want to simply use urethane or something specifically made for outdoors. Polyurethane will turn yellow and can crack over time, especially in our Texas heat. You'll need to find something with outdoor protection and some UV protection to save the beautiful color of your wood. This will also be under a cover when not in use, so it should hold up for a long time.
Here it is. Hope you enjoyed it and would love to see someone else build something like it.

Participated in the
On a Budget Contest


