

Introduction: Joule Thief Bicycle Light (front)


Transform cheap bicycle light into Joule thief bicycle light
Step 1: Introduction


I want to apologize for my poor English, but i will give my best to explain and include a lot of pictures for the illustration
First of all, Im not going to explain how j.t. circuit works, or how to make one, for those information you have to look for other sources.
I will explain how to use j.t. circuit with bicycle light and convert it to efficient and relatively cheap source of light.
Ive bought cheapest bicycle light for this project (1 euro) and a small lever switch.
Step 2:


First you need small ph screwdriver to disassemble board with leds and electronic switch (circuit).
Electronic switch cant be used with 1,5 volts or less so we are going to dismiss it and use small lever switch which will make whole project little more bulky than original one but that’s the price of transferring from 4 AAA cells to only 1 AAA cell.
Take out leds with soldering iron.
Step 3:


Take out battery terminals , cut one in a half (because we will use only one cell, which one to cut you can see in the pictures), than we need to flatten one side of the battery holder to make place for j.t circuit. ( cut out the plastic which is dividing the battery compartments). Its important to flatten it as much as we can to make enough place for the board. You can use sharp knife, scalpel, sandpaper or dremel with sanding stones, as you can see in pictures i like to use small chisel which ive made from an old screwdriver and piece of sandpaper for finishing. Use coarsesandpaper because glue will hold better for the roughsurface.
Step 4:


Now we are going to solder 5 leds into parallel connection, for that purpose we need a peace of soft copper wire without insulation (dont use enamelled wire) and soldering iron. Any type of wire will work in case its soft enough to wrap it around leds terminals, watch for the led polarity!
You will also need small peace of plastic tube for the insulation when connecting leds to the opposite terminals.
Three leds in the middle are easy to connect but watch for the polarity and insulation when you are connecting opposite ones.
Step 5:


Make a hole for the switch, you need to cut out small peaces of plastic leftovers from battery holder for a perfect fit.
Connect wires from battery terminals ( one directly to j.t. and other to the switch at first and than to j.t.).
You can use drill (or a hand drill like me) for this purpose because plastic is soft and elastic (not like outer casing, which is brittle).
Drill diameter should be same as a switch thread.
Step 6:


In this step solder wires on j.t. board for the leds, put the board in the holder and fasten it with few drops of melted glue. As you can see on the pictures i have soldered wires from the battery and switch to the bottom of j.t. circuit, because i made the board very tight fit in the holder so theres no place for the wires.
If you make the j.t. board a bit shorter than you will have enough place to pull thry and solder wires from the upper side of the board.
Step 7:


Now you need to make the hole for the switch on the outer case. I don’t recommend using drills because plastic is poor quality (very fragile) and will easily break into peaces, its better to use sanding stone in dremel or electric drill. I really cant give any instruction how to choose where to make the hole, or how to measure and mark the place for the hole.
There is no precise method to choosing place for hole, after making a few lamps you will probably make them in the right place (from my experience). Even if you miss a bit you can always repair it with a small round file or sanding stone you have already used to make the hole.
Step 8:


Here you can see some lights ive made for my friends. I modified lights they already use.These were even simpler to made because they use 3 AAA and 4 AAA cells. So theres plenty of space to mount j.t. board inside. Only thing you need to drill is a hole for the switch and its done!
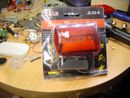
Step 9:


Mounted and ready to go!
Step 10:


Of course this lamp is not going to shine bright as original one working with 4 batteries but its still producing enough light for city biking, and alkaline battery will least for a long , long time.
After all the purpose of the bicycle light is to be seen in traffic, not to shine like lighthouse and this project is doing just fine job.
Ive included few pictures of my other bicycle lamp project for your inspiration , as you can see its all up to your creativity.
Here you can see different types of j.t. circuits placed in bicycle lights
one with SSSR germanium transistor and capacitors
one with ferrite rod and two transistor
j.t. s with different size torus inductors
Keep always in mind it must to fit into outer casing.
Good luck!


