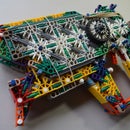
Introduction: K'NEX Gun: Defiance (R5) (Build)
This gun, the Defiance, is one of the best bolt action guns that I have yet seen. I has abilities that many other bolt action guns don't have, and is versatile enough that you could modify it to you liking without much fear of damaging the performance. With ranges exceeding 60 ft. (easily), this gun is durable and sturdy enough to "protect" you thorough many a K'NEX war.
Features:
- Bolt action
- New trigger mech
- New bullet transfer system mech
- Great grip/handle
- Nice, usable, sights
- New magazine set up, with magazine breach
- New bolt and pin set up (adapted from the Zaktangle)
- Extra magazine goes into the stock
- Easier to unjam than ANY other bolt action gun
- Very comfortable setup
Alright, lets move on to the first step.
Step 1: Main Body
This step is probably going to be one of the easiest, as it is the least elaborate. Build the left panel and then add the blue rods as seen in the pics.
Step 2: Internals - Part #1
We are now going to work on the internals, mech, etc. Don't forget to read the image notes, and if you need any help, drop me a note.
Step 3: The Bolt
So in this step you will be building the bolt, adapted from the Zaktangle. You can mod it to your own preferences, and indeed I suggest you do this, as it will make the Defiance more your own.
Step 4: Internals - Part #2
So in this step, you will be finishing off the internals. Follow the pics and image notes (if there are any) as seen.
Step 5: The Grip
I am sorry that I did not take the handle all the way apart, but this is something that you should mod to your liking, as my handle is hefty and piece consuming. And yes, the broken parts are needed if you are going to build this exact handle.
Step 6: Right-side Panel and Body Additions
This step is pretty self-explanatory, just do and build what you see in the pics.
Step 7: Magazine
Again, I am kinda sorry that I did not take apart the magazine to its full extent, but it is really pretty easy to build, just ask me any questions if you have any. Keep the image notes in mind while building.
Step 8: Extras and Finishing Up
All you will be doing in this step is adding the side panels and rubber bands n' stuff. If you are running low (or if you are completely out) of green rods, just skip most of these pics and look at the pics that are about the rubber bands. Again, keep the image notes in mind while building.
Thanks for building the Defiance, I would love pics, comments and reviews on how the gun worked. Thanks again for your support, and I hope you enjoy the build.
-The Red Book of Westmarch


