

Introduction: LED Series With Potentiometer


For this you will need:
- any number of LEDs
- resistors
- jumper wires
- breadboard
- Arduino Uno
- potentiometer
Step 1: Add the LEDs

First, place all of your LEDs where you want them on your breadboard. I used a different color for each one. Connect the long end of the LEDs to a resistor, and then connect them to pins on the arduino. Connect the short ends to the ground rail of the breadboard.
Step 2: Add Potentiometer
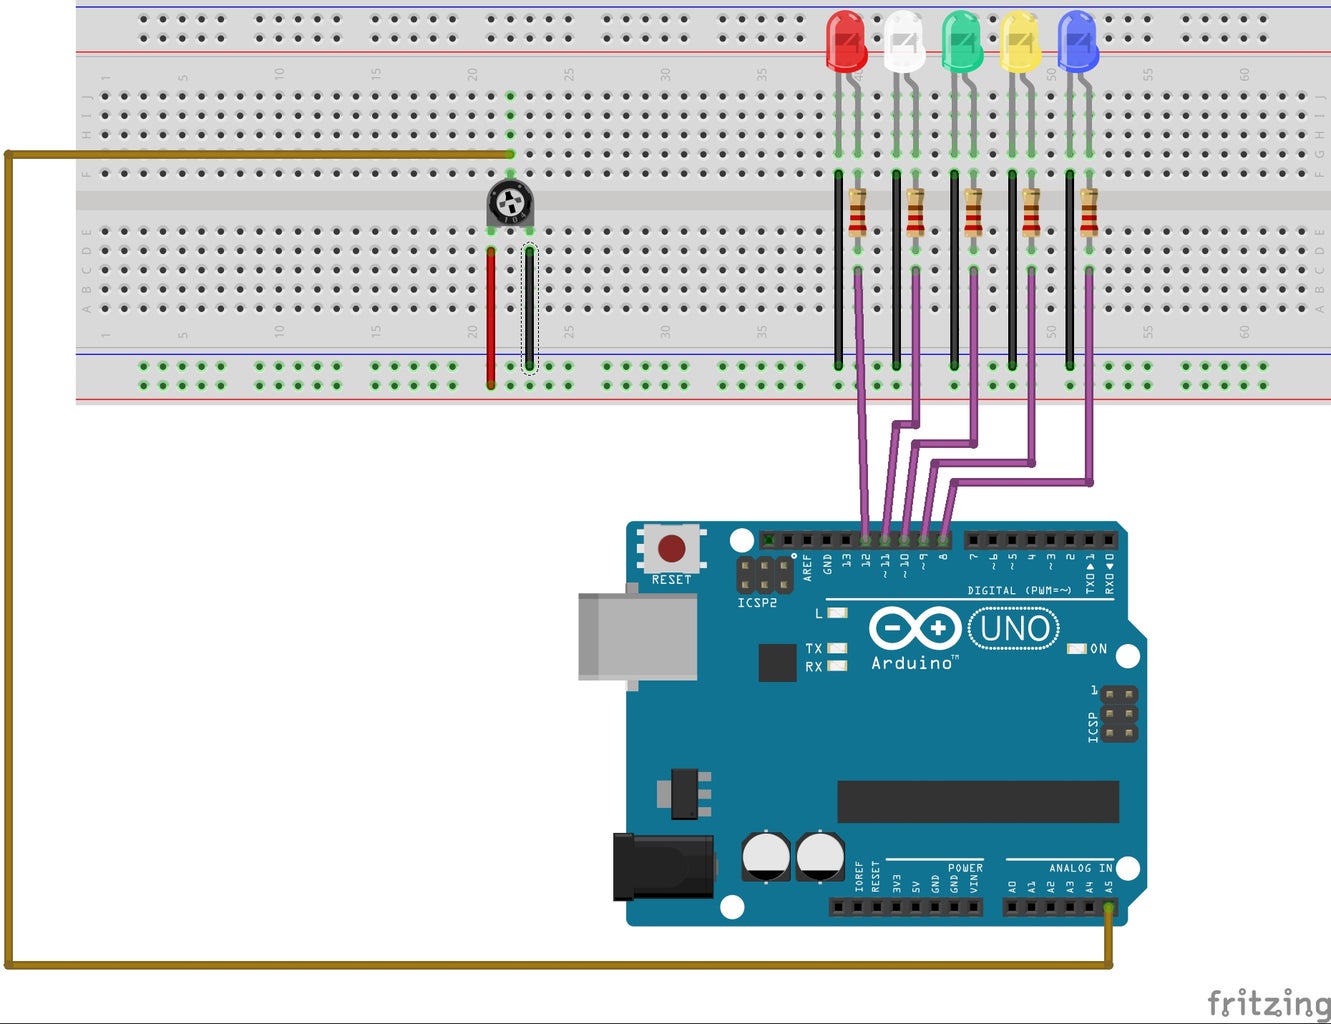
Connect your potentiometer to an analog pin (I used A0), and to the ground and power rails on the breadboard.
Step 3: Finish Connections + Code

Be sure to connect your breadboard to your arduino by connecting the ground and power rails to the GND and 5V pins on the Arduino, respectively.
Afterwards, upload your code and test it. The potentiometer should turn off the LEDs in order.


