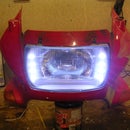
Introduction: LED Dashboard Bulb Replacement
Simple replacement fix for dashboard lamps. LED's should out live the vehicle so should never need to replace them again.
you need;
- straw hat 1/2 watt leds (one for each bulb) (eBay has thousands to chose from complete with resisters)
- resisters for the leds to operate on 12-13.5 volts
- heat shrink tubing (to make it neat and tidy
- soldering iron and solder
- some thin wire (i use telephone cable)
- hot glue gun and glue
- tools to remove the dash panel
this is really easy to do and has vastly improved the legibility of my dash
Step 1: Remove the Dash Panel
So firstly remove the panel and disassemble it so you can connect to the electrical tracks
Step 2: Assemble the LED's
So next we need to solder the resister to the LED, it does not matter which leg you use.
Cover the resister and leg with heat shrink tubing, leaving a little wire exposed to connect to.
Step 3: Place the LED's
Put the LED in the hole the orignal bulb sat in. It should sit in there quite nicely. if the hole is to big, wrap electical tape aroud the base of the led till it fits.
Hot glue the LED into place. let the glue cool completely before tugging at the LED or it may come out.
Step 4: "more Power Scotty!!"
so we need to make an electrical connection to the panel. some will have a printed circuit board in them and others metal tracks fitted into the panel. mine is the latter.
you may need to clean the tracks to solder a good connection.
pass the wire through to the back of the unit to connect the LED's
Step 5: Test the Polarity of the Wires
before we solder up the last connection to the LED's we need to check the polarity of the supply tracks, as LED's are polarity specific.
a quick reconnection to the vehicle and test the wire's onto the LED's and remember which way round they go.
Step 6: Solder Up the Final Connections
Make sure that the connections are insulated and won't get trapped by anything.
reassemble the panel and refit back into the vehicle.
stand back and admire your work.
start planning your next project!!


