

Introduction: Lamp Part & Wiring Intro


In this lesson, we will begin to lay the necessary groundwork for all your lamp projects to come. We'll learn about:
- Electrical currents
- Working with electricity safely
- Safety certification for commercial lamp parts
- The different types of lamp cord and which to use when
- How to tell the Hot wire from the Neutral
Knowing how to wire correctly means knowing how to wire safely! And as we all know, safety is first! And second, and third...
Step 1: 'Current' Affairs

I'm not going to dive into the deep end of electricity know-how, but there are a few important tidbits I want to share before we get started; like the basics of what a circuit is (the combination of the lamp cord, socket, plug, and switch creates one), electrical current (the fuel flow that lights the bulb), why portable lamps aren't grounded, and what materials will conduct electrical current.
A CIRCUIT is a closed loop through which charges (current) can continuously move.
In our case, a circuit consists of a power source (breaker box > wall outlet), two conducting wires (lamp cord), and a small lamp to which the free ends of the wires leading from the power source are attached (socket & bulb). When the connections are made properly, the circuit will “close” (controlled by a switch) and current will flow through the circuit and light the lamp.
The CURRENT is a flow of electrical charge within the circuit that powers the lamp.
The current flows into the lamp cord via the 'Hot' wire and returns to the source via the 'Neutral' wire. As a result, most lamp (or zip) cord is made up of two wires. Some cord, used mostly for hanging pendants, has three wires and the third is what's called the 'ground'.
A GROUND is an additional wire, a backup path, that provides a bypass through which electricity can flow if there's a short in the system (i.e.: a 'live/hot' wire is touching metal that is touching skin). Instead of passing to earth through the person, it will go through the ground wire. This will be in the form of the round prong on a three prong plug or a green wire in some lamp cords (yellow in Europe).
Due to the improved designs of modern lamp parts, there is such a low risk of live electricity making it's way to touchable lamp parts and as a result, most modern interior portable lamps are not grounded. (Portable = any lamp that is not hardwired into the wall or ceiling.) As long as both wires of the cord (Hot and Neutral) are isolated from the exposed metal parts and isolated from coming in contact with the exposed metal parts of the lamp, there is no need for a ground.
ELECTRICAL CONDUCTORS are types of material that allow the flow of electrical current in one or more directions. Metal is one we take advantage of for this class in the form of lamp cord wire and plug/socket prongs, threads, and terminals. It's important that no other conductive material come in contact with the 'live' metal, so even though the parts are designed to prevent this, your awareness of what materials are potential risks is important.
Here's the short list of all the materials that should NOT come in contact with any live metal on a lamp:
- other metal (eg: the lamp body, harp, or metal shade)
- graphite* (ie: pencil led)
- electronic circuits (they're made of a conductive polymer)
- water
- our bodies (all that water...)
*Fun Fact: Graphite, while shouldn't be connected to any live wires, is an excellent lubricant for stubborn threads of a socket! If you're having trouble screwing a lightbulb into a socket, unplug the lamp and rub graphite onto the inside threads of the socket. And ta da! Problem solved without interrupting conduction.
Step 2: Working Safely

Electricity Wrangling
As kids we are taught (for good reason) to fear electricity, and how to navigate it safely.
The same rules still apply; metal, water, and our bodies are good conductors of electricity, so please never combine any of these things with live (in our case, plugged in) electricity. And never, under any circumstance, for any reason, put a fork in an outlet. :)
Luckily in this class, we won't have anything to do with live electricity until we've built our practice cord sets, so there's little to no reason to be apprehensive. Just remember to never plug in one of your lamp creations until you've tested it. (More on this in Lesson 6)
General Safety
When drilling into any material (i.e.: a custom lamp base or shade), please wear safety goggles, and NEVER wear gloves! If the spinning bit gets ahold of the material of the glove, it could potentially pull off the glove and parts of you along with it. This risk is much lower with a hand drill of course, but it's always better to be safe than sorry.
Step 3: Practice Makes Perfectly Good Lamps
To learn proper wiring techniques, in the next few lessons we'll be making two mini practice lamp cord sets.

Practice cord set #1
Practice cord set #2
Before ordering the items you need (listed below), I recommend having a look at the lamp projects I link to in Lessons 7 & 8, because if you choose to make one of them, you may be able to use some of the parts you'll need for those in this lesson.
NOTE: You'll be able to re-use everything from the practice cord sets for your lamps – with the exception of the short lengths of lamp cord – which will save you $$ on future lamp projects.
Step 4: Where to Buy Parts
Hardware stores have a very limited supply of good looking, quality lamp parts, but you may find some of what you need there. The rest (or all) can be purchased online. In an effort to reduce shipping fees for you, the majority of the parts I link to are from Grand Brass, with only a few exceptions.
The best online options for lamp parts are:
www.grandbrass.com - Most of the parts I link to in this lesson are from Grand Brass. They have almost EVERYTHING. The only downside to them, is that delivery can take up to 2 weeks if you live on the West Coast.
www.txlampparts.net - Texas Lamp Parts. They offer faster delivery than Grand Brass, but their selection is a bit more limited.
Smaller or more specialized suppliers:
www.antiquelampsupply.com - Antique Lamp Supply has a very limited selection, but carries the round self-adhesive felt circles that I love!
www.mylampparts.com - My Lamp Parts also has a limited selection, but had the lamp base I was looking for to make my Mug Stack lamp I link to in Lesson 8.
The widest selection of cloth covered cord (Grand Brass is a close second) can be found at:
www.sundialwire.com - Sundial Wire are producers of cloth covered cord made entirely in the USA. Not all are UL listed.
Step 5: Practice Cord Sets Parts List
There are many color options in all of the below parts, so I recommend choosing neutral (or your favorite) colors that will compliment future unknown lamp projects.
Lamp Cord Segments
- 2 feet of SPT-1 lamp cord
- 2 feet of 18/2 or 18/3 SVT plastic or cloth covered cord

Sockets
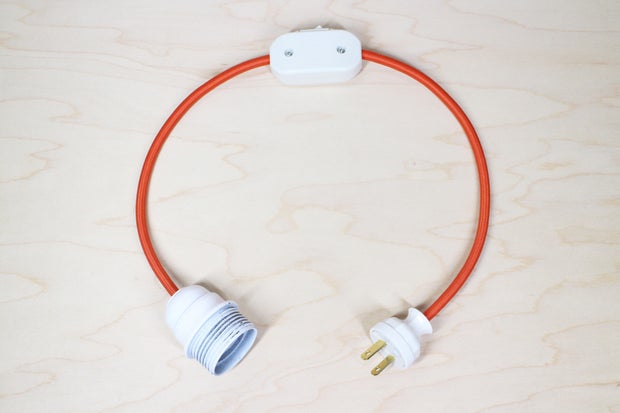
- 1 medium (Edison/E-26) base metal cap and shell socket
- 1 medium base phenolic socket, threaded w/ shoulder and ring

Switches
- 1 rotary single pole on/off line switch for SPT-1 cord
- 1 single pole rocker switch w/ screw terminal wire connections for use with SVT cord

Plugs
- 1 polarized Leviton's Kwik Easy lamp plug or any easy plug for 18/2 SPT-1 wire
- 1 polarized antique reproduction lamp plug w/ screw terminal connections for use with 18/2 twisted and SVT cord, or 18/3 SVT cord

Hardware
- 1 threaded 1/8 IP nipple, 3-4" long
- 1 small metal strain relief

Step 6: Safety Certification

Underwriters Laboratories (UL) and Canadian Standards Association (CSA) are the two most common certification symbols you'll see on lamp parts in North America. These marks mean that the parts have been tested for, and passed, the requirements for all National safety standards for lamp parts.
I recommend always using certified parts, with ONE EXCEPTION: cloth covered cord. There are a few types of cloth cord that are UL or CSA approved (carried by online retailer Grand Brass), but the majority of it is not. :(
If you are making lamps just for yourself or for friends, use as much cloth covered cord a you like! They are perfectly safe to use even if they're not certified. If you plan on selling your lamps, you'll have to stick to the few colors/styles that have passed certification. The product descriptions on all lamp part web stores will tell you whether or not a particular cord has a certification number. It won't say 'uncertified' if it's not -- it just won't mention UL at all.
Step 7: Lamp Cord

We'll start this wiring adventure with learning about our electricity superhighway and current connector... LAMP CORD!
The lamp cord we'll be using is made of 18 gauge wire (gauge = thickness) coated in a thermoplastic insulation, or 'cover.' The insulation protects us from being shocked by the electrically charged wires inside the lamp cord. There are cords available made from thicker and thinner wires (22, 20, 16, 14 gauge), but 18 gauge is industry standard for most portable interior lamps, so we will be using 18 gauge exclusively for this class.
As discussed briefly in the earlier 'Current' Affairs section, lamp cord comes with either:
- Two 18 gauge wires(Hot + Neutral)which is indicated as 18/2 or 18-2, or
- Three 18 gauge wires(Hot + Neutral + Ground), indicated as 18/3 or 18-3.
This info will either proceed or follow the cord type name in its supplier product description.

18/2 or 18-2 wire

18/3 or 18-3 wire
Safety Fact: In commercial wire sizing (AWG - American Wire Gauge), as the number goes down the gauge goes up! 16 gauge wire is thicker than 18 gauge (counterintuitive I know!) and as a result can deliver more power. Larger appliances will require a much thicker gauge than 18, so never use lamp cord to rewire your dryer or anything other than lighting for that matter! If a device draws more power than the wire gauge can handle, it can potentially overheat (and cause a fire).
But not to worry, if you stick to using 18/2 and 18/3 cord for all your lamps, AND your wiring is done properly using certified parts, you will NEVER cause a fire. Lamp cord has been made specifically for this application.
Step 8: COMMON LAMP CORDS AND THEIR USES
Here is a list of the most commonly sold lamp cords, their characteristics, and applications:
Note: One of the coolest benefits of making your own lamps is being able to choose the color/type of cord, so that it either 'pops' and complements the lamp or is as visually subtle as possible, depending on what you're going for. So I've listed the color options for all types of cord as well.

SPT-1, 18/2 - SPT, also known as zip cord, is short for Stranded Parallel Thermoplastic. This means the two wires (Hot & Neutral) run parallel to each other in an insulated Thermoplastic cover. I use this for table and floor lamps. It comes in either a simple plastic cover or a nylon or rayon cloth outer 'jacket'. SPT-1 cord is:
- Flexible
- Easy to maneuver through standard lamp pipe and hardware
- BEST USE: table and floor lamps
- Plastic Cover Colors: this less expensive type comes in white, cream, brown, black, gold, and clear
- Cloth Covered Colors: this super fun, but more expensive cord comes in a wide variety of solid colors and two-tone patterns.
SPT-2, 18/2 - This cord is made with the same gauge wire as SPT-1, but its insulation is thicker. While this thicker insulation means it's somewhat more resistant to heat and abrasion, unfortunately, the thicker the lamp cord, the more problems you may encounter when trying to insert, pull, or slip the cord through your lamp or fixture. For this reason, I avoid using this cord. SPT-1 is more than adequate for all table and floor lamp applications.
NOTE: If you are considering trying to sell your lamps, you may be required to use this thicker, less subtle cord. SPT-2 cord is:
- Less flexible than SPT-1, but slightly more heat and abrasion resistant
- Harder to work with
- BEST USE: table and floor lamps in UL Certification situations only. I really dislike using this cord. : P
- Plastic Cover Colors: white, cream, brown, black, gold, and clear
- Cloth Covered Colors: n/a
Twisted Cloth Covered Wire, 18/2 - This is a great cord to use if you want an old timey look. It is:
- Very flexible
- Easy to maneuver through standard lamp pipe and hardware
- BEST USE: table and floor lamps
- When used with a strain relief, can be used for lightweight hanging pendants
- Colors: it comes in a wide variety of solid colors and two-tone patterns
SVT and SVT-B, 18/2 & 18/3 - The name SVT came from its original use Service Cord Type Vacuum Cleaner Thermoplastic, but is now used on lamps as well as other small appliances (i.e.: desktop fans). It's a round cord that is perfect for hanging pendants, as the double insulation (the outside layer and the individually insulated interior wires) can hold more weight than the SPT cords. SVT cord is:
- Less flexible
- Not recommended for maneuvering through standard lamp pipe
- BEST USE: hanging pendants and floor lamps
- Plastic Cover Colors: white, black, grey, red, clear silver, royal blue
- Cloth Colors: it comes in a wide variety of solid colors
CORD SETS

It is possible to buy cords that come pre-wired with the plug, and sometimes even the socket and/or switch. While these can sometimes be time savers, I find them limiting as far as customizing plug type or cord color and length. Once you've learned to wire up your own set, feel free to dabble in the pre-made sets. But please don't start there as you'll miss out on valuable learning.
Step 9: Hot & Neutral Wires
The most important thing to know about lamp cord is how to tell the Hot wire from the Neutral. Why is it important to connect Hot and Neutral wires correctly?
When wired properly, the metal threads of a socket will never be “hot” or give you a shock, whether the switch is on or off. When wired incorrectly, the threads – and any metal touching the threads, including the outside of the socket, if it is conductive metal, or the threads of a light bulb – can give you a shock whether the switch is on or off. So for this reason, it's very important to follow the instructions for the Hot and Neutral wires carefully.
Which is which?
On both SPT wires, the Hot side of the insulating cover is smooth and the Neutral is ribbed or 'squared' with 2 ridges.

Smooth HOT Wire

Ribbed NEUTRAL Wire
On Twisted Cloth Covered, SVT, and SVT-B cords, the black wire is Hot and the white wire is Neutral. If you are using an 18/3 cord, the green wire is ground -- which is unnecessary for us to use -- and will get cut off when wiring the plugs and sockets.

Step 10: What's Next?
Now that you have a basic understanding of electrical currents, wiring safety, and lamp cord characteristics (aka, which wire is which), it's time to start building your practice cord sets.


