

Introduction: Make a Pattern and Sew a Hooded Vest


This project can easily be completed in a day if you are well acquainted with your sewing machine. If you are new to sewing, it will likely take a whole day, perhaps a weekend if you take it slow.
Don't let the number of steps throw you off, you'll be creating a pattern and sewing a lined garment in just a few steps.
If you are buying fabric, for adults you'll need about 1-1.25 yards, I usually buy two with a coupon and keep the scraps for later. It takes 1.5 yards to do a women's medium hoodie with arms using 55" fabric.
Step 1: Gather Your Tools and Make Some Space

Step 2: Starting Your Pattern


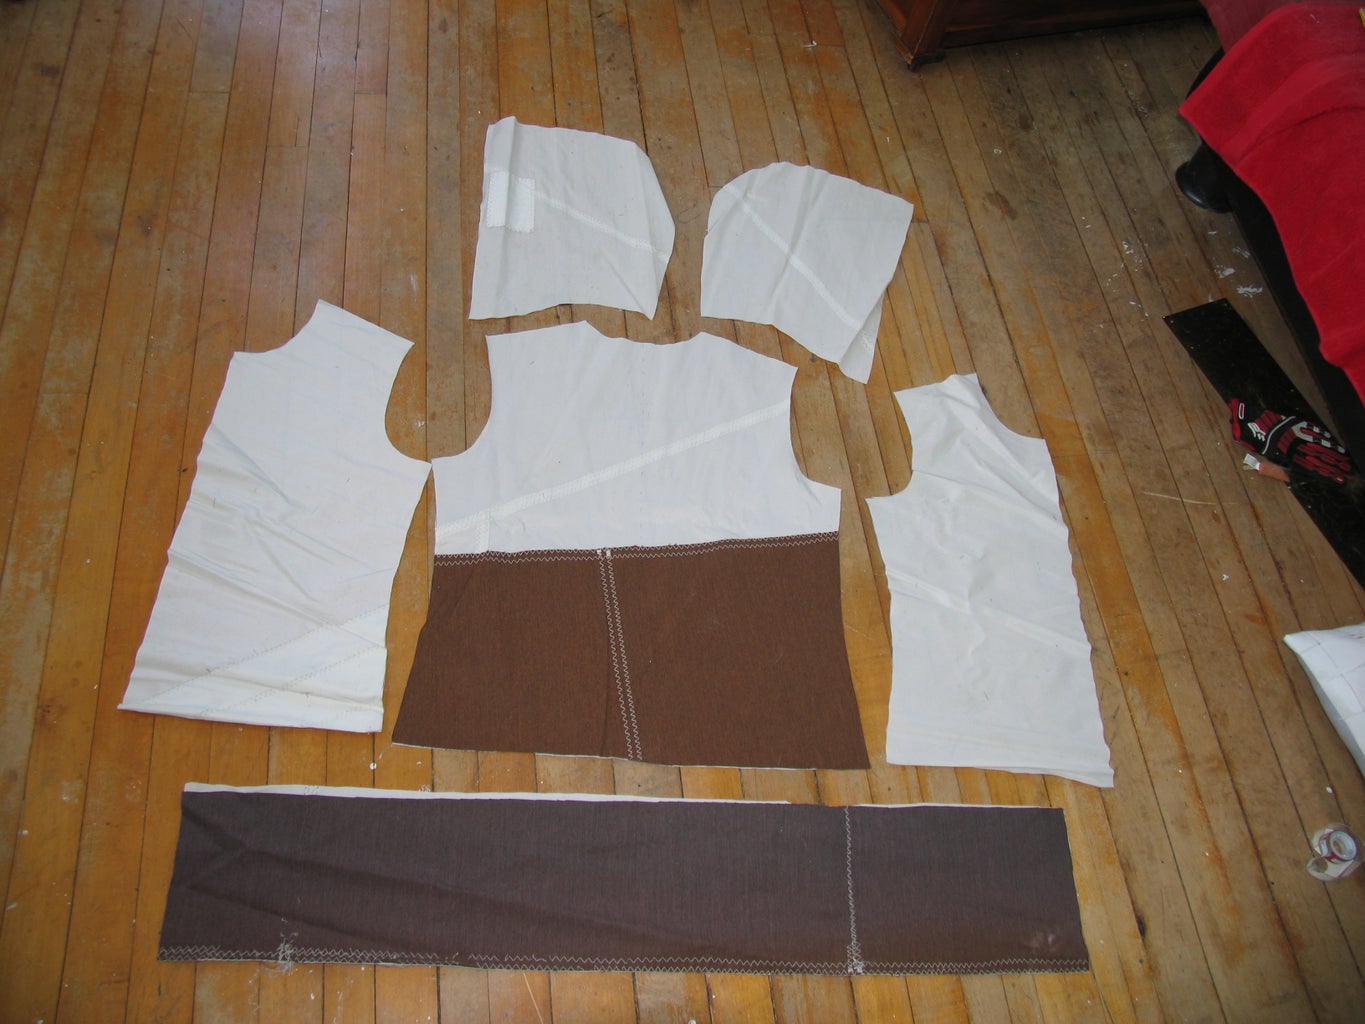
Start with the big simple pieces, first the back piece. Lay your garment down and flatten it so all the seams are at the edges. Pin it in place or use some weights to keep it from shifting. Start tracing at the straight forward spots, shoulders and side seams. If you are able to fold your final fabric in half, you only have to trace half of the piece.
When you get to the bottom, just turn up the bottom band to copy the lines.
For the arm holes and neck scoop you’ll need to be a little careful and creative. Starting with the arm holes and making sure not to shift the garment out of place, first mark where your shoulder and side seam end and the arm holes begin. Then slowly lift the arms out of your way and trace the curve you see there. You’ll want to sort of spin the arms out of the way so that the seam stays flat on your fabric/paper so you can trace it.
Now do the same with the hood for your neck scoop. Remember that the back of the neck scoop will be shallow as it usually rests in line with your shoulders right where your neck joins your back.
Don’t forget to mark where your center line is, as it will be important later on when you get to sewing. Now you’ll want to add your seam allowance, I use 1/2” you can use whatever you’re comfortable with. Anything between 3/8” and 5/8” is fairly standard with this type of garment. Take your original off your pattern piece and trace around your marks using your seam allowance measure, I usually use a compass for this. I just set it to 1/2” and trace around. This extra fabric will be eaten up when you sew it together if this is your first garment.
Good job, your first piece is done! Now follow the same idea with the front piece. With this one, the neck scoop will be deeper. You’ll only need to trace one of these as you can just flip the piece over to create the other side.
Step 3: The Hood

And now onto the hood, which I have always found to be the least logical piece, and which I always leave for last. Depending on your garment, this will likely be two or three pieces. The three piece hoods are usually a little easier to figure out around the neck line, the two piece hoods are faster to sew together. You will also only need to trace one side of this (assuming a two piece hood) as you can just flip your pattern piece over to cut the matching piece.
Again pin this piece in place so all your seams lay at the edges, and again you’ll need to be creative and careful when it comes to the neck. Very slowly move the garment out of your way so you can follow that seam. Hoods are usually longer along the straight, front edge. Then they will curve up and away towards the back, then back down again to meet the back curve. It’s a sort of very slight s curve. This is the curve that allows the hood to go around your shoulders, starting from the collarbone, over the shoulder and around the neck simultaneously, joining at the neck joint.Step 4: The Layout

If you are lining your garment, you’ll need to cut two sets of everything.
Step 5: Back to the Hood


I like to start here in the sewing process. It’s quick and easy unlike the process of creating that funny s curve in your pattern… Pin your hood right sides together and sew along that nice long curve that goes from the front of the hood to the back. For those new to sewing, this is where that seam allowance comes in. The ½” allowance tells you that you should be running the outside of the fabric along the ½” mark on your needle plate. If you have an older machine that doesn’t have markings on it, grab yourself a sharpie and measure from the needle out your seam allowance and mark it. Eventually it will wear off, but it should last a project or two.
Take your time sewing if you don’t have good control over your machine yet, go slow. It might seem a little tedious but you’ll be happier with the results in the end.
After you’ve sewn your first line, take your hood to your ironing board, and press that seam open. Back to the sewing machine and sew down both sides of that seam. I usually just run the seam along the left edge of my presser foot, which on most machines results in a 1/8” seam. This will make it a stronger seam, adds a nice little detail to the finished garment, and reduces bulk, especially if you are lining your garment. First piece done!
Step 6: The Shoulders

Then over to the ironing board, press the seams open, and sew them down like with the hood. I do this with most of my seams. Anything I can reach to press open and then sew down. I like the detail it gives, and strong seams make happy people.
Step 7: The Sides

Step 8: Attach the Hood

Step 9: Bueller, Bueller
Step 10: Press the Front Edge


Step 11: Inserting the Zipper the Quick and Dirty Way

Now that you have your pressed fold along the front edge of your garment, you will simply pin the tape of the zipper into that fold, so that when you sew the garment closed you will sew the zipper in place at the same time.
If your zipper is too long, you'll need to cut it off where it is appropriate. If you are using a metal zipper, you'll want to carefully pry the zipper stop off and reinsert it at the new top of your zipper (just cut between the teeth). If you are using a plastic zipper, you can either melt the top two teeth together, or do it the "proper" way. You'll want to remove about an inch of teeth (try to cut as little of the tape away as possible) the when you are pinning the seam shut, curve the zipper tape away from the teeth and into the seam. You'll need to purchase zipper stops if you want to keep the zipper pull from running off though.
Now go back to the bottom of your garment and pin the other side together in the same way you just did. I usually leave the zipper closed to start, so that I can make sure everything is lining up. Once you have your zipper started on the second side, you can open it to make your pinning easier. The raw edges at the bottom and the seams where the hood attaches should match across the zipper. Continue pinning up the garment until you meet your previous row of pins.
Step 12: The Armholes


Next you will need to cut slitss into the fabric so that when you turn the garment out, the seam will lie flat. Depending on your fabric you can cut right up to the fold, just don’t cut the seam itself. Now you want to iron your arm holes so you have a nice crisp line to follow.
Pin your two layers together. Match your liner and outer garments seams together, making sure all the seams at the shoulder and side line up. Make sure both of these seams are open, on both fabrics if you didn't sew them open earlier. This will decrease the bulk of the seam making your garment more comfortable.
Now you are going to sew the arm holes together. This will be a little tricky and probably frustrating. Take your time, adjust the fabric so that you are always sewing in a straight line, even if it is only for an inch or two. Remember a sewing machine, like a vaccum cleaner likes to go in a straight line.
Step 13: Last Step, the Bottom

Now to finish your garment.
Just like your zipper and your armholes. Fold and iron both layers to the inside, pin and sew. Remember the liner needs to fold towards the outer fabric, and the outer fabric needs to fold towards the liner.
I forgot to take a picture of this step...sorry...
Step 14: Tadaa!


Participated in the
Sew Warm Contest


