Introduction: Make an Ocarina Out of Stock Sheet Wood
With the dead line for the third Epilog challenge a few hours away this is the last instructable I will be able to enter.
The instructions in the challenge ask what I would do with an Epilog laser if I won.
I would clearly first learn how to use it, having never used one before.
Win or loose I will start making definite plans on starting a home based business.
Winning a laser cutter will give me not just a head start but also something to build up around giving me the ability to hit the ground running, so to speak.
Starting a business is not only difficult but rewarding as well, a part of the American dream to be successful and help those around you to become successful.
Instructables.com and Epiloglaser.com are helping many around the world be successful not only in their professional lives but in their personal lives as well by providing the sharing of information at no cost and the donation of equipment so people can achieve their dreams.
In closing I would like to thank the staff at instructables, Epilog, and the instructables community for making possible this opportunity and challenge (it was) to win a laser cutter.
THANK YOU ALL!
and good luck to everyone.
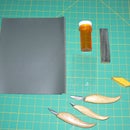
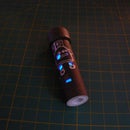
In this instructable you will learn how to make a wood ocarina out of 1/8" sheet stock.
I have tried to make this the more comprehensive than my last 2 instructable's (carve and ocarina and PVC ocarina).
The reason is that using sheet wood you can make just about any size ocarina you want.
When making an ocarina in this fashion you can use this as a guide to make one using different dimensions.
materials list:
1/8" hard wood all pieces (I'm using cherry)
(1) 1 1/2" X 3 5/8" (top)
(1) 1 1/2" X 3 1/8" (bottom)
(1) 1 1/2" X 3/4" (front)
(2) 3 1/8" X 3/4" (sides)
(2) 1 1/4" X 3/4" (back + tuning)
(1) 1/2" X 1 1/2" (bottom airway)
medium CA (crazy glue)
Tools list:
1/2" chisel
steel ruler
small chisel
small skew chisel
100 & 220 sand paper
a unibit or various drill bits
a pencil
a drill
various small files
optional:
wood stain
polyurethane
U tube sound sample link
http://www.youtube.com/watch?v=aSjJhQeexv8
Attachments
Step 1: Dry Fit
Dry fit all your pieces together first before gluing.
Make sure it's fits, sand if necessary.
Step 2: Glue Sides
Glue the sides to the bottom
Step 3: Glue Front
Glue the front to the bottom and sides
Step 4: Glue Bottom Airway
Glue the bottom airway to the front and sides
Step 5: Glue Back
Glue the back on
Step 6: Flat Sand the Top
Flat sand the top with 100 then with 220 to get the top flat and even, so the top piece will
sit flush on top
Step 7: Marking the Airway
draw a 1/2" wide mark on the bottom airway piece down the center.
Step 8: Making the Airway (a)
carve out the area you just marked 1/32" deep with a 1/2" chisel
and clean with a file
Step 9: Making the Airway (b)
make a mark 3/4" on the air way. carve this section into a ramp with your 1/2" chisel it should end at 2/32"
Step 10: Making the Window
take the top piece and draw a line the same width as the air way piece
Step 11: Making the Fipple
behind the window you just carved out draw a square 1/2" X 1/2"
carve a ramp out of it. the vertex of the ramp should be about 1/32"
once your done carving clean it up with a file.
Step 12: Test
at this point should be able to simply press the two parts together
blow into it and get a tone! If not double check everything.
Do not glue the top until the tuning is finished.
Step 13: Check With a Tuner
go to http://www.seventhstring.com/tuner/tuner.html
this is an online tuner.
this is where is get a little complicated. I know very little about music so bear with me.
for the rest of the instructable you will need a tuner(http://www.seventhstring.com/tuner/tuner.html )and short simple lesson on how music notes work.
Music notes go in 8 note increments called octaves, so one octave would go CDEFGABC.
If you have heard the term "middle C", it is the middle C note in a piano key board, It is also known as C4. The number indicates the octave the note is at (or would it be in?).
So when you blow into your ocarina you will see a note on the tuner with a number and possibly a funny little "b" or a "#".
This explanation of sharps and flats is for the purposes of tuning.
The "b" is called a flat and that means your note is on the low side and the "#" is called a sharp and means your note is on the high side.
The blue arrow at the bottom shows you how true your note is. For example while trying to tune the base note on the ocarina (E in this case) you want the blue arrow at the bottom as close to 0 as you can get it. Ideally you want it at 0.
Also set the tuner to use sharps and flats.
I checked mine and I'm getting an E flat.
I added another piece to tune it to a E note
As a side note you can add material to the chamber, effectively making the chamber smaller to raises the pitch. So I was able to add material and go from Eb to E.
Unfortunately you can't remove material from this ocarina. If you could you would able to lower the pitch by making the chamber bigger. Theoretically if I had an E# I could remove material and lower the pitch to an E.
Step 14: Make a Fingering Chart
go to
http://www.stlocarina.com/fico.html
and go to the 6 hole ocarina option and print a fingering chart starting with
the left C all the way to the next C up on the keyboard composer. I put in a screen shot to make it easy, so you can just print that one.
As a side note the 2 black dots that are outside the ocarina drawing are for the bottom finger holes on a 6 hole ocarina which gives you 2 more notes. We won't be making these to keep things simple.
Step 15: Transposition
Now we are going to do what is called transposing in music.
Since the base note on the ocarina is an E (the lowest note you can play on this ocarina)we are going to shift the scale from C to E so instead of going CDEFGABC, this ocarina is going to go EFGABCDE. When using tablature you will play the song the same, the song will just sound 3 notes higher.
With the previous 2 ocarina instructables we were able to tune to a C in this case it's not possible so we are using transposition.
I included two fingering charts with the top one being the transposed one that we are going to use.
Step 16: Drilling the First Finger Hole
Seeing as how the base note is E the first hole that we will drill (the #1 hole)
is the F note. This hole is the top right hole.
As far as I'm aware the hole placement isn't critical and I have not found it to be.
Also the best tool I have found for this is the unibit or Christmas tree drill bit as some call it(for obvious reasons). Regular drill bits at larger sizes catch on the wood and end up ruining it and best is no bits to change.
All 4 holes start small and you test the tone with the tuner and gradually increase the size of the hole until you get to the desired note.
In the case of this first hole we are looking for an F
Start with the smallest drill bit you have or go to the first step in the unibit and check the tone. keep increasing the size of the hole until you get an F.
The tuning will most likely proceed like this;
You will drill the first hole and get an E# then Fb then an F but with the arrow far to the left.
Keep making the hole bigger until the arrow is at the 0 point. If the arrow is floating to the left of 0 use a round or rat tail file to enlarge the hole so you don't make it too big.
Remember clean the holes with fine sand paper.
Step 17: Drilling the Second Hole
As you can see from the fingering chart you printed out you will need to cover the hole you just made to tune for the G note.
Following the same procedure as before start with a small hole, actually you can start with the same size hole as the last one because each successive hole will be bigger than the last hole.
Remember when you are testing, cover the #1 hole and tune (drill a bigger hole) until you reach the G note with the arrow as close to 0 as possible.
Step 18: Checking the #1 and #2 Holes
At this point you should check you A note. That is leaving the #1 and #2 holes uncovered.
If your 1 and 2 holes are tuned correctly you should see an A note on the tuner with the arrow close to 0. If not go back to step 16 and double check.
Step 19: Making the Third Hole
Referencing the fingering chart again you will see the next note is a B.
For this one you will need to cover the #2 hole and leave the #1 hole open.
As before start with a small hole and work your way up while checking on the tuner.
Step 20: Making the Fourth Hole
Like before you can tune this hole 1 of 2 ways you can cover the #1 hole and tune for a D
or leave all the holes open and tune for an E just like it shows in the finger chart you made.
Step 21: Glue the Top
Glue the top on top on to the body and carve the mouth piece out.
Sand it smooth with 220 sandpaper.
Step 22: Finishing
Now that the ocarina is tuned you can stain it, carve it , decorate it with a wood burner or leave it as it is.
Step 23: Play and Have Fun!
Here are some web sites with tablature so you can start playing.
http://composer.songbirdocarina.com/songbook.asp?letter=a
http://clayz.com/songlist.html
What's tablature your asking?
Tablature is some times referred to as fake music(notation).
Basically is shows you where to put your fingers to play a song but it doesn't show you how to play the song, you already have know that.
Where as music notation shows you how to play the song never having heard it.
Like what notes to play, how long to hold them, the time that the song is played at ect.....

Participated in the
3rd Epilog Challenge


