

Introduction: PC Controlled Bluetooth Robot (With a GUI !)


In this Instructable I will show you how to build a robot that is controlled via Bluetooth using a keyboard, has a graphical user interface built with processing that displays the input from the keyboard and actually turns the whole bushiness into a great fun, and It's also economical to build. I've also made a video about it and uploaded it to YouTube. I recommend you to check out the video in order to better understand the process of this build. We will use 3 programs: The Arduino IDE (Which is based on C# and C++), Processing (Which is based on Java) and Toshiba Bluetooth stack (That will allow us to work with the Bluetooth module). I will leave links for everything you need, including software. The operating system of my computer is Windows 7, but any Windows version would be just fine. All the code will be outlined, So keep confident.
To Sum, This Instructable will describe how to build a physical robot, program it, control it remotely and even build a friendly user interface for it.
*Check the beginning of the video for a demo !
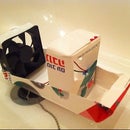
Step 1: Hardware- a Chassis !

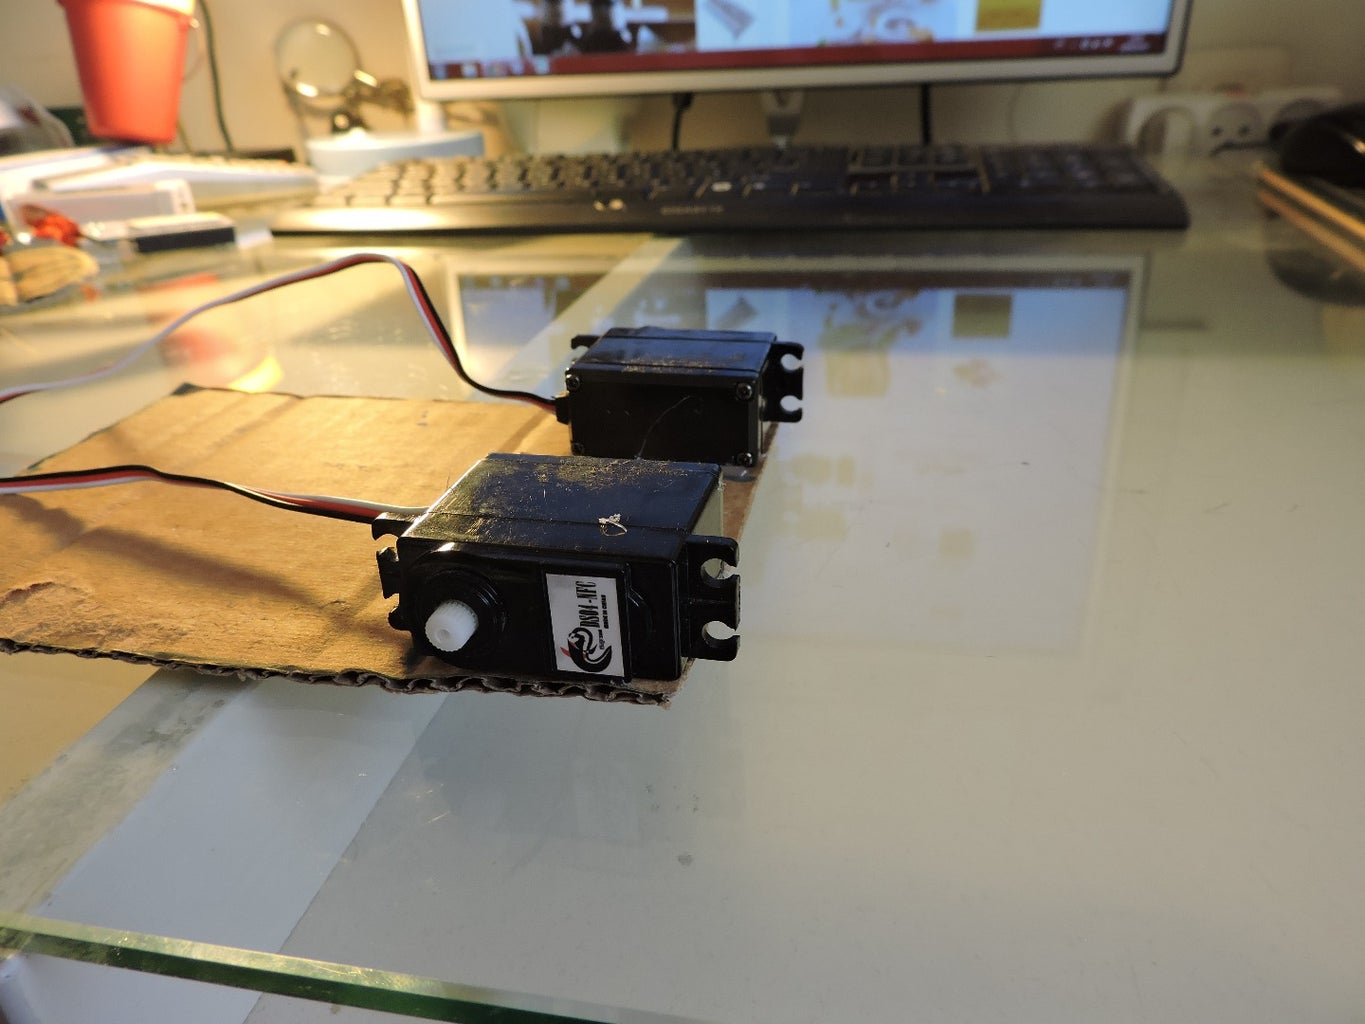


The first step of this build is to obtain a chassis. The chassis has to include a body and two servo motors. It can be either bought online, taken out of an old RC car or made in home using common materials such as cardboard, exactly like in this robot. I've made the body using a cardboard rectangle (12CM ^ 16CM) and then cut 2 circles, attached them to the two servos using hot glue and screws to act as wheels, attached the servos to the chassis using Double sided tape and finally applied a thin layer of hot glue to the wheels to act as tires and to improve grip. I've also attached a bottle cap to the rear bottom of the robot in order to reduce friction with the floor.
For convenience, I've added links for multiple sites:
Chassis (Note that if you buy a chassis online then it will be probably based on DC motors, And so you will have to use a motor shield and modify the Arduino code as well) -
Ebay US: http://goo.gl/LbWVTj
Ebay UK: http://goo.gl/haaxl0
Amazon: http://goo.gl/VGOsc7
Aliexpress: http://goo.gl/mjY6et
DealXtreme: http://goo.gl/1vL9qV
Continuous rotation servos-
Ebay US: http://goo.gl/Nqb5Lk
Ebay UK : http://goo.gl/EkYktu
Amazon: http://goo.gl/2EOkp0
Aliexpress: http://goo.gl/Nqb5LkEbay
Step 2: Arduino + Bluetooth Module


You will also need an Arduino board and a Bluetooth module. I'm using the Arduion Uno and the HC-06 module, and I'll leave a link for where you can get it online. A Bluetooth usb adapter will be needed as well in case your computer doesn't have a Bluetooth built-in.
Start by attaching the Arduino board to the body of the chassis. To achieve that, I've used a small amount of double sided tape in a spot without solder joints.
By now you should have an idea of how this robot is going to look like.
Links:
Arduino Uno-
Ebay US: Arduino Uno Ebay
Ebay UK: Arduino Uno Ebay UK
Amazon: Arduino Uno Amazon
Aliexpress: Arduino Uno Aliexpress
Bluetooth Module (HC-06)-
Ebay US: http://www.ebay.com/itm/Wireless-Serial-4-Pin-Blu...
Amazon: http://www.amazon.com/JBtek-Bluetooth-Converter-S...
Aliexpress: http://www.aliexpress.com/item/1pcs-HC-06-HC06-JY...
Step 3: Power !


This part is quite simple, since I'll simply specify which batteries I Have used.
I've used a 2 cell 1200 Mah lithium battery for the servos, and a 5V 1000 Mah back-up battery for the Arduino itself. You can also use a 9V battery to power the Arduino, and 4 AA batteries to power the servos. Anyway, You'll see how everything works out in just a second.
Again, Attach both of them to the Arduino using a small amount of double sided tape.
Links:
Power Bank Battery for the Arduino-
Power Bank Ebay
2S 1200 Mah lithium battery for the servos-
2S battery charger-
Step 4: Connecting Everything Together


For easier wiring, I recommend using a Prototyping shield. The bluetooth module has 4 pins: Voltage (VCC), Ground (GND), Transmit (TXD) and Recieve (RXD). Start by connecting it to the Arduino according to the diagram above. The resistors are used to act as a voltage divider, so make sure you do not forget them, since the Transmit and Receive pins of the Bluetooth module operate on 3V and cannot handle the 5V current of the Arduino. Finally, connect the Servos to the Board according to the second diagram.
Links:
Prototyping Shield-
Ebay US: Prototyping Shield Ebay US
Ebay UK:Prototyping Shield Ebay UK
Amazon: Prototyping shield Amazon
Aliexpress:Prototyping Shield Aliexpress
Step 5: Code- Theory

Let's speak theoretically. We have a robot, and we would like to control it remotely with a keyboard using Bluetooth and have a nice user interface that would allow us to do this easily. In order to do that, we will need a computer and a software called Processing. Processing is an open source visual programming language that will allow us to receive input from the keyboard, display it on our interface and send signals through the Bluetooth serial port. We will then upload a program to the robot using the Arduino IDE that will listen for the signals in the Bluetooth serial port, and take different actions according to which signal arrived. For example, If the UP button on the keyboard is pressed, the processing software receives it as an input, displays it on the screen and sends the number "1". The robot, which lays within the Bluetooth range, receives the number "1" and moves forward, since it is defined in its code that the number "1" means forward. If the right button is pressed then the number "2" is sent and the robot moves right, if the space button is pressed the robot brakes and so on and so forth.
Using this method you can even add some really neat features, such as turning on LED headlights by pressing the "L" key.
Step 6: Arduino Code


We'll start by creating the Arduino code that will run on the robot, and listen for the signals in the serial port.
First, open the Arduino code. After You've opened it, Upload it to the board. Make sure that the Bluetooth module is disconnected while you are uploading the code, Otherwise you will get an error and It won't work. After the upload is complete, you can reconnect your Bluetooth module.
I've wanted to paste the code here, But unfortunately It scrambled the whole thing into a big mess of letters, so I've simply uploaded it as a file.
I've explained all of the code using grey comments, in order to allow everybody to understand it.
Attachments

Step 7: Initializing the Connection With the Robot


First, Go ahead and download Toshiba Bluetooth Stack, That will allow us to turn the Bluetooth module into a Serial Port we can work with.
Choose a download link that suits your system:
If one of them doesn't work, Then try the other one.
Simply follow the pictures above and Their instruction notes.
Step 8: Creating the GUI (Graphical User Interface) for the Robot


The thing that sets aside this robot from others is the fact that it has a whole user interface built especially for him. To make it, I've used Processing. Using the graphical functions, I created and aligned squares and triangles to simulate a keyboard's arrows. The program receives input from the keyboard, and flashes the shapes according to which button was pressed (You can check the video at the beginning for demo). It then sends signals through the Bluetooth serial port accordingly (Remember, the ones that the Arduino listens for ?). This way we can control the robot remotely using a keyboard.
Controls:
Forward = UP arrow
Backwards = DOWN arrow
Right = RIGHT arrow
Left = Left arrow
don't forget that you can modify the code and add more cool features.
So without further redo, go to Processing.org and download processing. Afterwards, use it to open the RobotGuiV2.
This part is quite tricky. Whenever we run the program a list of the available ports appear in the output section. And indeed, Port 40 is available. But, whenever we enter the port 40 into the program, we get an error. Well the truth is that you have to check which port works for you. The one that worked for me is 11, And it will probably work for you as well, but if not, then simply play with your available ports, until you get it.
Again, I've clarified the entire code using grey comments.
Attachments
Step 9: Done ! + About Me


After You've found the correct port, Your robot is done. Now you can control it remotely with your keyboard. enjoy !
I found it to be very fun. About the range, it really depends on your Bluetooth module. I had no problem driving in my room.
Feel free to examine, modify and play with the code. You can change the keyboard buttons, add more features, and maybe even improve the robot.
I hope this tutorial was helpful, I had a great time writing it. If this Instructable was indeed helpful, Please Vote ! I've entered two contests: Coded creations and Move It.
A few words about myself:
I'm a 15 year old guy called Roy, whose interests include, among others, robotics, electronics and programming. I intend to keep uploading videos like this to YouTube and writing this kind of Instructables. So, If you like these kind of things that I do, please subscribe ! It means a lot.
Yours,
Roy.
Attachments


Participated in the
Coded Creations

Participated in the
Move It


