

Introduction: Ridiculously Overbuilt Bicycle Wheel Dishing Tool


In my first attempt to lace up a bicycle wheel from parts, I determined that it would be easier if I had a wheel dishing tool. They are a little expensive, but very simple in construction and design.
I wanted to build one with parts I had on hand, materials just kicking about in my garage and storage and junk pile (of which I have too much) and other than one purchased component, I was able to stick to that limitation.
1" square aluminum tubing, a bit more than four feet
2" flat aluminum strip, 1/8" thick, less than three feet
1/4" threaded rod, less than two feet
1/4" nuts, two
pop rivets
Gorilla Glue
hack saw, power miter saw with carbide blade, drill press, 1/4-20 thread tap, pop-rivet tool, 1/8, 3/16, 1/4 drill bits, metal file
The purpose of a dishing tool is to make certain that the wheel rim is precisely centered between the dropouts and hence centered in the bicycle frame. The reference points are the bearing locknuts on each side and the rim edge, and the measurement should be the same when measured from each side of the wheel.
It's easier to eyeball a difference than it is to work on a numeric reference, hence the design of the dishing tool. I felt it was important to have both sides of the tool parallel and coincidental (same line) and rigid enough to be reliable.
I'll admit that this particular construction is well overbuilt, but it used stuff I had, rather than stuff I had to purchase. One could easily use flat stock in place of the square tubing, but that would make the reference adjustment portion a bit different.
Step 1: The "backbone"


This single piece remains intact until nearly at the end.
Cut a piece of the one-inch square tubing to 25" long. I determined this figure by measuring all the bike wheels I have, including one ten-year old 27" wheel and found that 25" coverage should work for me. If you expect to be truing up a 36" unicycle wheel, you'll want to adjust that length by quite a bit!
Mark the center of the length you select, then center-punch for future drilling.
Step 2: Top End

Looking at photos of other dishing tools, I recognized that I didn't need much on the top of the tool, but for maximum strength, I'd have to make it wider than the commercial stuff. I arbitrarily selected six inches, cut another piece and marked it for drilling, as in the previous step.
Step 3: Trigonometry?


Another arbitrary figure of five inches to separate the pieces, to allow clearance for the axle and for tool reference adjustment. Some of these numbers could be smaller, but the end result for me was acceptable. I found a web site (http://www.1728.org/trig4.htm ) for doing the trig, since it's been too many years for me to remember my math classes.
The end result is that the angle of note in this case is 33.7 degrees, which is the angle opposite the 5" side. By using a 6" reference for the portion that contacts the rim, I should be able to handle rims down to 20" size and up to 27". The numbers shown also position the angled pieces approximately in the center of each edge contactor.
It worked out by accident that the hypotenuse calculated out to 9.01" which I rounded down to 9" with little impact on the overall result.
Step 4: Tricky Cutting


Since my power miter saw (with carbide blade) will not cut the acute angle needed to complement 33.7 degrees, I had to turn the workpiece 90 degrees. First, cutting a clean 90 degrees on a scrap piece of two-by-four, I then clamped the workpiece to the scrap. Careful alignment and even more careful cutting means all fingers remain after the cuts.
Measure the proper locations for the 9.01 inches and mark again. Double check your markings and measurements, or you'll have too-long or too-short pieces. You can't have a 9" piece of tubing become 9" when the miters are cut, it's more like 9.5" or so. I had to use one full piece of square tubing, and a short piece of a second one.
Repeat for both pieces.
Step 5: Layout (in the Sun)


This is where the parts start to resemble something useful. It's also the right place to check that your angle cuts are how they should be. If you used a hacksaw, you probably didn't get perfect miters, but that really won't matter. If I had welding skills and a TIG welder, this would be a beautiful welding project.
Since the really critical part is to have each side that contacts the rim to be on the same line, having those parts as a single tube takes care of any tricky alignment troubles.
Step 6: Strengthen the Joints


Having the power saw handy made cutting the gussets easy. Four pieces at five inches and two pieces at six inches. The second photo isn't particularly accurate, as I changed my mind on the end gussets in mid-project.
Step 7: Threading or Not, But Drilling for Sure


It's pretty important to have the reference pointer in the right place for the measuring process. I figure that passing through the center of the top piece and through the center of the bottom piece (even when cut out) would take care of that.
The centers of each length have been marked in a previous step. Using a drill press assures alignment through the box section, unless your drill press is off-kilter. If you're careful, you could probably mark both sides of the square tube and drill from each side with a small diameter bit first, then follow up with a larger diameter.
Since I wanted threaded holes, I started with a 1/8" bit on the top piece and worked my way up to the correct size for a 1/4-20 tap. Unfortunately my cheap tap set wasn't equipped with a long enough tap to make it through both sides in one direction. There's no way to make sure that the threads align for a through-bolt when tapping from opposite directions.
The end result is that top hole of the short piece is an un-threaded 1/4 hole, and the bottom one is threaded.
Using the piece of threaded rod, set up all the parts for alignment once again.
Drill the bottom tube in the previously marked center.
Step 8: Gusset the Joints


This first image shows the final alignment of the end gussets. More area for rivets. Marked center lines to track the tubing underneath, drill for rivets on all four pieces. Pay no attention to the top gusset with the clecoes in place. Some of these photo were taken in no chronological or sensible order.
Not shown in any of the photos is much of the drilling process. Drill the gussets first, align the parts carefully for best joints and mark the tubing. I suggest drilling one side first, and riveting and gluing it completely before moving to the opposite side.
After the gussets are drilled, mark one hole, drill the square tube and re-align the gusset. Place a rivet in the first hole to help keep parts aligned while marking and drilling the other holes.
I have a collection of clecoes, which are strong spring-loaded clamps that serve in place of rivets, and can be removed easily. This enabled me to secure the gussets as I drilled one hole, inserted the cleco, and drilled the next.
Step 9: Sticky Situation


Gorilla glue is pretty strong stuff, but has its weaknesses too. It's not particularly strong on non-porous surfaces, but we're backing this up with rivets. The glue will do a great job to keep any small movements from creeping into the tool, maintaining its precision for many years. One could use a silicone adhesive in place of the glue, with similar results.
Sharp eyes will not some pencil marking to be sure to get the right side of the gusset on the right part of the tubing. Those holes won't line up otherwise!
Once the goop is applied, start putting the rivets back in the holes. I recommend filling the holes with the rivets before popping them. You want the slight play available to be able to get all the rivets in without having to "double-drill" the ones that won't align.
After the one side is fully riveted, flip it over and duplicate for the other side. You'll have glue all over the place, unless you wait for the first side to set up first.
Step 10: Wait Until Dry (or Not)

Since the rivets are pretty strong, you don't have to wait for the glue to cure. I did, because the glue drips and sticks to everything.
Mark the bottom tubing six inches from each end and cut it free.
Step 11: Reference This


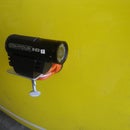
The different dishing tools on the market all have different ways of referencing the wheel bearing locknut. One of them suggests that you don't have to remove the outer nuts in order to use the tool. I didn't see that as a particular benefit and didn't want the complications that meant in construction. One of the ones I liked better used a tubular sleeve at the end of the adjustable rod. A little research (Thank you, Sheldon Brown!) led me to believe that I could get away with anything that fits over my current axle. An 11mm deep socket with a 1/4" drive was perfect! Four dollars at sears.
Loading up the threads and drive opening with JB Weld, inserting the threaded rod into the drive opening, results in a glob of JB Weld being pushed into the socket body. Using a scrap push stick, flatten the excess down into the bottom of the socket and let cure overnight.
Step 12: Use


each side of the tool rests on the rim, with the reference guide above the locknut
Lower the reference socket to contact the locknut, and secure with the upper thread lock, to avoid mis-adjustment while moving from one side to the other. Both sides of the tool must remain flat, and no air must be visible under either side. No rocking of the tool is permitted, no gap under the reference socket.
With the locking adjuster nut secured, flip over the wheel and check the other side. It will then look like the picture with the gap, which is twice the distance your rim needs to be moved in the opposite direction from the tool.


