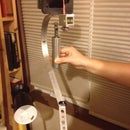
Introduction: Smartphone Tripod Adapter From Found Materials
There are plenty of inexpensive tripod adapters for smartphones out there, but why buy? There's no fun in that!!!
For this instructable ( my first ) I'll be showing you how I built a tripod adapter for my smartphone from free, found objects for nothing more than a couple of hours out of my day.
Step 1: Tools and Materials
Since this was made from found materials this part might not be very helpful to most. I used a scrap piece of 1/2" black "StarBoard " and the temporary license plate tag that came with my bike. You can substitute with whatever suitable materials you find.
Tools used:
-Square & Ruler
-Drill w/ 3/16' Drill Bit
-1/4-20 Tap w/ Tap Handle
-Coarse file & Sand Paper
-Saw (power or hand is your choice, I used both)
-Utility Knife
-Clamps
-Gorilla Glue
Step 2: Cutting the Parts
I opted to go freeform with the design so the only concerns to keep in mind were access to the shutter release button, the lens and, of course, fit.
Luckily, The "StarBoard" was the right thickness for my phone. I started by cutting an "L" shape out of it a 1/2" wide all the way around. As long as the ends of the "L" extend past the center of the phone on both sides by about a half inch you should be fine.
Next were the front and back panels. Both were cut from the temp. tag. The back panel was easy, I just free handed some curves and cut them out. The front panel was a little more challenging for my phone. I wanted keep full access to the touch screen and home button so I had to cut enough away while still leaving something on the sides to hold the phone in. For this I oversized the panel and carefully trimmed it to final shape after glue-up.
Step 3: Prep & Glue-Up
Here, I started by sanding down all surfaces on the three parts. I wanted to get rid of the lettering on the front and back panels as well as give everything "mechanical tooth" for the glue to better adhere.
Once sanded, I thoroughly cleaned and dried all surfaces on the parts.
Next, I masked off all but the glue surfaces. Once activated, Gorilla Glue will expand quite a bit. The masking tape will aid in clean up.
Apply the glue according to the directions on the bottle and clamp the pieces together. I recommend clamps over weight placed on top because clamps won't allow movement between the parts while drying.
Once the glue has set, remove the clamps. With a new blade, lightly run your utility knife along the inside edges and proceed to remove the tape and any excess glue.
Step 4: Finishing Up!
This is where you clean up all of your edges, sand the piece down and finish shaping it. I have my final shape and fit the front panel around the touch screen.
Now you'll want to find and mark the center line of the adapter. Next, find the centers of the side and bottom of your phone, place it in the adapter and transfer the center marks with your square down to the center line on the adapter. You now have your mounting points for both portrait and landscape modes.
This is where you have to make some decisions as to which way you want to go. Since I won't be using my adapter for anything rough I'm comfortable drilling and tapping the "StarBoard" to mount on the tripod. If you want something sturdier, you can go with threaded inserts for wood and some epoxy.
If you choose my route, drill a 3/16" hole on each mark and carefully tap the holes with the 1/4-20 tap.
Step 5: Enjoy!
You can use a rubber band to hold the phone in place for weird angles.


