

Introduction: Steel Toe Bunny Slippers


"Sir, let me take this moment to compliment you on your fashion sense, particularly your slippers."
Tired of heavy, clunky boots when you're in the shop? Live in a warehouse and don't want to put 'real' shoes on when you let the dog out? Need to just pop into the workshop for a sec and hate tying up a bajjilion laces? Channeling Chris Knight?
Well, my friend, despair no more. Steel toed bunny slippers are here. Comfy yet safe, cute and fluffy but strong and durable, you'll be a fashion trendsetter.
This Instructable is listed under 'fashion' because it's clothing, but it's also 'workshop', because, well, why shouldn't you be fashionable – or at least comfy–in the workshop?
Step 1: Aquire Materials

You'll need:
1 pair of bunny slippers:http://amzn.com/B00OBVBQRK
1 pair of 'turbotoe' steel toe caps:http://amzn.com/B00BOK565Y
Barge all purpose cement:http://amzn.com/B00F0VPV62
scissors
rubber gloves (to protect your hands from the cement)
utility knife, x-acto or similar
Fabric that matches the bunny slippers
1 yd 1/2" white elastic band
Sewing machine or serger (though it can be done by hand)
Step 2: Cut the Soles Out From the Bunny Slippers

Using the Xacto or utility knife, cut along the outside of the sole. Leave about 1/8" (one eighth inch) left between where you cut and where the sole is sewn to the bunny slipper fabric. By leaving a little rubber (vs cutting the seam itself) you're both keeping the fabric from fraying as well as having a better material to eventually glue to the sole.
Discard the old sole.
Step 3: Remove Foam Insole
Remove and set asside the foam insoles from the bunny slippers.
Step 4: Cut the Insole Free


Very carefully, make a small incision into the next layer up- what will eventually be the material that lies agains the insole, under your foot. Using the scissors, cut around that layer around the toe until the cap portion is free; again leaving about 1/8" allowance.
Step 5: Cut Into the Bunny, Take It's Fluff Out


You heard me.
Repeat the last step, making a small incision into the upper part of the slipper and cut around to separate it from the 'bunny' part of the slipper. The fabric you're cutting will eventually lie against the top of your foot. Feet. Whatever.
Remove most of the fluff and set aside.
Step 6: Test Fit Turbotoe Into Bunny Slipper


Depending on what size turbotoe (from here on I'll just call it 'toe insert') you buy, and what size bunny slipper you get, your toe insert might need to be trimmed, length-wise. Test fit it into the insert into the bunny slipper.
Step 7: Trim Yo' Toe

Trim your insert to be the correct length. You want it to be slightly too large for the slipper, as the slipper is somewhat elastic and the stretch will help it fit later on.
I trimmed about 1/2" off the heel.
You also need to trim the rubber down the sides, angled so it's the tallest at the toe and lowest at the back, as shown.
note: in this photo, I have not trimmed the length down yet.
Step 8: Trim Foam Insole


Take the foam insole that was in the slippers and trim it to the length and width of the inserts, so that it fits snuggly inside the inserts.
Step 9: Glue in the Insoles

Here's where I make a note about Barge all purpose cement.
It is nasty, nasty stuff. It is not good for you. It is not healthy, nor even moderately benign. It is noxious, nasty, bad-for-you stuff. It does, however, make a really good bond. If you're doing this you should do it somewhere with very good ventilation, if not outside.
To use it, you brush on a moderate layer onto both sides of what you're gluing. Let it dry minimum 5 minutes, or until the shine goes away, and possibly even longer. Then press the two sides together and hold for 1 minute.
Anyways, brush it onto the bottom of the foam insoles, the corresponding inside bottom of the steel toe inserts, and glue.
Step 10: Put Some of the Fluffs Back In


Take some of the fluffs, and put it back into the bunny. Most of the room in the toe will be taken up by the insert, but about 1/2 of the original fluff can go back in.
It's very usefull to have a thin sheet of foam around. I cut some up to hold the fluff in place- I didn't glue it in, just laid it in.
Step 11: Add Some Cushion to the Toe


Using the same thin foam sheet (the kind you get in packages all the time) I added some cushioning to the inside of the steel toe.
Step 12: Sand the Rubber


In order to make a good bond, use low grit (I used #80) sandpaper to scuff up the edges of the insert.
Step 13: Place and Glue in the Toe


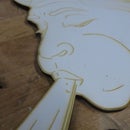
See the first photo on how to assemble and which parts are which.
With this step you're just glueing on the tip of the toe (maybe 3" worth) to hold things together and act as a guide for the rest.
Paint the cement both onto the sole and the rubber edge of the upper.
Brush on the cement onto the toe and let dry a sec, as described before. When ready, carefully place the toe of the slipper onto the insert. Hold in place for 2 minutes.
Step 14: Glue in Tongue to Underside of Steel Toe


Next up is to glue the fabric that is aproximately the 'tongue' to the underside of the steel toe cap. To describe this better, this is the fabric that will eventually lie on top of your foot when it's in the slipper.
Paint on the cement to the underside of the steel toe and the topside of the tongue fabric (the wrong side- the side that won't be touching your foot). Press in and even out, taking care not to get glue on the 'right' side. Stuff in a rag to keep pressure and let set.
Step 15: Glue Down the Fabric Insole


Roll up the fabric that will be the insole so that the 'wrong' side is facing out (see photo). This will really help as you not get cement on the 'right' side. Paint cement onto the foam insole, and unroll the fabric insole down into the toe and lay down on top of the foam insole. Press down the fabric insole and smooth out.
I made a rough wood jig to clamp down the whole shebang, but this is likely unnecessary, though hilarious.
Step 16: Glue Around the Sides

The first slipper I did, I glued the whole edge and then held it down. I recommend instead doing it in 4" lengths at a time: Paint on glue, wait 5 minutes, press and hold, repeat. The slippers are impossible to clamp, so doing it in smaller lengths makes it easy to hold by hand.
Step 17: Make the Heel Straps


Due to the added weight of the steel toe, the slippers need heel straps.
Measure out about 4.5" (will vary depending on your foot) of elastic strap. Measure out the fabric you chose that matches the bunny slippers (I used 1/4 yard of white fake fur). It should be about 7" long and 4 times as wide as your elastic strap.
Fold your fabric so it's wrong-side out and sew (or serge if you have one).
Lay the elastic strap on the inside-out tube and turn inside out. By laying the elastic on it it first you'll wind up with the strap in the inside, which is a bit easier than putting it through after.
Once it's turned right way out with the elastic on the inside, sew the ends of the tube closed with a bit of the elastic sticking out. Sew both ends like this, so the elastic is captured within the tube at both ends.
Step 18: Sew on the Heel Strap

Sew on the heel strap, joining the strap at the base of the bunny where it meets the insole. I recommend hand-sewing this, going over a couple times to make sure it has good strength.
Step 19: Be Fashionably (and Safely) Fuzzy!


Wear them with pride, comfort, and safety*!
*not actually ANSI rated safe.


