

Introduction: Zero to Air Conditioner Controller With Raspberry Pi

I recently took on this project having no prior electrical or raspberry pi experience. I wrote this instructable because I wanted to turn a fun and useful project that can seem overwhelming and complex, and break it down to it's simplest form.
Step 1: What You'll Need:

- Raspberry Pi Kit: http://a.co/43Mqzl6
- SD Card: http://a.co/auI9JCP
Infrared LED Receiver and Transmitter: http://a.co/5zIwvPQ
Transistor: https://www.adafruit.com/product/756
Resistor: https://www.sparkfun.com/products/8374
Breadboard: http://a.co/agJUFac
Male-to-Male and Male-to-Female jumper wires: http://a.co/8ixaBeN
If you can't wait for delivery like me and can easily get to new york city, there is also a store called Tinkersphere that you can visit, and they are very knowledgeable and can get you everything you need to get started.
Step 2: Format SD Card
Now that you have all the parts, it's time to setup your raspberry pi with a Linux distribution.
- On your computer, download this SD Memory Card formatter: SD Card Formatter
- Insert your SD card into your computer.
- Open the SD Card Formatter application, select Overwrite format, and click Format.
On your computer, download the NOOBS (New Out Of Box Software) linux distribution from here.
Copy extracted files onto the formatted SD Card.
See more details on formatting here: https://www.raspberrypi.org/documentation/installa...
Step 3: Configure Your Raspberry Pi
- Connect your SD card, an ethernet cable, a keyboard, a mouse and HDMI cable to your TV or Monitor.
- Connect the power supply to raspberry pi to turn it on.
- Login to your Pi. The default RaspberryPi login is username pi with password raspberry.
- Expand SD card partition. Open the Terminal application and run the following commands:
# open the RaspiConfig tool:<br>sudo raspi-config

# navigate to the "expand_rootfs" option and select it
# quit out of the raspi-config screen
# reboot the system:
sudo shutdown -r now
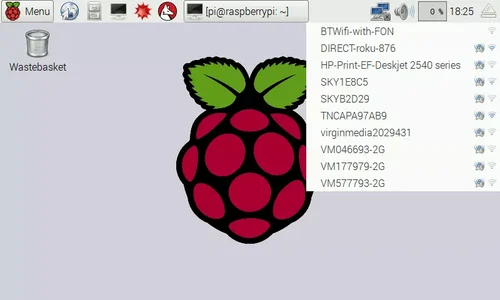
- Setup WiFi.
- See image on how to enable via the UI.
- For more details, including setting the WiFi via terminal, see here.
- Enable SSH.
- Navigate to Preferences > Raspberry Pi Configuration > Interfaces
- Select Enabled next to SSH.
- For detail more see here.
Step 4: Install and Configure LIRC
LIRC (Linux Infrared Remote Control) is a package that allows you to decode and send infra-red signals of many (but not all) commonly used remote controls. You can read more about it here.
We will install it on your Raspberry Pi and run it. It will allow you to first record your remotes infrared signals, and later you will call on it to send any of those recorded signals to your air conditioner.
To install LIRC, run the following commands from the Terminal:
Install and configure LIRC to run on the RaspberryPi:
sudo apt-get install lirc
Add to your /etc/modules file by entering the command below:
sudo cat >> /etc/modules <<EOF
lirc_dev lirc_rpi gpio_in_pin=23 gpio_out_pin=22 EOF
Change your /etc/lirc/hardware.conf file by entering the command below:
sudo cat > /etc/lirc/hardware.conf <<EOF
######################################################## # /etc/lirc/hardware.conf # # Arguments which will be used when launching lircd LIRCD_ARGS="--uinput"
# Don't start lircmd even if there seems to be a good config file # START_LIRCMD=false
# Don't start irexec, even if a good config file seems to exist. # START_IREXEC=false
# Try to load appropriate kernel modules LOAD_MODULES=true
# Run "lircd --driver=help" for a list of supported drivers. DRIVER="default" # usually /dev/lirc0 is the correct setting for systems using udev DEVICE="/dev/lirc0" MODULES="lirc_rpi"
# Default configuration files for your hardware if any LIRCD_CONF="" LIRCMD_CONF="" ######################################################## EOF
Edit your /boot/config.txt by entering the command below
cat >> /boot/config.txt <<EOF
dtoverlay=lirc-rpi,gpio_in_pin=23,gpio_out_pin=22 EOF
Now restart lircd so it picks up these changes:
sudo /etc/init.d/lirc stop
sudo /etc/init.d/lirc start
Now that all the software is ready, let's setup the hardware.
Step 5: Wire Everything Up.

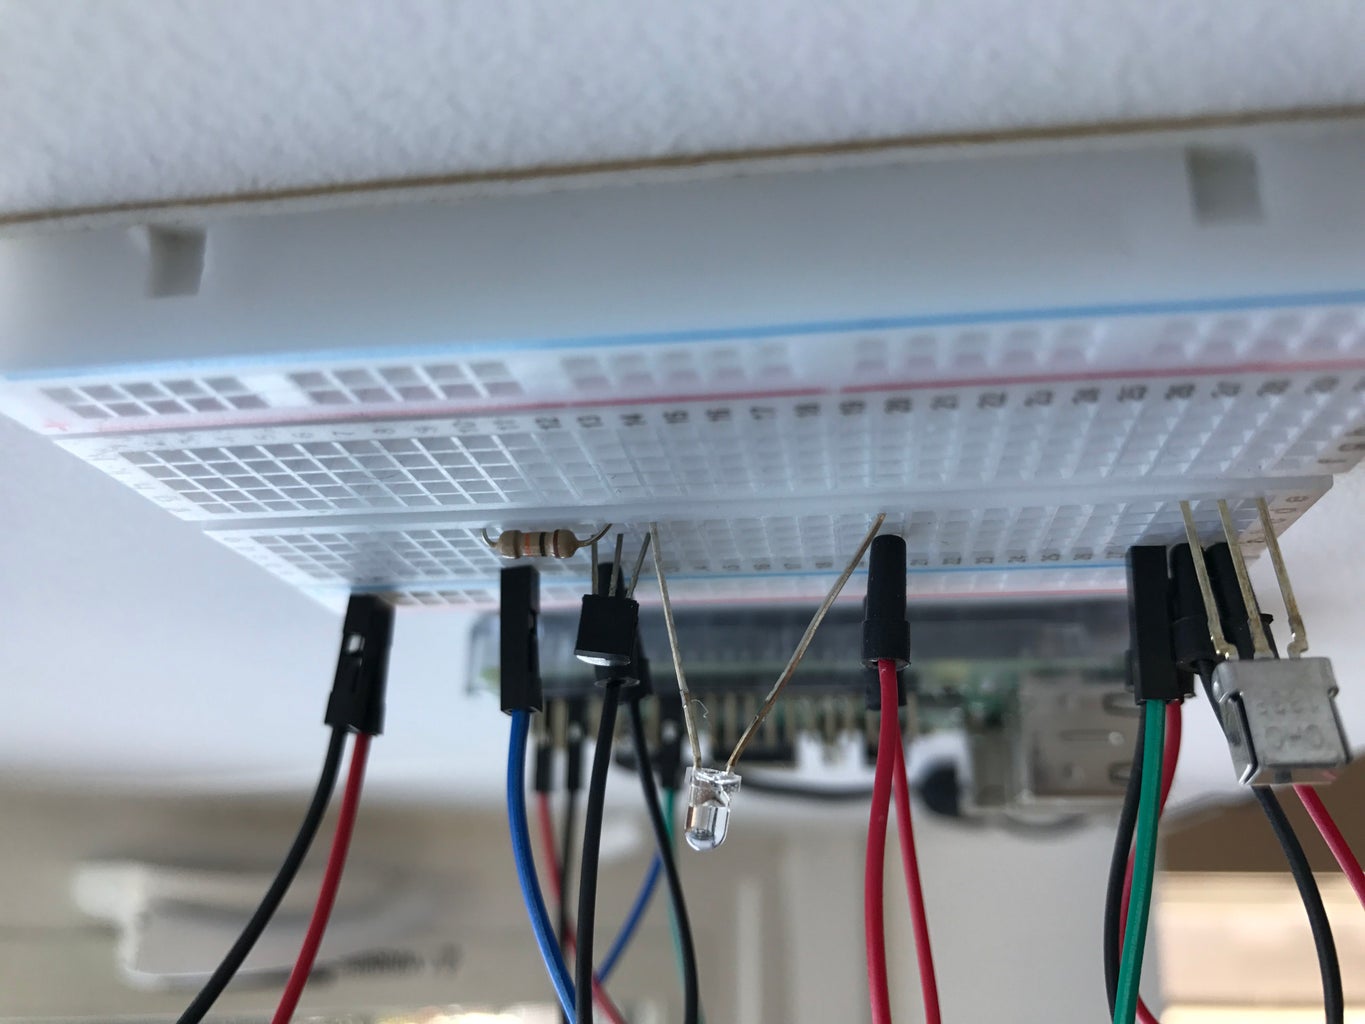


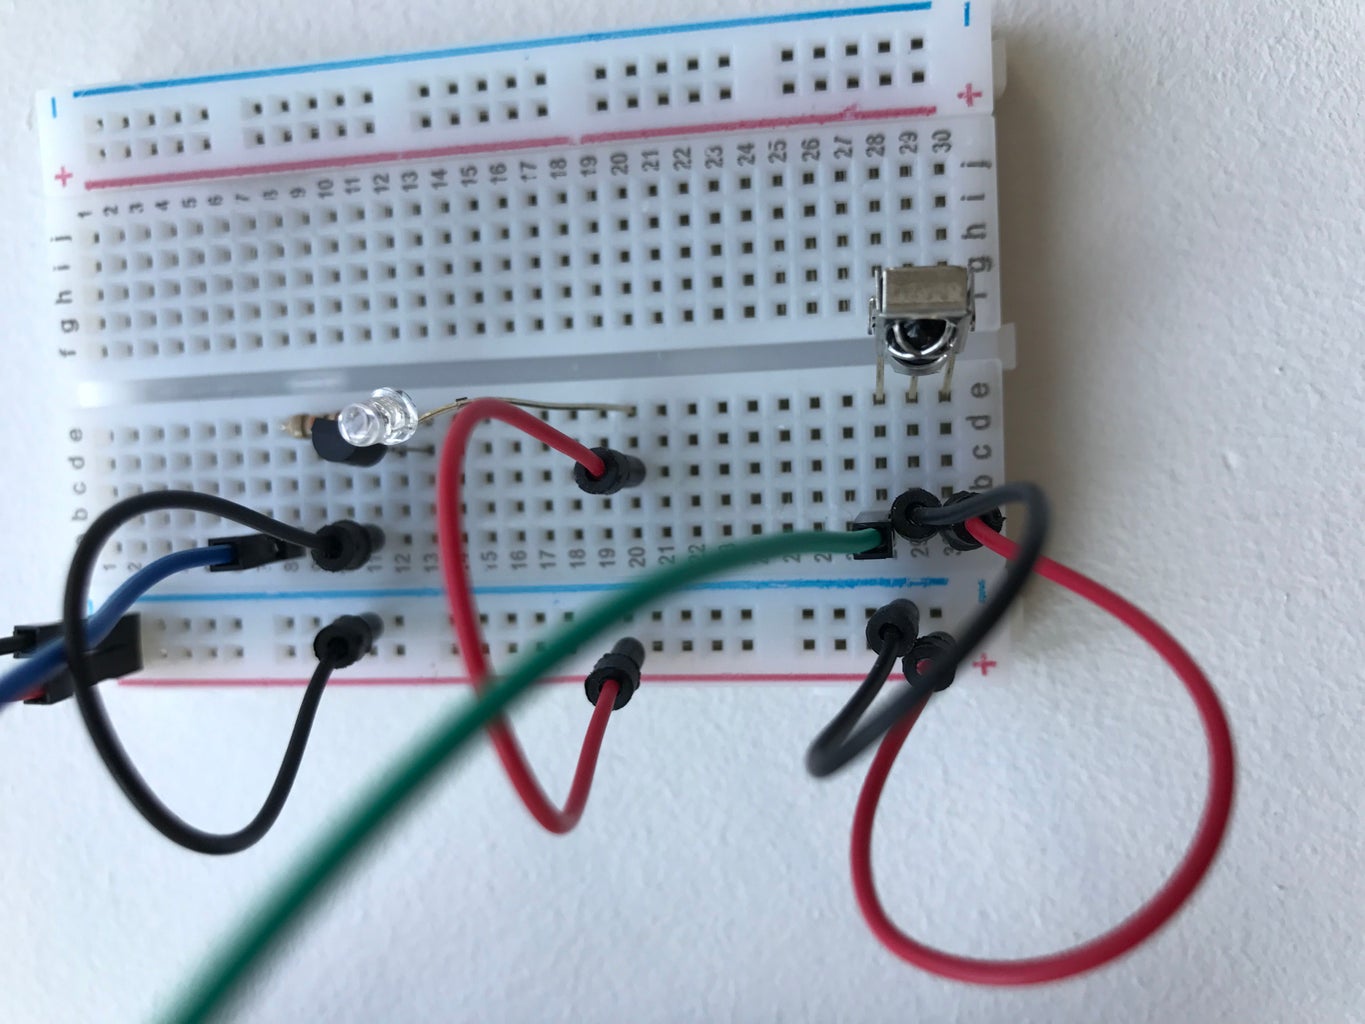

See the various images from different angles on how to connect each piece.
Step 6: Record AC Remote Codes
Here is where you need to send the signals from your remote to LIRC. It will store the various commands you send it, such as on, off, mode, speed, etc.
If everything is wired correctly, the infrared receiver should be ready to receive commands. To test this, run these two commands to stop lircd and start outputting raw data from the IR receiver:
sudo /etc/init.d/lirc stop

mode2 -d /dev/lirc0
Now point your remote to the IR receiver and start pressing buttons. You should see output similar to this:
pulse 38
space 48201
pulse 83
space 13801
If you are not seeing this, double check all your connections, and make sure nothing is obstructing your IR receiver, such as too much direct sunlight. Doing this in a dark room might also help.
Before you record your AC's codes, check if a configuration file already exists here:
http://lirc.sourceforge.net/remotes/
I was able to find it on Github, which can also be another source, in addition to google. Here are the codes for my air conditioner split system that someone so generously published:
https://github.com/mattjm/Fujitsu_IR
If you are unable to find your units remote control codes, this video tutorial does a good job of breaking down how to do this:
For convenience, here are the commands to run for recording and writing the lircd.conf file with your remotes unique IR codes:
# Stop lirc to free up /dev/lirc0
sudo /etc/init.d/lirc stop

# Create a new remote control configuration file (using /dev/lirc0) and save the output to ~/lircd.conf
irrecord -d /dev/lirc0 ~/lircd.conf

# Make a backup of the original lircd.conf file
sudo mv /etc/lirc/lircd.conf /etc/lirc/lircd_original.conf

# Copy over your new configuration file
sudo cp ~/lircd.conf /etc/lirc/lircd.conf

# Start up lirc again
sudo /etc/init.d/lirc start
Step 7: Time to Test!
Before you start sending commands to your AC, make sure you move your raspberry pi close to your unit, and that no light or object is obstructing your IR emitter.
In my case, I ran the following commands. Make sure to change where it says fujitsu_heat_ac to your own device name:
# List all of the commands that LIRC knows for 'Fujitsu'
irsend LIST fujitsu_heat_ac ""# Send the power on command and set to cool mode irsend SEND_ONCE fujitsu_heat_ac cool-on
# Send the heat command on auto speed, and 80 degrees irsend SEND_ONCE fujitsu_heat_ac heat-auto-80F
And that's it! You now have an air conditioner remote control on your raspberry pi!
The sky's the limit from here. You can put a web server on top of this to control it remotely, connect it with your smart device such as the Amazon Echo, or simply start with setting a scheduled cron job to turn it on before you get home from work for example.
Good luck!
Step 8: Sources and Further Readings
Here are the posts I used to help me with this project, and that I referenced throughout this instructable. I skipped a lot of technical detail to hopefully get you up and running faster, but I do recommend to go back and learn what each command and configuration does. These sources will go into more detail when you are ready:
Thanks!

Participated in the
First Time Author Contest


