

Introduction: Garduino Upgrade, Now With More Twitter!


I thought it would be great to combine both these projects and build myself an indoor garden that I could monitor from work via Twitter. Thus began an adventure in gardening and electronics that taught me a lot and took me much longer than perhaps it should have. Fortunately for you I'm going to write down all the steps so you can get started right away. Maybe you'll follow up with this project and upgrade your garden or use this as a guide to start on a similar project. Either way, I hope you'll let me know what you get up to.
If you're ready then head to the next step and begin the process!
Edit: Please see the code now posted on GitHub - https://github.com/chrisgilmerproj/garduino-upgrade
Step 1: Gather Your Materials
This project is really two projects in one. It is both a gardening project and a wireless project. But, as is true with any project, getting your materials will probably be the hardest part. This is because building can move along pretty fast once you have everything, but it's finding out you're missing the one crucial piece that always holds things up. Below is a list of web pages from my wiki with a list of all the parts you'll need. Go ahead and take a look, I've listed them with as much detail as I could and if I've left something out just let me know so I can add it to the list.
Various Parts Lists:
I highly recommend you buy a couple extra parts here and there. You'll find, as I did, that they come in handy when you make a mistake. For the majority of the parts nothing is particularly expensive so buying a few extra things won't hurt.
Step 2: Build Your Garduino

When you get started you'll want to get some plants and a place to plant them. I recommend a local gardening store where possible. You'll pick up some healthy plants there and probably a few good tips on how to care for them. I picked up basil and mint, a couple plants I'd find useful to have for cooking. I also got an 8" x 18" planter with a matching dish to catch water. You can certainly go out and use tubs or custom pots, just choose what's right for you and your plants. Also, pick something that will look nice around your house if that's important to you.
The first thing that is different about my project is that I was building an indoor garden. My apartment doesn't have a lot of light from any of the windows, nor does any good light fall on the patio. This changed a lot of the parameters for my garden. For one, I didn't need a light or temperature sensor, something I discovered after the fact, as my light will be constant from the fluorescent bulb and my temperature inside the apartment is pretty stable.
I also learned that whether you choose to keep your plants inside or outside you should be aware of bugs. My first plants died because of spider mites, something I hadn't even thought of when starting this project. I found the solution was actually pretty easy, involving a spray bottle, a tiny bit of soap and water. It's a much cleaner solution, especially if you plan to eat your plants, and doesn't hurt the environment either.
Step 3: Upgrade #1: Remote Sensors


My sensor was designed to have the temperature, light and moisture sensors onboard. Also, I included 2 red LEDs so that I could indicate if the plants were being watered or if the temperature went out of an acceptable range. Of course this was before I had decided to keep the plants indoors, so in retrospect I'd probably ditch the temp and light sensor and leave the LED on the arduino. Better yet I could have just used the onboard LED connected to pin 13 on the arduino. Then all I'd have is two wires leaving the arduino to act as the moisture sensor for the plant. Regardless, this was a fun part of the project and I learned a lot.
You can download the schematic and board layout files I created. I decided to build the board by hand instead of having it manufactured for me primarily due to cost.

Step 4: Update #2: Relay Boxes


Finding the whole thing incredibly useful I wrote up another instructable on how I built my relay boxes and made it more generic for other projects where you might want an arduino to control power. Check out the Arduino Controlled Relay Box Instructable when you get a chance.
At this point I decided to add on an arduino protoboard to my project so that I could have access to more power lines without having to solder together a new breadboard. You may choose to do something different, but this made things significantly easier, especially if I decide to do more modification later.
If you don't do anything else with your Garduino definitely do this upgrade. It's definitely the most important.
Step 5: Upgrade #3: New Software

In fact I thought I could do a better job regulating the time from my laptop. Not only would the light only be on at night and in the morning when I wouldn't care, but I could reset the arduino power at any time and it wouldn't change this schedule. The added advantage to this method would be that I'd also be able to record the sensor readings from the garden to look at them later.
To get started you have to know that the arduino can talk over a serial connection to your laptop. You probably already knew this, but what you may not know is that you can use the Python programming language to read and talk to the arduino. This is great because it opens up all sorts of tools for you to use when interacting with your arduino.
For this you'll need to download and install the following:At this point I also want to direct you to the Arduino Controlled Servo Robot project by Oomlout. My methods roughly follow what I learned there. The basic premise is that you'll be sending a command from the laptop to the arduino every 15 seconds. The arduino will decode this message, check that it is a correct message, and then the arduino will use the commands to manage the garden. If no message is received then no new actions will be applied to the garden.
I choose to send a command that looks like this: "+++lw". The arduino can tell if the message is correct by reading that I have included the "+++". Then I pass the letters 'l' and 'w'. If the 'l' is lower case then it tells the arduino to turn off the light. If the 'l' is an uppercase 'L' then the light will come on. Easy, right?
The 'w' is trickier. I have included some safety protocols in my software. The arduino will only turn on the pump for a maximum of 5 times for 5 seconds each time. You may wonder how a plant will live on only 25 seconds of watering. Well I reset the counter every 4 hours. This way the plant will continue to get water and my kitchen will not continue to get flooded. The 'w' as a lower case tells the arduino nothing useful, but if I change the 'w' to an uppercase 'W' then the pump counter will reset to zero and the arduino can again water my plant if it's necessary. Make sense? You may want to something slightly different, but this worked for me.
Instead of including the code in the text here I've decided to include files. You should be able to open these with your Arduino IDE for the arduino code and with IDLE or a text editor for the Python code.
Step 6: Upgrade #4: Wireless Control

Early on I decided to use Xbee wireless devices to talk between my computer and the computer. Now I apparently did things the hard way because I thought you'd need to send the data through the Xbee controller from the arduino and then decode it on the other end with the Xbee Python library. This turns out to be completely untrue. You certainly can do it this way, but it's way harder than simply using the Xbee modules as a direct serial link to your computer.
It may have taken me hours, but this step shouldn't take you very long once you've set up your Xbees. Essentially you remove the USB cable between your computer and the arduino, hook up your Xbee modules (one to the computer via an FTDI cable and one to the arduino via tx/rx lines), and then continue as though you were still using the USB cable. Don't believe me? Try it. Maybe this was obvious to other people but it was pretty exciting when I figured it out.
Now I should tell you there are several steps to doing this whole wireless step. You need to first purchase and assemble the Xbee modules. Then you'll want to program each of the Xbee chips and finally connect them up. The best resource I found for setting up my modules was actually a tutorial about Wirelessly Programming your Arduino.
I decided to set up my arduino to be wirelessly programmed so that I could easily update the code from my laptop when I needed to upgrade my arduino. This was an added bonus to being able to wirelessly talk to my arduino via serial and it just seemed to sweeten the whole project. I also found this made some of the debugging easier since I needed to do a lot of writing and rewriting to the arduino.
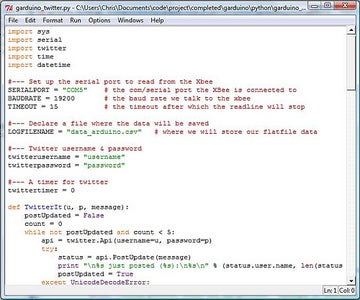
Step 7: Update #5: Twitter Your Garden


I set up my twitter to send back the readings for the different sensors and the current time. I know you can track the time you posted, but I wanted the time from my computer. I also decided to have it tweet every half hour. When I originally was programming this I had it tweet every 5 minutes, which was good when I wanted to ensure it was actually working, but got annoying to follow pretty quick. I may actually have it tweet every hour or couple hours in the future. You get to decide what you want for yourself and go from there.
I have asked friends to help me come up with some silly messages for my garden to tweet, based on the sensor readings, so maybe I'll get some snarky comments up there soon.
You may have noticed that this code was already provided to you earlier in this Instructable. My hope was that you got excited and already started to play with it. If not, what are you waiting for?
Step 8: Useful Project Notes
Plants:
When it comes to plants remember that they are indeed alive. They are also tasty, not just to you but often to other things as well. My first plants were eaten by cats and then destroyed by spider mites. I never would have thought about this during the planning stage of the project and it definitely cost me a few extra bucks to replace them.
Lighting:
Plants need light and it can be tough finding the right set of lights. There is plenty of information out there about lights for growing plants but it turns out to be incredibly difficult to find these lights at a local hardware store. It took me a while but after asking around I was directed to a Hydroponics Store. You know the kind (wink, wink), and they hooked me up in no time at all. Pun partially intended. The people were great at the store and definitely reminded me of why I like to buy local when possible.
Water:
You've got to be really careful when you get started with automatically watering your plants. The soil resistivity will change dramatically as you first start to water it, meaning your calibration of the sensors will be difficult. I found this out the hard way when my pump decided to water not only my plant but my entire kitchen. It's better to program in some safety catches in the software to prevent this. My plants will only water for up to 30 seconds at four different times in the day and no more. It may be different for you, but be warned.
Wireless Programming:
You may have set up your arduino to be wirelessly programmed. I did and I found the only annoying thing is that I'd reset my arduino when I reset my computer. Turns out I was flipping the reset line on the arduino via the Xbee. The easiest solution to fix this was to disconnect the reset line whenever I didn't want to reprogram. I could still leave the other electronics in place, but removing the reset line fixed the problem without having to disassemble anything else.
Final Comments:
I had a lot of fun building this project. I learned a lot along the way and I hope to have some delicious plants for eating after all this work. I hope you found this project interesting and useful for upgrading your own Garduino. If you do follow any of the upgrades in this project let me know and tell me how they worked out for you.
You can always ask for more information or check out my website for more information. I keep a blog, a project wiki, and an svn repository with the latest code. I also have a set of photos you can look at. Hopefully it's all up to date and full of resources to help you out. Good luck with your project!
PS - If you like this project please vote for it in the "Arduino Contest" and help me win!
