

Introduction: 3D Composite Logo


This was a foam core fiber glass logo for my Brazilian Jiu-Jitsu instructor a few years back. I started out by glueing to pieces of foam, tracing his logo and cutting it out. I know I don't have all the steps it took I apologize, but very simple :).
Step 1: Shaping


I continued to smooth out the sides until I achieved the sharp edges you will see.
Step 2: Fine Grit Sanding

Just as the title describes, I used fine grit sand paper to get a smooth surface to see what it would look like. I did like it so I ruffed it up a little to increase adhesion surface for the epoxy and glassing process.
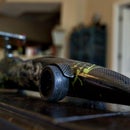
Step 3: Glassing

I added 3 layers of 6oz fiber glass to both sides and then vacuum bagged it. That is a process used to achieve a higher quality product. By placing special layers of bagging material, peel ply, bleeder material, and then vacuuming the air out with a vacuum compressor, you can achieve great results.
Step 4: Paint


Sand the part, then I painted it with a red primer. To finish the color I used an epoxy that was tinted in a dark red and achieved the desired color.
Step 5: Sand and Buff

You can use a 120 grit paper for any imperfections down to 400 and later 800 grit paper. I than used a fine 1200 grit paper and finished with a 3000 grit before buffing.


