

Introduction: Camera Stabilizer


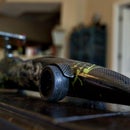


The pictures do not display a step-by-step process. However, I will do my best to explain how I made this. This is a camera stabilizer use for video capture. It produces a stable image rather than a shaky camcorder or handheld technique.
Step 1: Main Body


You will need to find a metal pipe about .75 to 1 inch in diameter. I use this as the mold to roll the fiberglass onto it. In order to release the fiberglass from the pipe you will need parchment paper rolls on top of the mold first. Once you have secured the parchment paper, you can then add the fiberglass. To secure the fiberglass onto the mold I added parchment paper on top of the glass and just rolled a string to hold everything together. Once you give it 24 to 48 hours for a solid cure, you will be able to release the glass from the mold cut and paint to your liking.
Step 2: Base Plate and Bearing Handle


For the large bearing I used PVC pipe. The bearing was slightly larger therefore I used a heat gun to heat the pipe and stretch the bearing into it. Did I cut it just to fit the bearings height. The base plate was laid out on parchment as well and I laid the fiberglass layers on top. I built up about an eighth of an inch of glass before I cover the top with parchment and pressed it down with some wood and weights. Please note that hand lamination fiberglass requires the full saturation of the material, and you my squeegee out as much of the resin as possible. If you have the option to vacuum and infuse or vacuum bag, this will make a much lighter and stronger part. If you do not have this option, fully saturate the class and don't worry about squeezing out too much resin. For the Barry handle I used the same process and then cut out the pieces to form a half rectangle include them individually making a frame quarter of an inch thick. To glue them together I used five minute epoxy.
Step 3: Handle Continued


For the handle I make sure the diameter of the pipe mold was the same diameter as that of rollerblade bearings. Once I have the pipes I cut them to fit 90° and use the epoxy yet again. Also they have square or rectangle holding the main large bearing has three bearings at its axis points also the same size as rollerblade bearings. For this gimbal I use the same fiberglass pipe that I used for the handle only cut a quarter of an inch thick to build an enclosure for the bearings within the gimbal. Are used a total of five rollerblade bearings for the gimbal and one large bearing for the pipe that I purchased on Amazon.
Step 4: Top Camera Plate.
The top camera plate can be purchased ;however, mounting it into the pipe is another story. To find a centerpoint of any circle in a simple way you can use the trick of tracing the circle, and drawing a square around it. Once you have the square you can join each corner with a diagonal in this way you will find the center of the square and the circle. I then cut out that piece of paper and placed it on the top of any pipe or circle, as a guide to drill the holes. For the top and base plates I used wood mounting hardware quarter of an inch threaded and glued in with epoxy.
Step 5: Quick Release
Once you figured out the right pipe diameters in order to fit within each other as a telescopic tube, you will want to be able to adjust it. To do this I purchased a bicycle quick release latch. I then researched Basic bicycle seat construction and re-created the cutting and drilling. It's very simple all you need is one drilled hole and a slit to the end of the tube. Do not make this two large as it will have to hide behind the QR latch.
Step 6: Weights

You will need weights to adjust your stabilizer balance. I made mine out of resin using the inner part of 45 pound Olympic weights once I covered the back portion of it with masking tape and a piece of plastic. I poured black paint into the resin and before I pour the resident into the mold I waxed the inside with regular candle wax. Once solidified, you can push them out very easily.
Step 7: Hardware


For the hardware I purchased a large bearing and the diameter will depend on your tube diameter. For the game ball bearings I just used rollerblade bearings that I had laying around. As far as screws go, you will need quarter inch screws and 5/16 anywhere the bearings are mounted. I apologize for not having the exact measurements of the tubes; as I did not note them down. Also the base plate will have a slit going down the middle on both ends of it, in order to slide the weights forward and backwards for adjustment. If you look at any camera stabilizer, you can get an idea of what you need to create. This is probably not the best instructable but I will but if you have any questions I will try to help you as much as I can. Good luck with everything!

Participated in the
Tech Contest


