

Introduction: A Simple Pair of Moccasins With Canvas Gaiters


I've always wanted a pair of moccs that were more than just a pair of slippers. I was looking for comfortable footwear that I could wear in any weather condition and that would stand up to abuse, all the while allowing my feet to feel the ground underneath them. Since I work in leathercraft, which is the corner of my 'craft' triangle (the other two being metalwork and woodwork), I figured I could come up with a pair that were suitable to my needs.
For this I would have to research. I looked at my local leather shop for some patterns and found them very costly. Not only that, they were limited to a specific size and would take some serious modification to adjust for different sized feet. Next was a search online, where I found the resources, strangely, lacking. There were sites that offered patterns, however I ran into the same issues that plagued me at my leather supplier.
For the plans I was searching for, I had to go to the source. I planned a trip to the Canadian Museum of Civilization and decided to study many of the styles they had on display. After taking lots of pics, many of which were closer than the museum security were comfortable with, I started to read some of the descriptions. Instead of using a pattern for their mocs, natives would use the person's feet as a template, then draw the pattern directly on the leather as a way of creating a custom fit. A bit more research at the local library would confirm that and so I was able to design more of a technique than a pattern, that could be modified to fit any foot, and was based completely on traditional craft.
Step 1: Tools and Supplies

Tools:
Cutting wheel or utility knife
Scissors
Sewing awl and/or needles and awl
Cutting mat
Supplies:
Tanned leather (deer hide works well, but is very thin and will need to be lined) Thicker hides like Caribou, buffalo, bison etc work best
Canvas for gaiters
sinew or artificial sinew or waxed cotton or waxed polyester thread
Optional:
fur for lining - rabbit, goat, etc.
Step 2: Picking Your Design

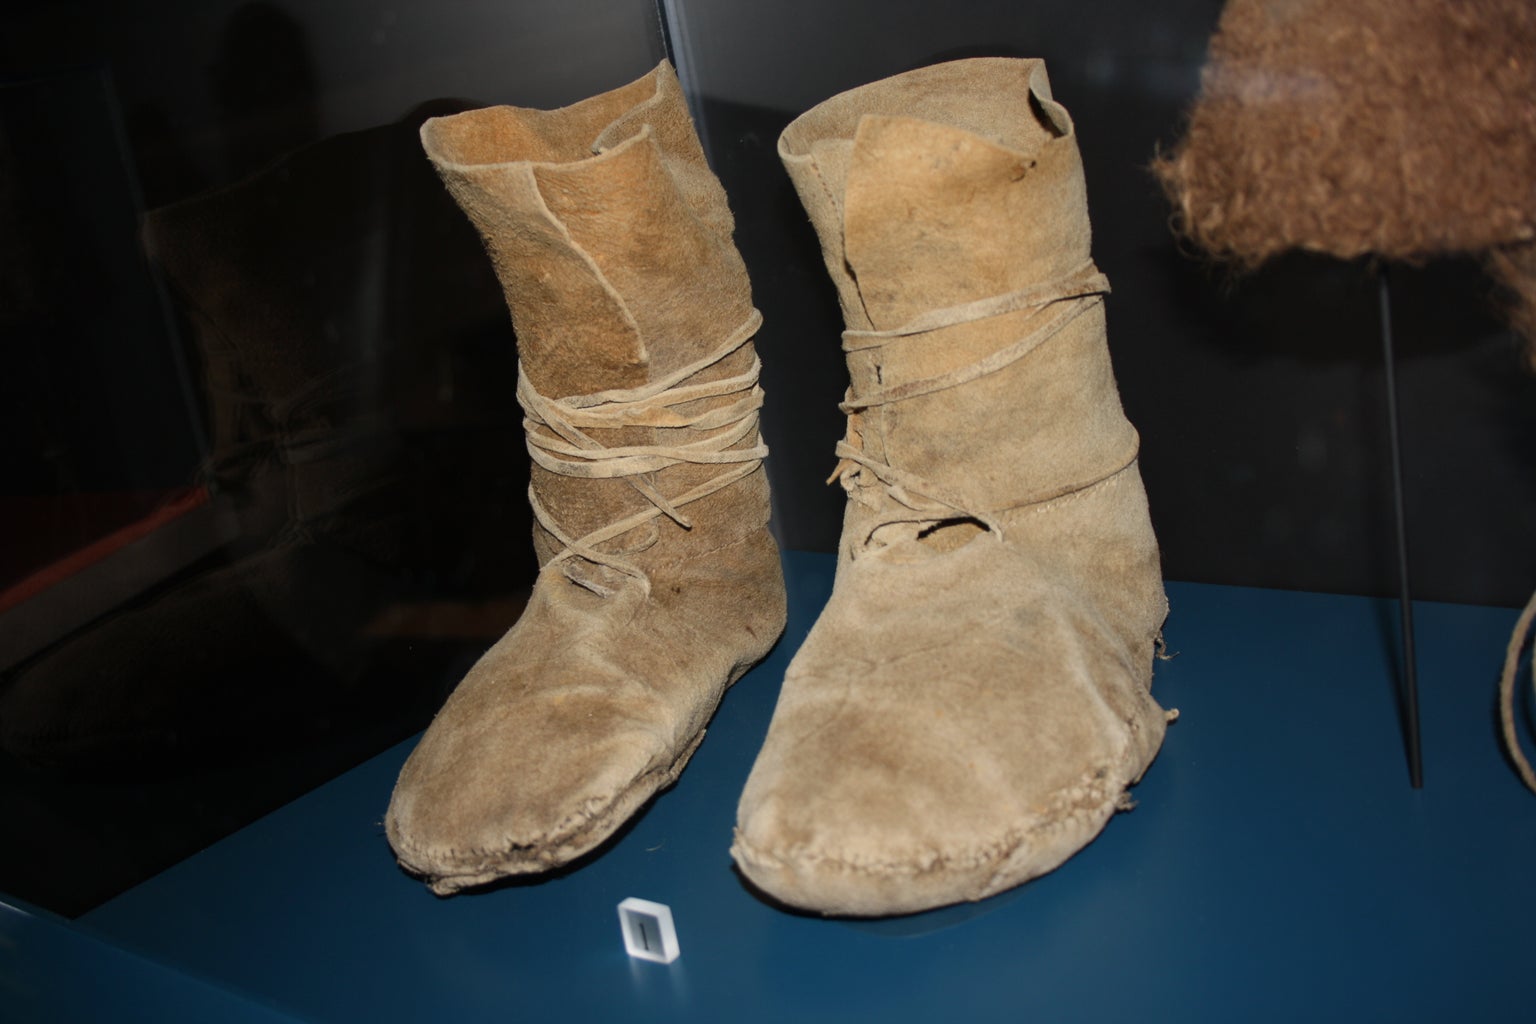


There are many different styles of traditional native mocs, however most will find the pair in the first pic the most recognizable. The technique I created is based on this style, but also includes gaiters so that they can be worn in the winter or in harsher environments where leg protection is important.
I've included a few other pictures of moccasins that were displayed at the museum. The technique in this instructable can easily be adapted to these other styles since it uses the wearer's feet as the template.
Step 3: Cutting Your Pattern

The pattern is completely adjustable, depending on the person's foot size, however I've included some basic measurements for someone with a size 9-10 foot.
Examining the pattern:
Have the person stand directly on the leather and your measurements can be taken from there.
1. draw a 2" line around the toe (3-4 if you plan to include a lining) and extending as far back as the front of the ankle.
2. Now measure an addition 3" out to create the uppers around the ankle it should end up being roughly 8 1/2 inches long.
3. The uppers should extend roughly 4" back from the heel of the foot.
4. From there you can measure the tail that will extend from the back of the moc. As the diagram shows, it should be roughly 1.5 inches wide by 1.5 inches long. There are some traditional tail designs in the pattern.
5. Once you have measured everything, you can cut the pattern from the leather and copy the same steps for the other foot.
6. the tongue and vamp can be cut next. The design is for 8" in length, however you can make it longer depending on your taste. When creating mine, I added an additional 3" so that the extra material would fit under the gaiter keeping the snow out.
7. Finally, you can punch the holes, with your awl, or if you're experienced enough can do this as you're sewing.
Step 4: Assembling the Moccasin

It's important to ensure that the number of holes in the vamp/tongue matches the holes around the toe of the moc, or it will end up lopsided. As your stitch, pull the material together tightly and the excess leather in the toe will start to become wavy. It's alright, this is natural and it will even out as you stitch.
For the heel of the shoe, you can simply stitch them together (which is more traditional) with the seam on the outside, or you can overlap the ends for a much cleaner look. You can also sew the tail up into the moc if you don't want it extending from the foot, however traditionally, they are left to hang out behind.
Lastly, you can fold down the upper, or leave it up for a high cut look. It's really just a matter of taste. The holes punched in the upper are for the lace that goes around the ankle for support, and ties at the front like a traditional shoe.
Step 5: Cutting Lacing

All lacing is cut from a single patch of leather. Traditionally, a strip would be cut around and around the patch until a long strand of leather was created. Using a cutting wheel instead of a knife will make this process easier, as well as, leave you with a cleaner, straighter length of lacing.
You should end up with, at least, 3 feet of lacing for each moccasin.
Step 6:

The gaiters are simply cut pieces of painter's canvas that have had their edges sewn down. I've found that the optimum size is roughly 12x24" with one edge shortened to 22" to create a taper that adjusts for calf size.
Attaching your gaiters:
You have the option of leaving your gaiters off of your mocs, however it's a nice addition to attach them to the uppers. If you do decide to attach them, you, again have the option of having the 'uppers' of the moc in the up or down position. There's no real rule to this. With the short end of the taper down, start sewing to the outside of the foot, and continue around until your reach the inside. You should be left with several inches of material that can be wrapped around the calf, overlapping the material on the outside of the leg.
Step 7: Tying Your New Moccasins
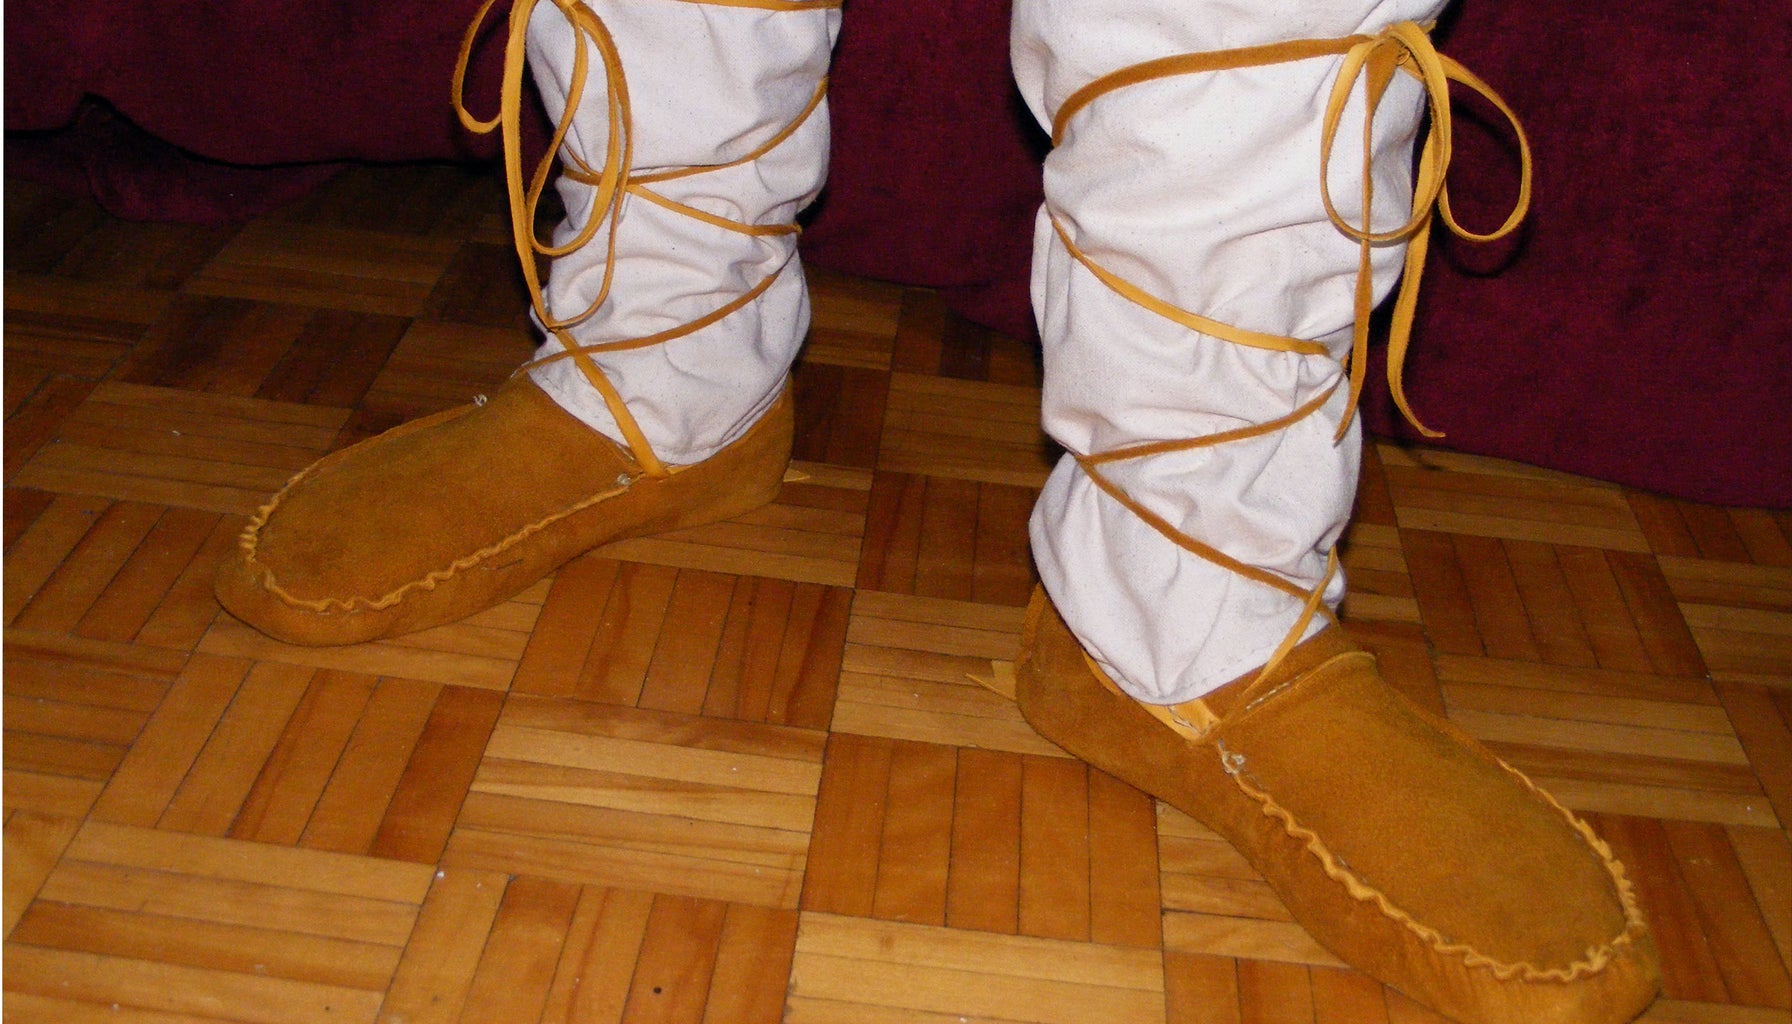
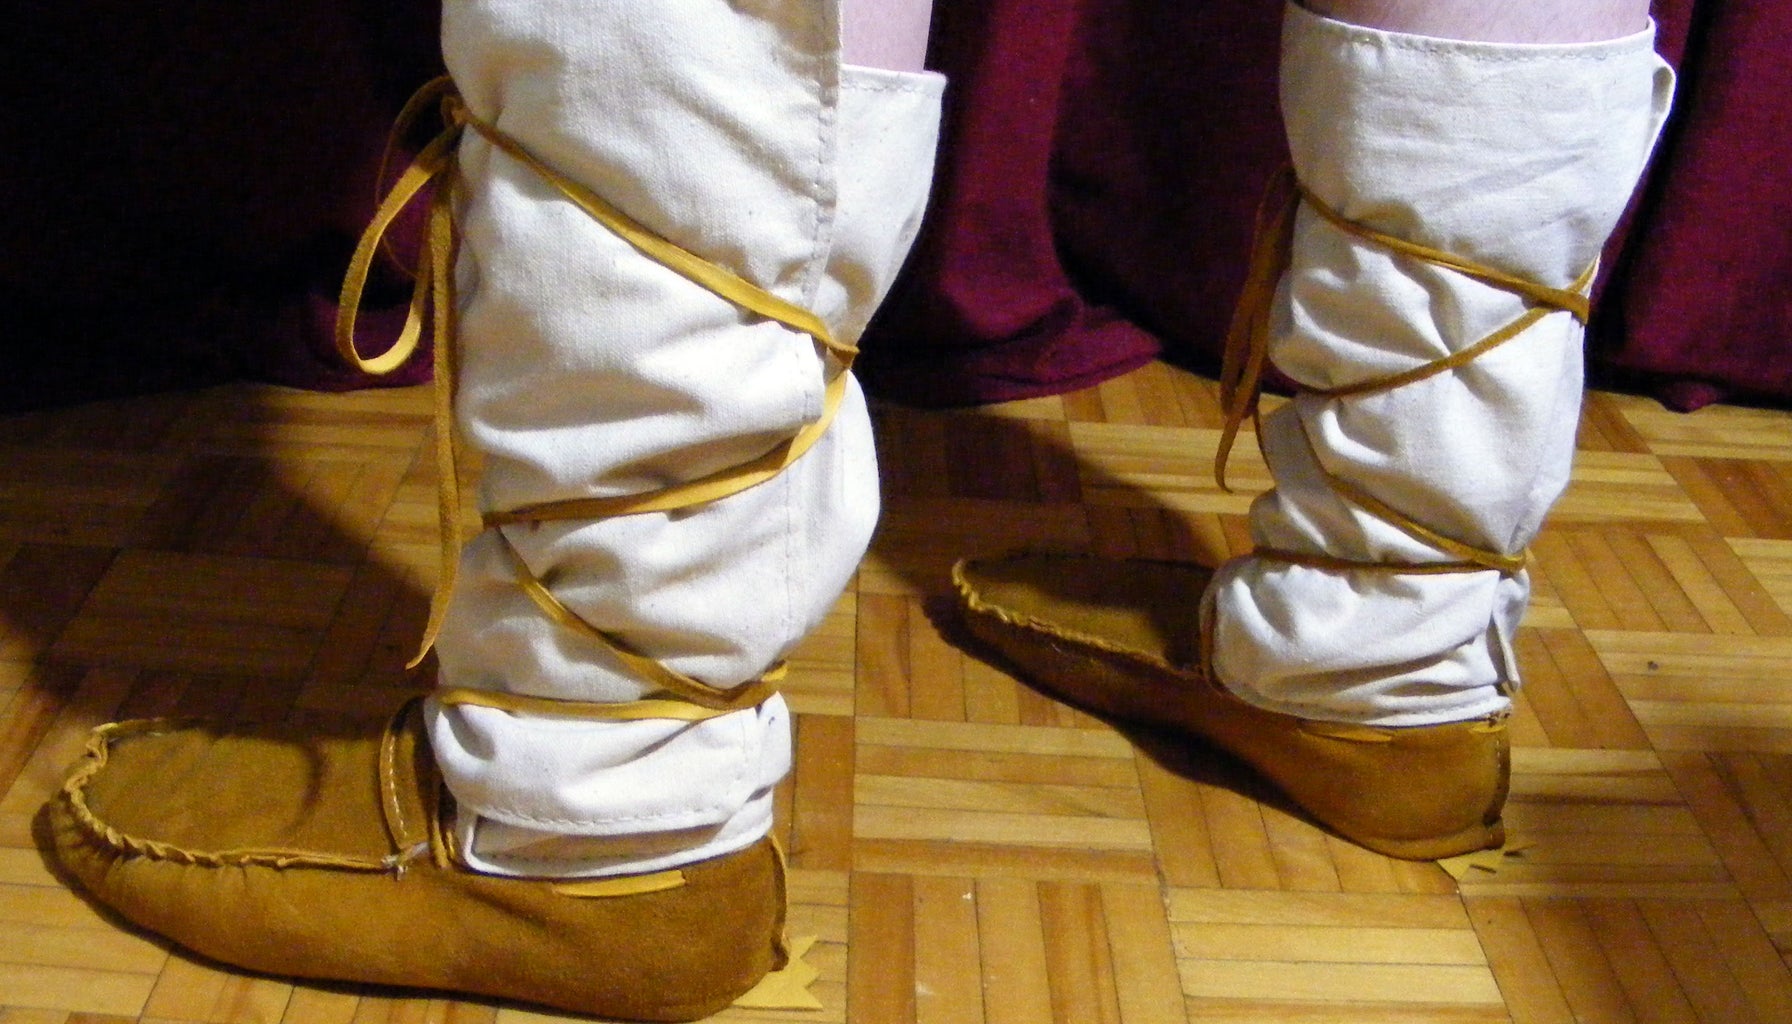
With your moccasins complete, now it's time to wear them. As you can see in the pics, the gaiters are wrapped around with the seam on the outside of the leg. This helps prevent accidentally opening as you walk. Tying your mocs is simply crossing over the lace in front and back of the leg until you reach the top. It's function is to keep the moccasin snug on your feet, and the gaiters closed up tightly, thereby keeping the elements out.
It's that simple. Not much material or tools and a very low cost project that can be fun and very functional
I hope you enjoyed the instructable.

Second Prize in the
Workshop Contest

Participated in the
Manly Crafts Contest

Participated in the
Instructables Outdoor Projects Contest


