

Introduction: Arduino Servo Control Using Ultrasonic Sensor
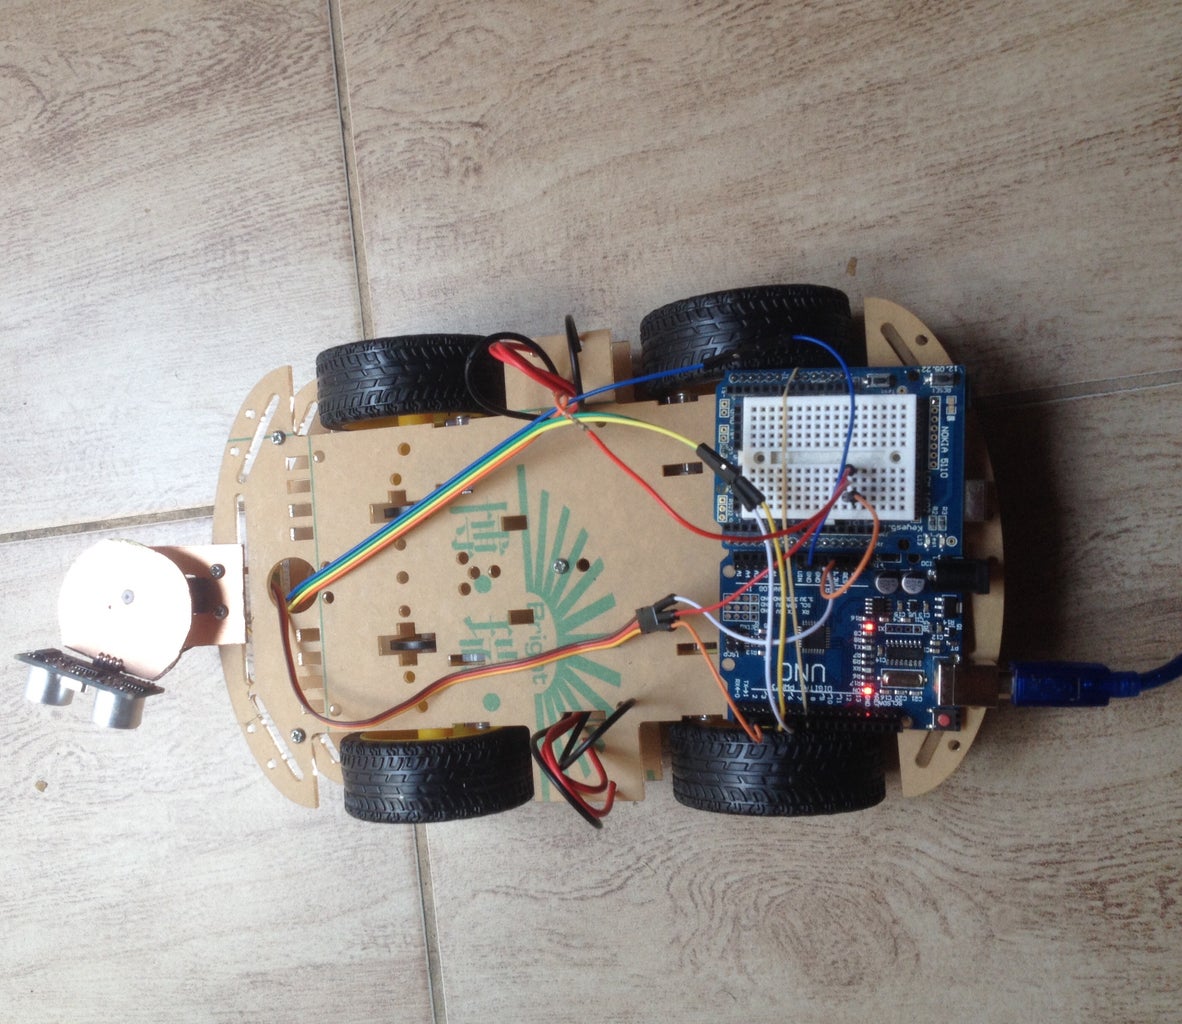


Hello everyone, i have another arduino project on servo control, but i decided to give it a twist using an ultrasonic sensor, it works as a communication interface for controlling the motors of a bobcat i am trying to make. most of the project i upload here are bits of a project i am working on. so, please enjoy.
Step 1: List of Parts.


First part is an Arduino board. (uno,leonardo etc)
Second part is the ultrasonic sensor
Third part is a servo motor.
The connection is very simple. The ultrasonic VCC is connected to +5v the Gnd to ground. I connected the Trigpin to Pin6 and the Echopin to pin5. But you can change this digital pins if you want to. i will not say much on how the ultrasonic sensor works here because i already made a separate instructable for it and you find it on my page.
The servo motor on the other hand has 3 cables often, BROWN,RED/ORANGE and YELLOW.
the Brown is the GND and the RED/Orange is the +5v, and the yellow is connected to a digital or analog input. Here i connected it to D2.
Step 2: About the Servo Functions.
attach() -The attach fucntion is used to indicate to the servo library which pin your servo is connected to e.g myservo.attach(2); digitalpin 2 or myservo.attach(A0)analog pin 0.
write()- The write function is used to give high to the servo, with the appropriate angle. The servo angle 0,90.18. 0 angle give the servo full speed to the right,90 positions it in the middle and 180 gives it full speed to the left. If you will like to attach a sensor to the servo like i did here always set it to the 90 degree angle first, to maks sure your sensor is pointing forward.
writeMicroseconds()- works like a delay. e.g myservo.writeMicroseconds(1500)
read()- reads the current angle of the servo. e.g servo.read(90).
attached()-Check whether the Servo variable is attached to a pin.
detach()- used to disconnect servos, in case you have more than one attached. e.g myservo.detach(2)

Step 3: CODE

This is a short code and only 20% of what i have in mind to implement with this embedded system.
but, i hope it can help anybody who is new in servo control and is in need of a quick instruction.
i hope it is not to complicated. so what basically happens is that my ultrasonic sensor is mounted to my servo and is facing a 90 degree angle when it comes across an obstacle less than or equal to 20cm in this direction the servo will rotate to the right. please also keep in mind that if 0 gives you a full rotation to the left then the full right rotation of that servo is 180. Thank you and Enjoy. :)
#include // include servo library
#define trigpin 5//set trigpin
#define echopin 6//set echopin
Servo myservo;// declare servo name type servo
  int duration, distance;//declare variable for unltrasonic sensor

void setup() {
  Serial.begin(9600);
  pinMode(trigpin, OUTPUT);

  pinMode(echopin, INPUT);
  myservo.attach(2);// attach your servo
myservo.writeMicroseconds(1500);
  // put your setup code here, to run once:
}
void loop() {myservo.write(90);// always set servo to 90 to position it to the middle //ultrasonic code digitalWrite(trigpin,HIGH); _delay_ms(500); digitalWrite(trigpin, LOW); duration=pulseIn(echopin,HIGH); distance=(duration/2)/29.1;
 if(distance <=20)// if ultrasonic sensor detects an obstacle less than 20cm in 90 degree angle.
 {
 myservo.write(0); //servo rotates at full speed to the right
 delay(600);
}
else
{
myservo.write(90);// else servo stays at 90 degree angle.
delay(600);}
Serial.print("cm"); //print distance unit cm
Serial.println(distance);//distance// put your main code here, to run repeatedly: }


