

Introduction: Automation of Washing Machine Using Arduino


We are having a semi automatic washing machine. Timer switch and drain switch are spoiled. I tried to replace them but it costs more money. We stopped using it. Then I thought to remove the manual switches and make it automatic. Then I tried this using arduino and worked well with lesser cost. I presented this to my grand mother. In their house there is no over head water tank system. So I didn't try for automatic water filling. We have to fill water manually.
Step 1: Parts Needed


- Arduino UNO
- 2 channel relay board
- 12v 1amp step down transformer
- 5v regulator IC
- L293D motor driver board
- 60 rpm geared motor
- PCB clad
- common anode 7 segment display
- 2* Tactile switches
- Threaded rod with nut
- Wires
- 2* push to ON switches
- 5v active buzzer
- 2* 10k resistors
Step 2: Code
Initially it checks for drain closed or not. If it is open drain will be closed automatically, if not all the filled water will be drained. After the drain is closed program runs. There are three timer settings i.e.,3/6/9 mins. After completing washing drain opens and after few mins drain closes and it beeps indicating that the washing is completed. During drain open display blinks until drain is closed.
Attachments

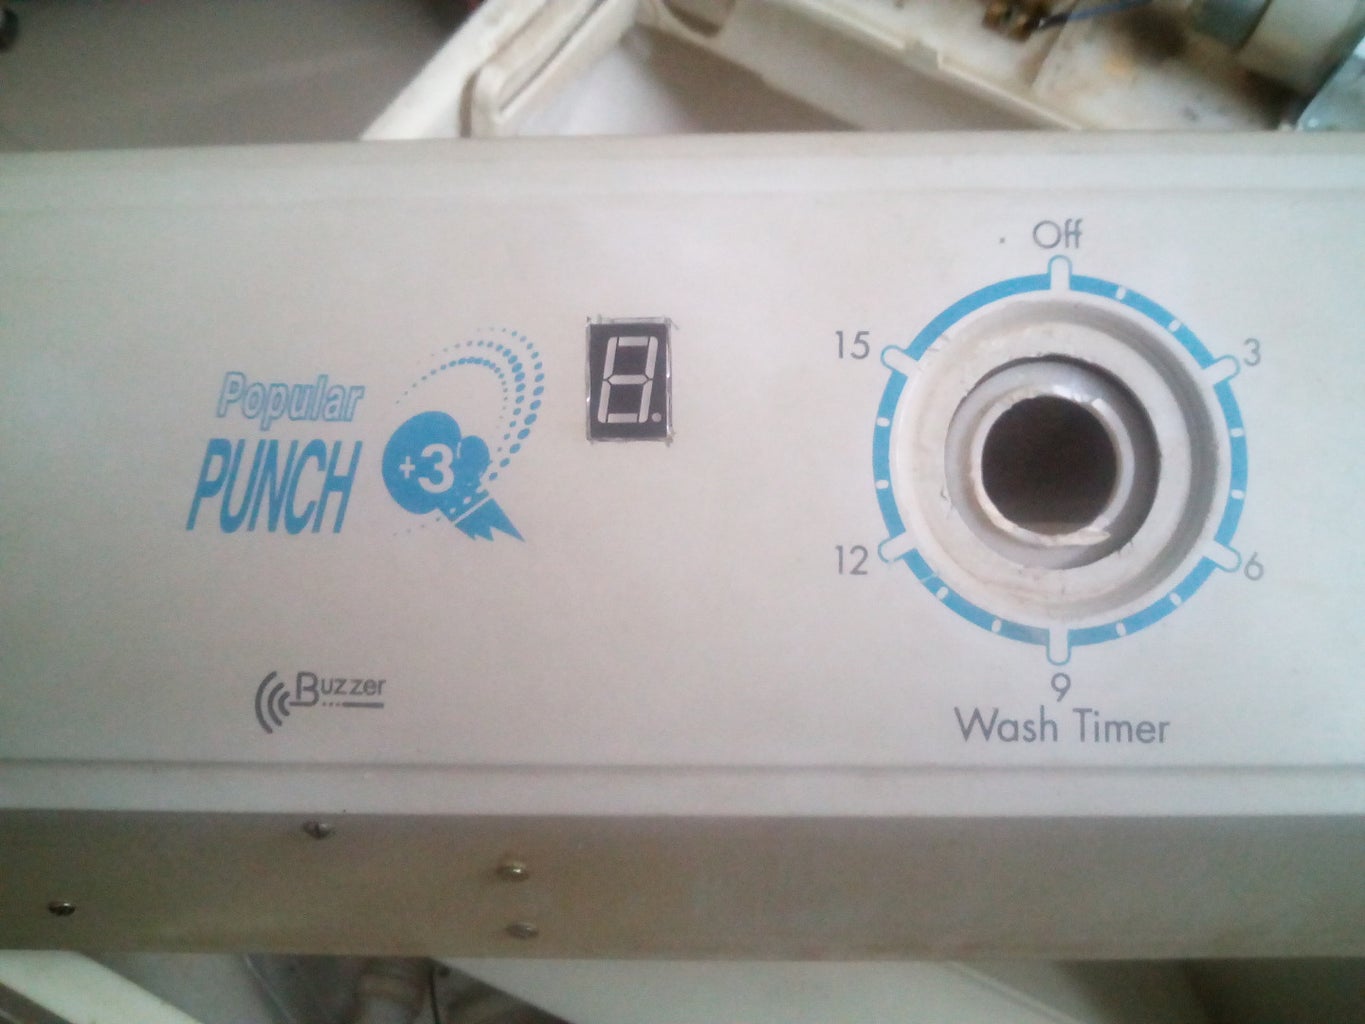
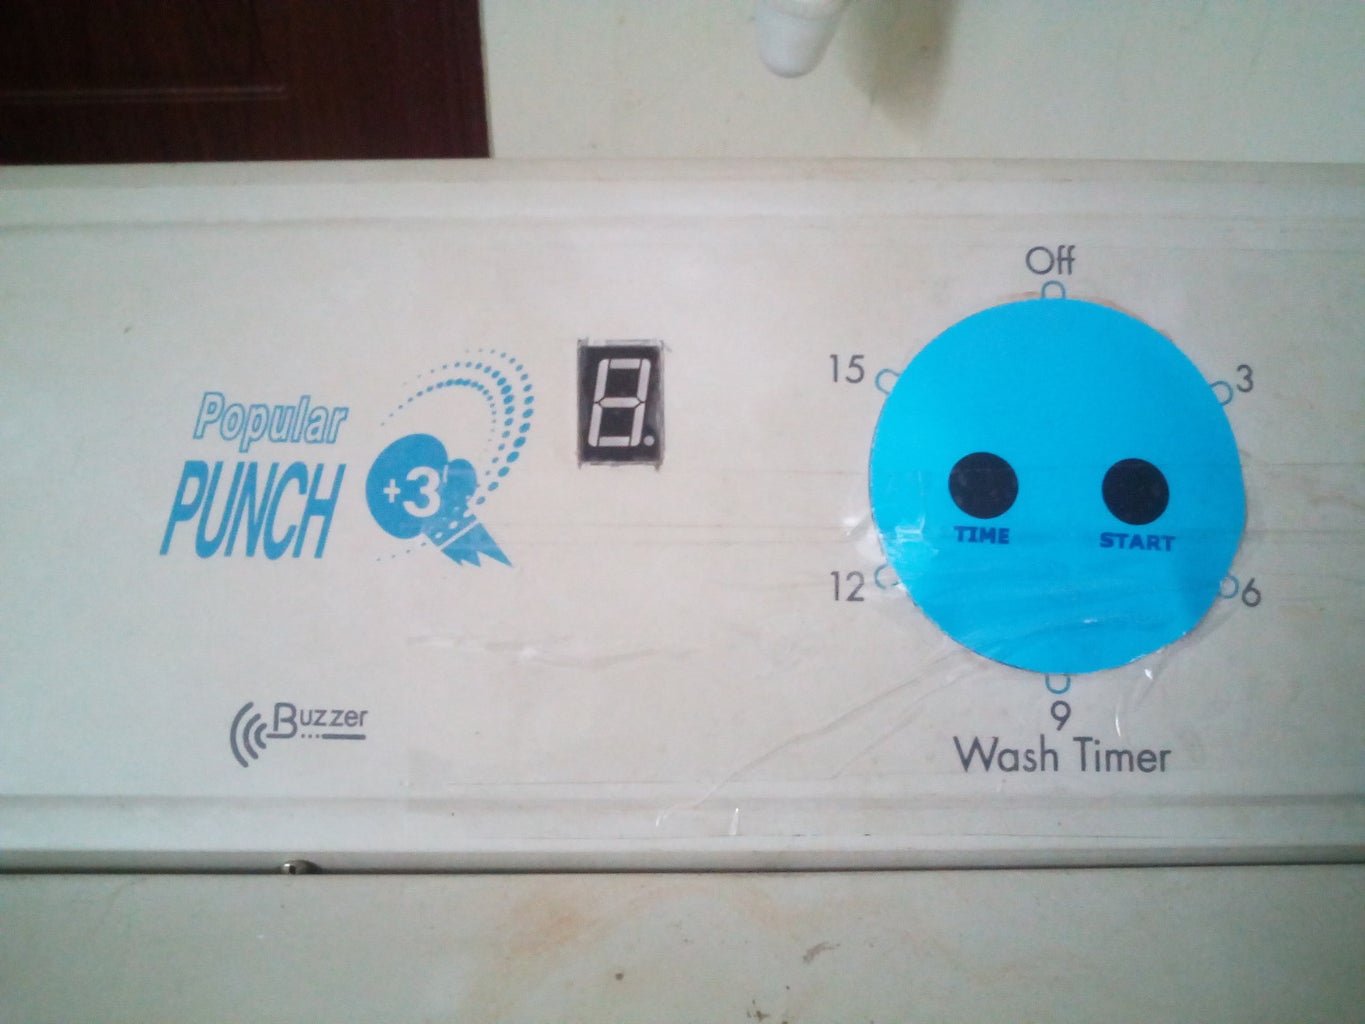
Step 3: Control Pannel


make the control panel using 2 tactile switches as shown in the pictures. Diptrace PCB layout is attached. For smooth functioning of tactile switches I used styrofoam, It acts as waterproof.
Attachments
Step 4: Drain System

In semi automatic washing machines the drain knob is connected to the drain switch with a nylon thread. When we operate the drain switch, it pulls the drain switch and lets the water drain. I replaced the manual switch using geared motor along with threaded rod. I inserted nut into a wooden block, and fixed the threaded rod to motor so that it pulls the drain switch with nylon thread as shown in the picture. I used two push to ON switches to control the range of geared motor movement to a certain distance. Otherwise it may pull off and break the switch or may not open fully to let the water drain. This is the major setup to take care.
Step 5: Washing Motor Control and Wiring

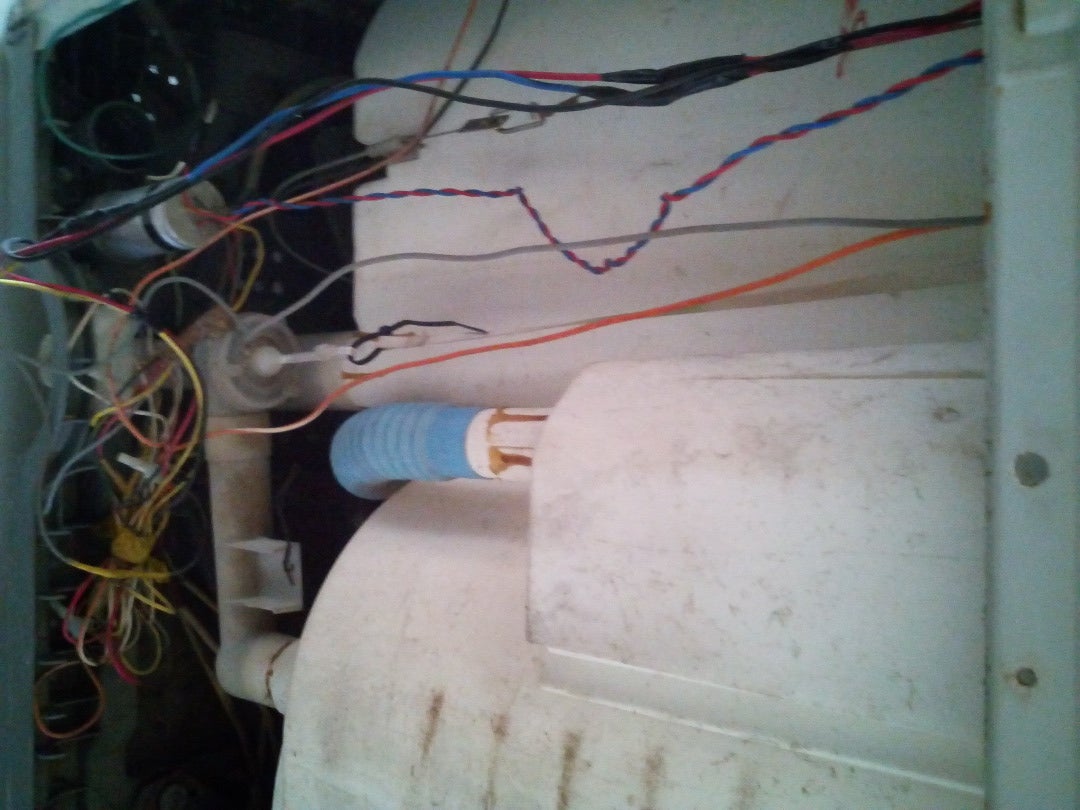
Washing motor contains 3 wires. In my washing machine one is directly connected to phase. Remaining two for CW and CCW motion. I connected through relay board as shown in the picture. Neutral is connected to relay board as shown in the picture. When relay 1 is ON motor rotates CW. When both relays are ON motor rotates CCW.
Step 6: Fitting


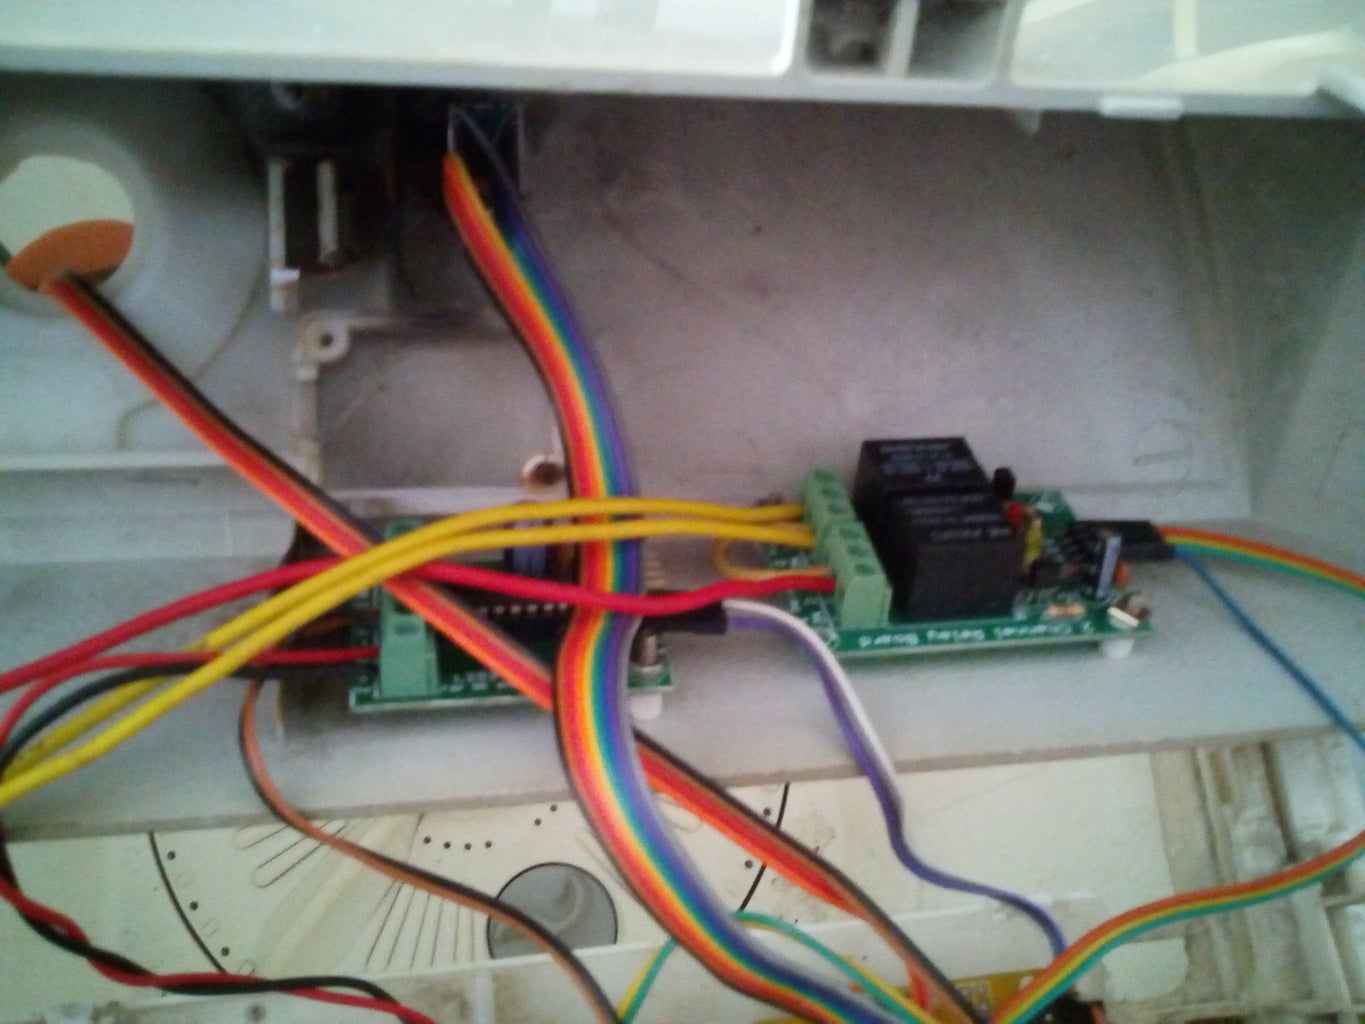
Fit all the components as shown in the pictures.
Step 7: Schematics and Wiring


L293D motor driver:
- 5v to EN A pin.
- A1 to pin 4 of arduino, A2 to pin 5.
- Supply 12v to board.
- Geared motor red wire to MA1, black to MA2.
Control board:
Connect mode switch to arduino pin 3, start switch to pin2 and power the board with 5v.
Buzzer:
Connect +ve to pin 6 of arduino and -ve to ground.
7-Segment display:
Connect anode to +5v and remaining to arduino pins from 12-19.
Step 8: Testing
Step 9: Washing Clothes After Assembling

Participated in the
Arduino All The Things! Contest


