

Introduction: Bokken Night Light


Years ago I practiced Kendo, but then I took an arrow to the knee. Now the equipment I used is in storage and I thought: "Why not do something useful with it?"
A bokken is a solid hardwood sword, used to represent a katana. Mine was damaged and repaired with wood filler, but I wanted to mount it as a wall ornament and give it a more modern twist.
As I had also been experimenting with LED strips I decided to combine the two, and you can too!
First, gather the supplies listed below.
I added a usb charger for the battery, but in the end I didn't expose the usb point, so you can decide whether to do this or not.
Supplies
1x 18650 battery
1x White LED strip
1x TP4056 - 18650 charger (optional)
1x Power switch
Some wire
A nail
Something to cap the end of the handle
Adhesive handle wrap, badminton / tennis racket wrap can work here.
Step 1: Drill and File the Bokken Into Shape.

There were four steps to this process:
Drill the hole for the battery
The 18650 is a cylinder, like a bigger version of an AA battery, but because it is lithium-ion it can provide a higher voltage and current.
Coincidentally, the handle of the bokken is marginally wider than the 18650, so it can accommodate one internally without any issues.
In my case I used a wood drill to cut in to the end of the handle (hilt) to exactly the length (depth?) of the battery and charge controller placed end-to-end, so that the charge controller would be flush with the end of the handle.
If you choose not to include the charge controller, just adjust the depth of the hole as appropriate.
A word of warning: If the battery does not fall easily in and out of the hole then it may get stuck, so don't force it!
Drill the hole for the switch
Obviously this depends on the kind of switch you have, but fortunately I found one that was circular and could be added to the handle with a matching diameter hole. I also drilled a hole between the switch and the starting point of the LED strip, and then one exit point from the switch to the outside of the handle, to run the wire to the battery along the handle.
File or sand the bokken for the LEDs
I chose to add the LEDs to the back of the blade (the edge opposite where the sharp bit would be) because on my bokken it is flat, however it was not quite wide enough to accommodate the LED strip, so I filed and sanded it until it was wider (10mm at all points).
Drill a hole for a nail
OK, I understand what you're thinking: "why a nail?". At first I tried to wire directly to the battery and run that wire alongside the battery within the hole up to the charge controller, but I had made the hole slightly too small, so it jammed (remember my earlier comment about how this was bad?).
Because this was going to cause problems I decided to drive a nail into the handle, perpendicular to the battery hole at the deepest point, so that the positive of the battery would sit on the side of the nail, then I could attach the wire to the head of the nail and run the wire along the outside of the handle. This actually worked really well, and was a better connection than my first approach.
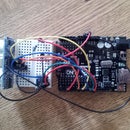
Step 2: Assemble and Fit the Electronics

The assembly for this project is quite simple: connect the battery to the LED strip with one wire connected also to the switch.
In practice it wasn't quite as easy as it sounds.
I connected the battery to the charge controller via the nail contraption I mentioned earlier, then attached a spring from an old AA battery box onto the negative end of the charge controller so that, when the battery was in the hole and the charge controller was added, the connection would be made.
Then all I needed to do was stop the charge controller from popping out of the end of the hole, so I cut a small piece of acrylic and screwed it onto the end with a couple of small screws. This means I can access the battery later, and add a hole for the micro-usb socket if I want to.
Once the charge controller was wired up to the battery, I added wires from the output. They were taped along the outside of the handle and through the hole that intersects with the switch. One wire then went straight to the LEDs via the other hole, the other was first cut and connected to the switch, then followed the same path.
Finally, I soldered the ends onto the LED strip and stuck the strip to the blade using the original adhesive strip.
A note here: don't peel the strip off once you have it in place, it never goes back down again flat no matter how much glue you use and it looks awful. Just awful.
Once you have done this you're ready to test.
Step 3: Paint and Finish

Assuming everything worked and your bokken didn't catch on fire, you're good to start painting. I covered each LED with a small square of tape then wrapped the handle in plastic. I used a white primer to cover every exposed surface (and some that weren't!).
Once the paint had dried I took the handle wrap and carefully covered the handle. I started from the end (with the hole) and worked towards the blade. This meant the overlapping sections didn't feel backwards - try it, you'll see what I mean.
I cut a hole carefully for the switch, then taped the end down with the provided fastening.
Step 4: Test


Admittedly this took a lot longer than I was expecting but it has turned out to be a great light.
The next step will be to build a mount that allows it to charge when it is docked, but can be removed when needed.
Enjoy!

Participated in the
Lighting Challenge


