

Introduction: CAM: Setup


CAM (Computer Aided Manufacturing) is the way you will create toolpaths to machine this part on the Shopbot. This lesson will cover Setup, the first part of the CAM process, in which you place your Work Coordinate System, set the dimensions of your stock, and place your model within the stock.
1) In the ribbon at the left, change the Workspace to CAM.
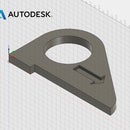
2) Orbit or click the view cube corner where Front, Right, and Bottom intersect. This is an isometric view of the part, with Z pointing up.
3) Right click the home icon next to the view cube, and choose Set current view as home>Fixed distance.
You want to view the part as it will appear when it is machined, and as you know from the Right Hand Rule, Z points up. For the Shopbot and other 3-axis CNC machines, this means that the cutting tools will always be normal to the XY plane.
4) In the browser on the left, click the icon next to Units to change the units to inches (again--you have to do this in each Workspace), and click OK.
Step 1:


Step 2:
There are three steps in the CAM process: Setup, Toolpath, & Simulate.
Setup determines the location of the Work Coordinate System (WCS) and the size of your raw material (stock).
Think of the Work Coordinate System as the way that you locate your stock when you place it on the Shopbot. The bed of the machine is 4' x 8', but your stock might be much smaller. For this reason, you must tell the machine where your part is located by setting a home location, which is the origin point of the Work Coordinate System. This origin, also called the Work Home, is often placed on one of the top corners of the stock.
5) In the ribbon, click Setup (the icon on the far left, above the Setup dropdown).
In the graphics window, the box surrounding the model--which represents the stock--contains many nodes. These nodes are potential locations for the WCS origin (Work Home).
6) In the Setup window, next to Origin, choose Model box point.
7) Click the top front left corner of the part, as shown in the screenshot. Do not click OK in the window.
This moves the WCS origin to the top front left corner and defines its X, Y, and Z coordinates. Note that the x-axis points along the long axis of the part, the y-axis points away, and the z-axis points up, following the Right Hand Rule. This X, Y, and Z orientation is important and you'll need to remember this when you place your stock on the Shopbot. For a more detailed explanation of the Work Coordinate System, watch this video: Setting up a Work Coordinate System.
Step 3:


Step 4:
You will use the Setup window tabs the same way you read--going from left to right. You've already set your WCS, so now it's time to define stock.
8) Click the Stock tab.
9) Change Mode to Fixed size box. Before selecting it, hover your mouse over it to read the explanations.
In general, if you see a parameter that you don't understand, you can hover your mouse over it to see a definition. Fusion is pretty good about offering explanations for terms, many of which include diagrams, to guide you.
10) For the purpose of this exercise, enter 24 for Width and Depth, and 0.75 for height.
If you plan to actually machine this part, now is a good time to find your stock, which should be a piece of 3/4" plywood that is larger than 15" in both X and Y. The largest dimension of the part is a bit more than 11", but you want to leave room for your fixturing system (the way you will hold the part down to the Shopbot table). Measure your stock and enter these dimensions into the X and Y values. It's fine if the stock is much larger than you need--no need to cut it down. It's important to be in the habit of having accurate stock sizes in CAM.
Otherwise, stick with 24" x 24" x 0.75" for now. Later, when you get your stock, you can easily update the setup with accurate dimensions.
Step 5:


Step 6:
11) Under Width (X), change Model Position to Offset from left side, and change Offset to 1.
12) Under Depth (Y), change Model Position to Offset from front side, and change Offset to 1.
On the Shopbot, after you home the machine, the spindle will be oriented above the front left corner of the machine bed. It's a good habit for you to place your stock in this corner of the Shopbot machine bed. For the sake of consistency, you just placed your part in the front left corner of the stock. You added an offset of 1" in order to ensure that there is sufficient room for the outer contour of the push stick in the stock material.
13) Click OK to generate Setup.
Step 7:


