

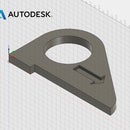
Introduction: Datron Certification Part at Pier 9


This Instructable is for workshop users at Pier 9 who plan to program the 3-axis Datron mill certification part in Fusion 360. It is expected that users have intermediate to advanced level CNC experience, and have completed at least one personal project on the Haas VF2 Vertical Mill. Click here to learn more about the steps involved in the CNC Learning Path at Pier 9.
In this Instructable, you will learn to program three stacking trays that you will machine in aluminum on the Datron. Feel free to modify these trays to make them most useful for the skills you want to build. Try adding raised features, perforations, or high-detail engravings to customize these parts.
Step 1: Modify Stock1 Body


Start by accessing the Datron certification part through the Pier 9 CNC Data Instructable (Pier 9 CNC Data/Datron models).
In this CAD model, stock1 and stock2 (for Setup1 and Setup2) have been created for you. You will need to edit them to reflect your actual stock size.
1) Get your aluminum stock from the materials rack.
The cross section should be 4" x 0.5"; the length should be at least 11.8".
2) If the stock is not 11.825", as it's set up in the CAD space, cut it to size on the horizontal bandsaw.
3) Edit Sketch 6 in the Model Workspace to accurately reflect the stock you'll be working with.
This is critical for ensuring the actual load does not exceed the optimal load when you are machining the outer contours of the part.
You should not have to edit the dimensions that impact the Y axis. Just edit the dimensions for the X axis, d46 and d48.
4) Check your work by measuring the stock model along the Y axis.
Ensure stock1, under Bodies, is visible in the Browser Tree. It might be easier to turn off the visibility of stock2.
Use the hot key I, for Inspection.
Step 2: Create Setup1


In your first Setup, you will face the stock to ensure a quality vacuum seal.
1) Create a new Setup.
2) In the Stock tab, choose Stock Mode--From solid and click stock1.
3) In the Setup tab, choose Box1, Box2, and Box3 as the Model Body.
4) Place the Work Home in the center of the part, at the bottom of the stock.
5) Click OK to generate Setup1.
Step 3: Setup 1: Facing


1) Create a Face toolpath.
2) Select the 14mm Face Mill from the Datron library.
The Datron library is available here, in the Tool Libraries subfolder.
3) Click OK to generate the toolpath.
4) Simulate.
Check that the face mill is removing 0.025" from the top of the stock, right to the model top.
Step 4: Create Setup2


You will now flip your stock, and place the faced surface flat against the vacuum table. In this Setup, you will machine the bottom and outside contours of each box.
1) Create a new Setup.
2) In the Stock tab, choose Stock Mode--From Solid, and click stock2.
3) In the Setup tab, choose Box1, Box2, and Box3 as the Model Body.
4) Place the Work Home in the center bottom of the stock.
5) Click OK to generate Setup2.
Step 5: Setup2: Facing


1) Create a Face toolpath.
2) Select the 14mm Face Mill from the Datron library.
3) Click OK to generate the toolpath.
4) Simulate.
Check that the face mill is removing 0.025" from the top of the stock, right to the model top.
Step 6: Setup2: 2D Pocket


For the next toolpath, you will remove the material around the inserts that allow the boxes to stack. Though this could be done with Adaptive, the depth of cut is so minimal that a traditional 2D Pocket will work more efficiently.
1) Create a 2D Pocket toolpath.
2) Choose the 8mm Specially Balanced flat nose end mill.
3) For Geometry, click the faces of the area around each insert.
Turn off the visibility of stock2 to prevent interference during your selection.
Though you might be in the habit of clicking contours for pocket selections, in this case you must select the faces instead.
4) In the Passes tab, check Multiple Depths.
Ensure the Maximum Roughing Stepdown is no more than 0.025". On the Datron, this should be your maximum stepdown for legacy toolpaths.
5) Check Stock to Leave.
Change Radial and Axial Stock to Leave to 0.005". On the Datron, leave no more than 0.005" for a finishing toolpath.
6) In the Linking tab, under Ramp, reduce the Helical Ramp Diameter to 0.24".
If you use the default settings, the ramp diameter will cause the tool to gouge the model. You can see this in the simulation.
7) Click OK to generate the toolpath.
Step 7: Setup2: 2D Contour


You will use a contour toolpath for finishing.
1) Create a 2D Contour toolpath.
2) Use the same tool, 8 mm Specially Balanced, which should be selected by default.
3) For Geometry, select the three contours around the bottom edge of each insert.
4) Click OK to generate the toolpath.
Step 8: Setup2: 2D Adaptive Part I


You will now rough out the outer contours around the boxes.
1) Create a new 2D Adaptive toolpath.
2) Use the same tool, 8 mm Specially Balanced.
Click Select next to Tool to view information about the tool. Note that within the Select Tool dialogue window, in the top right corner there is data about the tool. Scroll midway down to view the tool Comment, which indicates a recommended Optimal Load of 0.3mm.
If you Edit the tool, you will see the Tool Comment in the Post processor tab.
On the Datron, you will use the Tool Comment for each tool in the library to determine optimal load. The Haas Mill Optimal Load formula is too aggressive for the Datron!
3) In the Browser Tree, ensure Sketch 1 is visible.
4) For Geometry, select the rectangle in Sketch 1.
If the inside of the rectangle turns dark blue, click the red arrow to ensure the toolpath is generated on the outside of the contour.
Step 9: Setup2: 2D Adaptive Part II


5) In the Heights tab, change the Bottom Height to Model Bottom and add an Offset of 0.005 in.
This ensures that the tool does not touch the cardboard between the vacuum and the stock.
6) In the Passes tab, change the Optimal Load to 0.2mm.
Though the tool comment recommended an optimal load of 0.3mm, it is important to be more conservative on toolpaths that machine around the outside of raw stock. This is because the tool will, most likely, engage more material in certain areas because the stock is not perfectly square and it is not a perfect rectangular prism.
Even though the default units are inches, the software will do the conversion (0.00787").
7) Check Stock to Leave.
Change Radial and Axial Stock to Leave to 0.005".
8) Click OK to generate the toolpath.
Step 10: Setup2: 2D Contour Part I


You will now rough out the areas between the boxes. Though Adaptive is usually the best way to rough out material, in this case you'd have to use a very small diameter tool for the Adaptive algorithms to be able to generate a toolpath. So, instead, you'll use a Contour toolpath to slowly slot out the area between the boxes. In your own designs, ensure the space between objects exceeds the diameter of the tool you eventually plan to use.
1) Create a 2D Contour toolpath.
2) Select the 6 mm Specially Balanced flat nose endmill.
3) Select the four partial contours.
Traditional left clicking will select the full contour around each box, but you want a partial contour. To select a partial contour, double click on each desired contour. In the pop-up that appears, click Open Contour and then the + sign. The single edge will now be selected, indicated by the dark blue color and red arrow. Repeat for all four contours. To watch a video demonstration of this technique, click here.
4) Set the Tangential Extension Distance to 0.2".
This will extend each toolpath by 0.2" on either side of the contour, to prevent the toolpath from
5) In the Heights tab, set the top height to 0.005" above the Model Top.
When using the vacuum table, do not cut into the cardboard below the stock until the very last minute. Instead, always leave a 0.005" "skin" of material at the bottom of the stock to preserve the vacuum seal.
6) In the Passes tab, check Multiple Depths and set the Maximum Roughing Stepdown to 0.025".
On the Datron, do not use a stepdown more than 0.025".
7) Check Stock to Leave and set the Radial Stock to Leave to 0.005". Set Axial Stock to Leave to 0".
You will clean up these contours with a final contour at the end of the Setup. You don't need to add additional Axial Stock to Leave (along Z) because you've already done this in the Heights tab.
8) In the Linking tab, check Keep Tool Down.
This will prevent the tool from retracting up between each stepdown.
9) Uncheck Lead-In and Lead-Out.
This will prevent the tool from making unnecessary moves in the air between each stepdown.
Step 11: Setup2: 2D Contour Part II


6) In the Passes tab, check Multiple Depths and set the Maximum Roughing Stepdown to 0.025".
On the Datron, do not use a stepdown more than 0.025".
7) Check Stock to Leave and set the Radial Stock to Leave to 0.005". Set Axial Stock to Leave to 0".
You will clean up these contours with a final contour at the end of the Setup. You don't need to add additional Axial Stock to Leave (along Z) because you've already done this in the Heights tab.
8) In the Linking tab, check Keep Tool Down.
This will prevent the tool from retracting up between each stepdown.
9) Uncheck Lead-In and Lead-Out.
This will prevent the tool from making unnecessary moves in the air between each stepdown.
8) Click OK to generate the toolpath.
Step 12: Setup2: 2D Contour for Chamfer


You will now chamfer the top edges.
1) Create a 2D Contour toolpath.
2) Select the 3 mm 45 degree chamfer mill.
3) Select the two contours along the top edges of each box--six selections in total.
4) In the Passes tab, set the Chamfer Width to 0.01" and Chamfer Tip Offset to 0.02".
Chamfer Width is a preference that depends on aesthetics, tolerances, press fits, etc. The Chamfer Tip Offset is set such that the side of the tool cuts the chamfer without gouging the part below.
5) Click OK to generate the toolpath.
Step 13: Setup2: Final 2D Contour


You will now program the final finishing contour, which will clean up the box walls and remove each box from the "skin" of stock.
1) Create a 2D Contour toolpath.
2) Select the 6 mm Specially Balanced endmill.
3) Select the three contours.
4) In the Heights tab, set the bottom height to -0.005" from the Model bottom.
Never machine more than 0.005" below the bottom of the stock in your final toolpath--the tool should just be low enough to graze the cardboard sheet. Remember that you set the WCS at the bottom of the stock. When setting up the machine, you will probe the Z level on top of this cardboard sheet, to ensure an accurate Z offset in this final toolpath.
Remember the vacuum table is not a spoiler board!
5) Click OK to generate the toolpath.
Step 14: Create Setup3


You will now create a new setup to machine the top of each box. These will be held in position in the pneumatic vises, rather than the vacuum table, because the surface area of each box is not enough for a secure vacuum seal. (The rule of thumb is that for each 1/4" of Z-height, you need one grid square on the vacuum table.)
You will set up this program for a single box, and run it multiple times after probing each separately.
1) Create a new Setup.
2) Select Box1 as the Model Body.
3) Set the Work Home to the center top of the box.
It's much easier to probe the top of the stock in this situation, and the Z-level is not as critical as it was in the previous setup on the vacuum table. This is because the tool's lowest point is the inside of the box because the outer contours have already been finished.
4) In the Stock tab, change the Stock Mode to Relative size box with No additional stock.
The top face of this box was machined in Setup1, and the outer contours were machined in Setup2. Because these are the surfaces that will be probed in Setup3, there is no additional stock.
5) Click OK to generate the Setup.
Step 15: Setup3: 2D Adaptive


You will start by roughing out the inside of the box.
1) Create a 2D Adaptive toolpath.
2) Select the 8mm Specially Balanced endmill.
3) For Geometry, select the bottom contour of the inside of the box.
4) In the Passes tab, change the Optimal Load to 0.3 mm.
This was the recommended optimal load for this tool in the tool comment. You decreased this to 0.2 mm for the outside of the stock in Setup2, but in this case the load will be even because the stock is not irregularly shaped. It is safe to use the recommended optimal load.
5) Change the Minimum Cutting Radius to 0".
It is important to be conscious of a tool's behavior in inner corners, when it will come in contact with more material than usual. Though a minimum cutting radius can help the tool avoid sharp corners, this can lead to problems when you attempt to finish interior walls. For this reason, your designs should include fillets on the inner corners that have a 15-20% greater radius than the radius of the tool you will be using. In this design, for instance, the radius of the fillets is 5 mm, and the radius of the tool is 4 mm. Therefore, it is safe to change Minimum Cutting Radius to 0" without worrying that there will be more stock in the corners for the finishing toolpath to clean up.
Review Step 4 of the Datron CAM Instructable for more on this concept.
6) Change Stock to Leave to 0.005".
7) Click OK to generate the toolpath.
Step 16: Setup3: 2D Pocket Finishing


Finish the inside of the box with a 2D Pocket.
1) Create a 2D Pocket toolpath.
2) Select the 8 mm Specially Balanced endmill.
3) For Geometry, select the bottom contour of the inside of the box.
4) In the Passes tab, check Finishing Passes and add 2 finishing passes.
This will ensure that the tool removes a constant, very small amount of material on the inner walls of the part.
5) Add a finishing Stepover of 0.0015".
Remember that without finishing passes, the tool would be removing 0.005" from the bottom and sides of the box. By cutting this down for the final passes, the finish quality will be higher.
6) Change Maximum Stepover to 0.25".
The default maximum stepover is slightly smaller than the diameter of the tool. It can be helpful to cut this number down a bit to increase the overlap between passes. This will ensure that the tool doesn't miss any areas when it changes directions.
7) Uncheck Stock to Leave.
8) Click OK to generate the toolpath.
9) Under Setup3, highlight the Adaptive roughing toolpath and this Pocket finishing toolpath.
Inspect the inner corners of the part. Confirm that there is no large gap between toolpaths, which would otherwise indicate that there would be a spike in tool load that could damage cutters or the part.
Step 17: Setup3: 2D Contour for Chamfer


You will now chamfer the top edges of the box walls.
1) Create a 2D Contour toolpath.
2) Select the 3 mm 45 degree chamfer mill.
3) Select the two contours along the top edges of the box.
4) In the Passes tab, set the Chamfer Width to 0.01" and Chamfer Tip Offset to 0.02".
These settings will ensure that the chamfers match on either side of each box.
5) Click OK to generate the toolpath.
Step 18: Resources


Inspect the simulation carefully to determine whether you've completed all the CAM steps properly.
The next step is to machine your part. Use the Datron Quick Start Guide, take your time, ask questions, and enjoy!
Other Resources
The steps involved in CNC education at Pier 9, from theory to machine operation courses
A general overview of CAM principles in Fusion 360 or Inventor HSM for the Datron 3-axis Mill at Pier 9
Datron Quick Start Guide
Handout from the machine operation course
Workholding models, certification parts, tool libraries, and post processors for Pier 9 CNC equipment.


