

Introduction: Connect and Retrofit Your Connected Solutions With Hologram Nova and Ubidots


Use your Hologram Nova to retrofit infrastructure. Setup the Hologram Nova using a Raspberry Pi to send (temperature) data to Ubidots.
In the following guide, Ubidots will demonstrate how to setup a Hologram Nova using a Raspberry Pi and display a temperature values in the Ubidots Platform.
Step 1: Requirements
- Raspberry Pi (Already configured)
- Nova Global USB 2G/3G Modem
- Hologram Global IoT SIM Card
- Quad-band flexible UFL antennas
- Transparent enclosure - (optional)
- OneWire Temperature Sensor - DS18B20
Ubidots account - or - STEM License
Step 2: Hardware Setup


Hologram Nova
1) Activate the Hologram IoT SIM card. To activate your card, visit hologram.io/start . Once activated, insert the SIM at the back of the Nova.
WARNING: Do not insert or remove the SIM while the Nova is plugged in - otherwise, you may damage or corrupt the SIM.
2. Based on your environment attach the antenna, if desired. The larger black antenna provides better reception, while the smaller yellow antenna has the benefit to fit of fitting inside protection cases.
3. If desired, insert the Nova into the transparent enclosure. Remember to insert the SIM and connect the antenna before enclosing the Nova. Note that this step is purely optional and will not affect functionality of the Nova.
4. Connect the Nova to the Raspberry Pi using the USB port.
Raspberry Pi
This guide assumes your Raspberry Pi has Raspbian already installed on an SD card with access through SSH or access using your computer's terminal. If these configurations have not taken place on your hardware yet, quickly do so using this quick start guide from the Raspberry Pi Foundation.
Follow the table above to connect the OneWire Temperature Sensor to the Raspberry Pi.
NOTE: The OneWire temperature sensor is sold with different versions containing resistors. Please see the "Wiring Setup" step of this guide to ensure the right connection of your sensor version.
2. Connect the Rasperry Pi to its power source and wait until it finish the boot properly.
3. Once the Raspberry Pi starts properly you will start seeing some LEDs on the Nova providing feedback as to what is happening in the modem:
Blue LED = modem is on or off
Red LED = current network status Reference to the table below for additional LED details.
Step 3: Hologram Routes Setup

Every time the SIMCOM module sends a message over the cellular network, its first destination is the Hologram Cloud, but the message's journey doesn't have to end there! Using the Cloud Services Router (CSR) you can forward your data to Ubidots via HTTP(S) for data visualization and additional analytics for your IoT solution.
Routes in the Hologram platform provide convenient methods to trigger actions (Data storage, Email, SMS, Webhooks, etc) by the presence or even absence of a device message’s topic. In this case, we're going to trigger a Webhook action to forward the module's messages to Ubidots for computation and display.
1. Go to the Routes section from the Hologram Dashboard and click the "+ New Route" button.
2. Next, assign the route components as the topics and the action. Assign "Ubidots Platform" as the nickname for the route; this will be the identifier for the route in your route list.
3. Next, select the topics which the route will act upon. In this case select the topic assigned to your device "SIMCOM(SIM-ID)" or "_DEVICE_{Device-ID}_".
4. Then, select the Action App called "Advanced Webhook Builder (Your Own App)" to integrate Hologram's Cloud with Ubidots.
Building your Webhook
Now, you have to set the configuration required to handle the request. Please assign the parameters below to the specific fields:
- URL (Destination URL):
https://things.ubidots.com/api/v1.6/devices/<<device_id>>
- PAYLOAD (Payload for POST): <<decdata>>
- HEADERS: X-Auth-Token - Your Ubidots TOKEN
Content-Type - application/json
NOTE: If you don't know how to find your Ubidots TOKEN, see the following guide.
Once you've entered the parameters, reference the image above to verify.
5.- To finish, press "Add route.
Step 4: Install Dependencies
1. Access to the Raspberry Pi terminal through SSH or directly from the Raspberry. feel free to choose the one you're most familiar with.
2. Update your Raspberry Pi code libraries:
sudo apt-get update
3. Then, install the required library:
sudo apt-get install git git-core build-essential python-dev python-openssl python-smbus python3-pip python-pip screen
4. Install Hologram's Python SDK for interacting with the Nova:
curl -L hologram.io/python-install | bash
5. Verify Hologram's CLI (Command Line Interface) was installed. It will return a version greater than 0.6.0.
hologram version
If the version is lower than 0.6.0, update to the latest version using the command below:
curl -L hologram.io/python-update | bash
Step 5: Setup of the GPIO Pins

1. The Raspberry Pi comes equipped with a range of drivers for interfacing. In this tutorial, to be able to load the 1-Wire sensor's driver on the GPIO pins, we have to use the below two drivers. These drivers are therefore stored as loadable modules and the command modprobe is employed to boot them into the Linux kernel when required.
Run the commands below:
sudo modprobe w1-gpio
sudo modprobe w1-therm
2. Now, we need to change the directory to our 1-Wire device folder and list the devices in order to ensure that our sensor has loaded correctly. Copy, paste, and execute the below commands in the pi's terminal by press "enter" after each one to run the commands.
$ cd /sys/bus/w1/devices/
$ ls
At this moment you sensor has already been assembled and connected and should be listed as a series of numbers and letters. In our case, the device is registered as 28-0000056915de , but your case will be a different series of letters and numbers, so replace your serial number with your own and run the command.
$ cd 28-0000056915de
The sensor periodically writes to the w1_slave file, to read your temp sensor, please run the command below:
$ cat w1_slave T
his command will show you two lines of text with the output t= showing the temperature (in degrees Celsius). Please note that a decimal point should be placed after the the first two digits (this is provided in the final code- do not worry); for example, the temperature reading we've received is 25.875 degrees Celsius.
Now that you are able to see temperatures readings, it is time to post them to Ubidots!
Step 6: Sending Data to Ubidots


The following code sends a message with
the Hologram cloud via Hologram Python SDK, using a modem to establish a cellular connection, and sends the messages to the Hologram Cloud which is relayed then to Ubidots. Once the message is received in the Hologram cloud the message will be routed to Ubidots if the route is correctly configured from Step 2 within this guide.
1. Create and run a Python script in your Pi's terminal:
nano nova_temperature.py
Then, paste this code to the Pi terminal and replace the serial number 28-00000830fa90 of the line temp_sensor = '/sys/bus/w1/devices/28-0000056915de/w1_slave' with your own serial number.
Once the serial number is modified, save the code.
2. Execute the script above with the following command:
python ubidots_nova_temp.py
If you get privileges error messages, run the following command using sudo:
sudo python ubidots_nova_temp.py
3. Here you will begin receiving the following debugs message in the Pi's terminal every 10 seconds. To verify the message is received, see to Hologram's Dashboard, specifically the "Console" section. As you can see on the image above the messages triggered are routed to the previous route created called "Ubidots Platform"
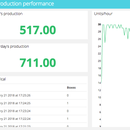
4. Go to your Ubidots account, and enter to the "Device" section to visualize the new device created with the Device ID from your Hologram Device. Inside the device you will find the temperatures values sent by the sensor connected via the Hologram webhook created.
Step 7: Rename the Device and Variables


The names of the variables created are the same as the API labels, which are the IDs used by the API. This doesn't mean their names can't be changed, so it is recommended to change the names of your devices and variables to make them friendlier to your IoT solution's nomenclature. Click here to learn how to rename your device and variables names.
You can also add and adjust the units of each variable from your list of options. As you can see above, we've assigned different units to the each variable and also assigned more friendly names to fit our projects nomenclature. This is highly recommended to users seeking deployments of 10+ devices.
Event Setup
An event (or alert) is any action triggered when data fulfills or exceeds a design rule. For example, an email or SMS message can be sent anytime a sensor stops sending data or a temperature exceeds a maximum or minimum threshold.
Step 8: Result
In just a few minutes you've built an easy DIY cellular temperature monitoring system using an Hologram Nova with a Raspberry Pi. Now its time to create Ubidots Dashboards to start tracking temperatures from your device and deploy your cellular connected monitoring solution with ease!
Happy hacking :)


