

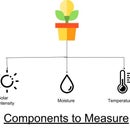
Introduction: How to Build a Motion Detection System With Arduino


Build a motion and presence production counter using a Feather HUZZAH programmed with Arduino and powered by Ubidots.
Effective physical motion and presence detection in Smart Homes and Smart Manufacturing can be very useful in applications ranging from elderly Ambient Assisted Living (AAL) solutions or a Production Counting System that feeds a larger MES. Other applications for Motion and Presence Detection include but are not limited to:
- Door and gate automation
- Parking sensors to designate free spots
- Remote tank level monitoring
- Smart homes and facilities for lighting and security
- Units detection and counting in conveyor lines
- Mark detection on printed materials
- Liquid detection inside cardboard, plastic, and paper tilts
- Distance detection
- People counters
While there are many applications for presence and motion, there are equally as many sensors to collect data, such as capacitive, inductive, photoelectric, and ultrasonic sensors. Depending on the costs, environmental conditions, and accuracy requirements, one should select the best fitting hardware for an environment and application requirements.
For this tutorial, we will focus on building a real-time production counter; the application will count every unit passing by on a conveyor belt. We will be using the Arduino IDE to program a Feather HUZZAH ESP8266, an ultrasonic sensor, and Ubidots to develop our application and display our IoT dashboard.
Step 1: Requirements
Step 2: Setup
- I Hardware Setup
- II. Firmware Setup
- III. Ubidots Application Development (events, variables, and dashboards)
Step 3: Hardware Setup


The Ultrasonic Sensor MB7389-100 is a low-cost option for Industrial applications with wide-range and low-power consumption requirements in challenging weather conditions thanks to its IPv67 rating.
To get started, mirror the diagram below to attach the ultrasonic sensor to the Feather HUZZAH ESP8266.
NOTE: The sensor reading can be taking as analog readings or PWM; below we are going to explain the setup for the PWM reading, for additional information please see the examples shown above.
[Optionally] place the micro-controller and the sensors inside de IP67 case to protect them from dust, water, and other threatening environmental factors. The standard case looks similar to the one shown in the photos above.
Step 4: Firmware Setup


First, you should install the Feather Huzzah in the Arduino IDE and compile the code. Remember to verify this set up by doing a simple blinking test. For further information about connecting your Feather device check out this helpful hardware setup guide.
To send sensor data to the Ubidots IoT Development Platform, copy and paste the code below into the Arduino IDE. Remember to assign the Wi-Fi network name, password, and your Ubidots account Token where indicated in the code.
/******************************** Libraries included *******************************/#include <esp8266wifi.h style="background-color: initial; font-family: Arial, Helvetica, Verdana, Tahoma, sans-serif; font-size: 15px; white-space: normal; color: rgb(85, 85, 85);">/******************************** Constants and objects *******************************//* Ubidots */const char* SSID_NAME = "xxxxxxxx"; // Put here your SSID nameconst char* SSID_PASS = "xxxxxxxx"; // Put here your passwordconst char* TOKEN = "Assig_your_ubidots_token"; // Put here your TOKENconst char* DEVICE_LABEL = "motion-control"; // Your device labelconst char* VARIABLE_LABEL = "distance"; // Your variable labelconst char* USER_AGENT = "ESP8266";const char* VERSION = "1.0";const char* HTTPSERVER = "industrial.api.ubidots.com";// Ubidots Business users//const char* HTTPSERVER = "things.ubidots.com"; // Ubidots Educational usersint HTTPPORT = 80;/* Ultrasonic Sensor */const int pwPin1 = 5; // The PWM pin where the sensor is connectedWiFiClient clientUbi;/******************************** Auxiliar Functions *******************************//** Gets the length of the body @arg variable the body of type char @return dataLen the length of the variable*/int dataLen(char* variable) { uint8_t dataLen = 0; for (int i = 0; i <= 250; i++) { if (variable[i] != '\0') { dataLen++; } else { break; } } return dataLen;}/******************************** Main Functions *******************************/void setup() { Serial.begin(115200); /* Connects to AP */ WiFi.begin(SSID_NAME, SSID_PASS); while (WiFi.status() != WL_CONNECTED) { delay(500); Serial.print("."); } pinMode(pwPin1, INPUT); WiFi.setAutoReconnect(true); Serial.println(F("WiFi connected")); Serial.println(F("IP address: ")); Serial.println(WiFi.localIP());}void loop() { /* The sensor reading is returned in millimeters, if you desire convert * it to inches just create a variable pointing to -> distance / 25.4 */ float distance = pulseIn(pwPin1, HIGH); sendToUbidots(DEVICE_LABEL, VARIABLE_LABEL, distance); delay(1000);}void sendToUbidots(const char* device_label, const char* variable_label, float sensor_value) { char* body = (char *) malloc(sizeof(char) * 150); char* data = (char *) malloc(sizeof(char) * 300); /* Space to store values to send */ char str_val[10]; /*---- Transforms the values of the sensors to char type -----*/ /* 4 is mininum width, 2 is precision; float value is copied onto str_val*/ dtostrf(sensor_value, 4, 2, str_val); /* Builds the body to be send into the request*/ sprintf(body, "{\"%s\":%s}", variable_label, str_val); /* Builds the HTTP request to be POST */ sprintf(data, "POST /api/v1.6/devices/%s", device_label); sprintf(data, "%s HTTP/1.1\r\n", data); sprintf(data, "%sHost: things.ubidots.com\r\n", data); sprintf(data, "%sUser-Agent: %s/%s\r\n", data, USER_AGENT, VERSION); sprintf(data, "%sX-Auth-Token: %s\r\n", data, TOKEN); sprintf(data, "%sConnection: close\r\n", data); sprintf(data, "%sContent-Type: application/json\r\n", data); sprintf(data, "%sContent-Length: %d\r\n\r\n", data, dataLen(body)); sprintf(data, "%s%s\r\n\r\n", data, body); /* Initial connection */ clientUbi.connect(HTTPSERVER, HTTPPORT); /* Verify the client connection */ if (clientUbi.connect(HTTPSERVER, HTTPPORT)) { Serial.println(F("Posting your variables: ")); Serial.println(data); /* Send the HTTP Request */ clientUbi.print(data); } /* While the client is available read the response of the server */ while (clientUbi.available()) { char c = clientUbi.read(); Serial.write(c); } /* Free memory */ free(data); free(body); /* Stop the client */ clientUbi.stop();}</esp8266wifi.h>ProTip: you can check if your device is correctly connected by opening the serial monitor in the Arduino IDE.
You can verify a device is created in your Ubidots backend by viewing it in your account Device Management –> Devices.
By clicking your device, you will find a variable called "distance" where the sensor's readings are stored. This name was assigned in the code you've just pasted in the Arduino IDE. If you wish to adjust your automatic variables, please do so by editing the Device card or by flashing an updated code with the correct variable nomenclature for your application.
With the Feather HUZZAH ESP8266 connected and reporting data to Ubidots, it's now time to build the application using Ubidots carefully designed code-free application configuration.
Step 5: Ubidots Application Development


Ubidots Event Configuration
The current readings we're sending to Ubidots are distance inputs. For translating these readings into the desired output that we want —counted units— we should create an event following these steps:
- Inside the current device "motion-control" create a new default variable called "boxes", which will receive a 1 every time a new unit is counted.
- Go to Device Management -> Events, and click the blue plus icon in the upper-right corner of the page to add a new event.
- Configure your event beginning with "If triggers":
- Select a variable: "distance"
- Value: value (default)
- Is less than or equal to[the maximum expected distance} between the sensor and the boxes passing by*our application calls for 500mm
- For 0 minutes
- Save
4. Once the triggers have been configured to your application's specifications, click the orange "plus" icon in the upper-right corner to add a conditional action.
5. Select “Set Variable” as the action.
6. Next, choose the previously created default variable "boxes" and value "1".
7. Save changes. If the event is properly set up, it will send a "1" every time the distance between the sensor and the unit is longer than an indicated threshold, which suggests that there's no object near — and should count a new unit that just passed by.
In the Feather specific Device card, you will find that the variable "boxes" where a "1" is sent any time a unit's presence is sensed.
Especially useful for industrial conveyor belts and unit counting this prototype can be customized to fit different environments or hardware simply in your coding or your applications development.
8. Visualize the number of units sensed (or times an object was detected)
Now, using the "boxes" variable, we are going to create a new rolling window variable to sum the total amount of readings received from the variable "boxes" in a defined spam (minutes, hours, days, weeks, etc). To execute this development, follow these simple steps:
Assign the following credentials to your new rolling window variable
Select a device: motion-control (or the name of the device you're sending your data)
Select a variable: boxes
Compute the: sum
Every: "1" hour (or according to your application requests)
Now assign a name to the new variable that indicates the number of boxes (or movements) counted in an hour, just like "boxes/hour" or "units/hours.
Step 6: Dashboard Configurations

Finally, create a dashboard to display the number of units sensed.
Go to Device Management –> Dashboards and add a new widget. This widget will display the amount of boxes counted today broken down by hour.
Assign the following credentials to your new widget to visualize your count.
How would you like to see your data?: Chart
Select a type of widget: line chart
Add a device: motion-control
Add a variable: boxes/hour
Finish. And with this final dashboard development - you're application is complete and you now have an efficient and effective motion and presence detection system. Here's a final look at our results.


