

Introduction: Converting 6v Power Wheels to 12v With Dual Gearboxes


In this article, I'll show you how to safely upgrade your kid's 6 volt Power Wheels BPRO (Battery powered ride on) to 12 volt. This will effectively double the top speed (and if you add a second gearbox, will provide much more traction for off-road use!)
I used a brand new 6v Mickey Racer for this project, but this should apply to pretty much all BPROs that come 6v from the factory. The basis of the project is replacing the stock wiring harness with a thicker gauge harness from a 12v BPRO. The stock 6v harness is undersized and you will run the risk of melting wires/starting fires if you try to run 12v/30A through tiny wires. Not to mention, the stock foot switch is only rated for 10A, which can be welded open during failure, resulting in a dangerous runaway situation. Don't put 12v to a 6v system and expect it to work for very long.
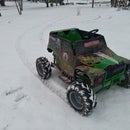
Shown here are the finished product, some of the tools involved in the project and the freshly unboxed ride.
Step 1: Remove Stock Wiring Harness


First thing you'll need to do is remove the stock wiring harness. For this model BPRO, it involved removing a protective channel cover on the underside, unscrewing the dashboard and then gently disconnecting everything. There's really not much to this 6v harness, just some 18-22awg wiring and a few connectors and switches. The good news is the car is set up to easily accept 12v components from the factory. The battery tray is molded to fit a standard sized 12v, there is a cutout for a second motor/gearbox and the dashboard has two spots to click in standard DPDT switches like those found in most 12v shifters. Overall, it seems like they planned ahead to offer this in a 12v version, but it was only sold with half the gear.
Step 2: Bench Test Replacement Wiring Harness


You'll need a 12v wiring harness obtained from a donor BPRO. If you've been modifying Power Wheels for any length of time, you've probably accumulated some junkyard pieces. If so, you have easy access to a wiring harness. If not, check out the Modified Power Wheels facebook group. Lots of members there have massive parts hoards and can hook you up with parts on the cheap.
You'll also need a matched pair of gearboxes. I had bought two identical Mickey Racers and converted the other into a 4x4 Monster Truck Mickey Racer on a custom welded frame, so I had an extra gearbox to work with. Again, you could go on FB and find one, or order new ones off Amazon. If you get generic ones off Amazon, make sure the RPMs are the same as what you've pulled out (or buy a pair of new ones), or else you'll have one side spinning faster than the other.
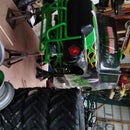
Hook everything up on the bench. It's fairly simple, the first picture here shows a standard 12v Harness (taken from a Power Wheels KFX 4 Wheeler). It's basically a battery input, a foot switch for the on/off throttle, two DPDT switches for hi/lo/fwd/rev and two motor outputs. Hook up the motors, hook up the battery, press the foot switch. If nothing happens, fiddle with the shifter switches and make sure everything is seated properly. If still nothing, replace switches with known functioning switches until you've found your issue. Once it works on the bench, it's time to put it in the car.
Step 3: Fit 12v Harness to Chassis


I started by threading the motor outputs into the rear compartment, then routing the bulk of the wires along the underside. Fit the foot switch into pedal area and run the DPDT shifter cluster up inside the dashboard. Each shifter switch mounts nicely in the dashboard. The foot switch area needed cut out a bit to fit a 12v switch. Loosely fit the gearboxs/motors in their locations. Be sure to secure the battery with a physical tie down - you don't want the battery falling out and hitting your kid in the head when he flips this thing. Also be sure to use an inline fuse holder with a 30A fuse directly after the + battery terminal. Failure to use a fuse can result in electrical fires. Your kids would probably appreciate it if you spent $1.50 to prevent trip a the burn ward for a disfiguring accident.
I did not bother connecting the lights and sounds on this project, but if you wanted to do that you would need a 12v to 6v Stepdown connected between the 12v feed and the input on the soundboard. The 6v sounds might work for a bit on 12v, but they'll sound sped up and weird before eventually burning out.
Also, the 6v charger will not work anymore, so I typically add a generic trickle charger plug to these so it can be charged with a Schumacher or other smart trickle charger.
Step 4: Modifiy and Install Rear Axle


The rear axle has two spacing tabs on the side that did not have a gearbox from the factory. Just grind or file the outer notch off. Then your gearbox will be able to slide on far enough for everything to fit back together. I added a little lithium grease to the axle where it contacts the body while I was at it.
Step 5: Finish Assembly

After that, you just need to finish putting the car together as normal. I just pressed the wheels and trim pieces on and it was ready for a test drive. It worked way better in 12v than in 6v. Plus now that it has a proper 12v wiring harness, it can later be converted to 18v Lithium power for even more speed and excitement!
Thanks for reading along, I hope this was helpful for you. If you'd like to see what other projects I'm working on, follow me on Instagram.com/PoppaFixIt


