

Introduction: Custom Laser Patterns Using Holograms

Do you have a bursting desire to project your designs on far away walls?
Are the pattern lenses that came with your laser pointer not personalised enough?
Have you ever wanted to make your own hologram?
Well you've come to the right place!
This instructable will show you a really easy way to make your own pattern generator for a laser pointer. The method will be using a computer to generate a hologram (a record of the interference pattern that would come from the light pattern you’d like to generate), and then printing this in very high resolution by using a 35mm projector film printing service.
All you need is a computer and a very small amount of money to buy a printed projector slide. You could even print it at home on transparent acetate film if you don’t mind limited quality.
Step 1: Resolution Is Everything

Real holograms are printed at around 127,000 dots per inch (dpi), which is unfathomably difficult to print, requiring very specialist expensive equipment. It is however possible to create holograms at lower resolutions as long as the light doesn’t have to diffract through much of an angle (because tighter gaps between pixels diffract light wider). This means the projected pattern size is limited by your print resolution.
It is just about possible to demonstrate the principle with a domestic printer at 600dpi, but the quality isn’t good and the pattern is so small it tends to get lost in the main beam. The software we will use was built for home printing, so if this is your thing head to Cortical Cafe’s CGH site to learn how to do it.
However, at very little cost we can print at much higher resolution. There are online services that offer digital printing of 35mm projector slides at 4k, that means 4096 across 36mm (incl. 1mm of border). That gives us 2,890dpi... much better!
Step 2: Generating the Hologram


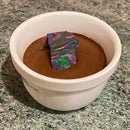
First you need to make a pattern to project. This can be done in any paint package that will save in the GIF file format. Start very small (say 20x20 pixels); the computation time and memory depend strongly on the number of projected pixels, and we are using the program to create much higher resolution output than it was designed for so it can crash if it runs out of memory. You can always go bigger later. Patterns with thin lines work better than filled in areas. The GIF needs to be two colour black on white, where the black pixels will become the projected points of light. To demonstrate this I’ve drawn a jellybaby on a marshmallow.
Next you need to create the hologram to print. We will use the software provided by Cortical Cafe, the site linked in the previous step. However the online program hasn’t been maintained and doesn’t appear to work (at the time of writing). Fortunately, they open sourced the software on SourceForge, and better still, there is a built java program in there so there is no need to compile anything.
The download page is here.
You’ll need to extract the zip into a folder before running the program with Java.
To get good results, set the settings as illustrated and then print the hologram exactly double scale... I found that the short throw of the automatic length is way too small and the hologram only appears tiny and washed out by the main beam. However I printed the hologram double scale as well, because I wasn’t certain of the real printing resolution, and these worked much better.
To do things properly (ADVANCED and experimental):
The 1200 x and y pixel resolution is as much as the program will run (on my machine anyway!). 8.789e-6 is the pixel spacing as printed in metres. Randomise phase prevents weird aberrations forming. Opt Depth is good for a first run described above, but I suspect may work better set manually to ~2m. The depth is the point where the pattern comes into best focus, and because our patterns are wide and lower resolution than professionally manufactured pattern lenses, the focus drops off more at other distances. Don’t select Scale either, it both distorts the aspect ratio and fills the hologram with the biggest picture possible. That might sound good, but the main beam of the laser will always fall in the image, making it hard to see all at once. Instead, choose pixel spacing (again in metres). Maybe aim for 15-30mm wide at 2m depth. If you are at 20 pixels that is ~1e-3. Try to get the features that look like a blurred version of the projected pattern to fit with space around, as this will mean you can get your laser out of the pattern.
Hit simulate and you should get a status bar progressing like in the screen shot. If it is stuck on initialising, it has run out of memory. Assuming it works, you can view the output. There appears to be an issue with the non-binary output (this isn’t used for home printing) so select ‘real_binary’. Once opened you can save it as a GIF. The output is mostly chaotic black and white but there are ripples that seem to echo the projected pattern shape. The hologram is actually the interference pattern you’d get from light shining from all of the projected points simultaneously.
I recommend preparing a different holograms trying lots of different things.
Step 3: Getting Your Holograms Printed
We will use digital printing of 35mm projector slides as it is relatively cheap (~£2/slide) and prints at a much higher resolution than can normally be expected. The company I used was https://www.digitalslides.co.uk/ but there are probably others with the same capability if you aren’t in the UK.
To be suitable to print with optimal quality we need to ensure:
- The file size in pixels exactly matches the printing service print size (4096x2732px)
- The file type is compatible with printing equipment without lossy conversion (uncompressed TIFF file works)
This means we will have to alter the smaller GIF files before sending them to the printers. Use your favourite photo editing suite to do this. I use the free but unfortunately named GIMP photo editing software which can be downloaded here.
Create a canvas 4096x2732 pixels, and start copying in the holograms. Resize any that you want to try double size (as per beginner instructions in the last step). Remember only to resize them by whole number multiples (otherwise you get a huge loss of quality as the pixels blur across the change). When finished, save the file as an uncompressed TIFF and upload it to your slide printer’s website.
I chose unmounted slides as the cheapest option, but there is some curl to the film that would be avoided if the slides were mounted. Order whichever you prefer.
Then relax while they post your slides.
Step 4: Making the Pattern Appear


This bit is really easy:
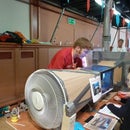
Shine the laser through the hologram at a wall. Obviously be careful where you point your laser, and don’t use a dangerously powerful one! Move the hologram closer to or further from the wall to get best focus. The pattern will move relative to the main dot if you change which part of the hologram you shine through but should still project correctly*. Aiming to one side usually helps keep the pattern from the main beam. Normally a small gap between the laser and the hologram also helps improve quality of projection a little because most laserpointers diverge, and the more of the hologram is illuminated, the better the reconstruction of the pattern as it is projected.
Play around with different distances, and clip things to keep them from moving if you are struggling to line things up. You have now made your own laser pattern holographic lens!
*This actually demonstrates the meaning behind the word hologram. Holograms have a special property that the whole image is recorded at every point, using more of the hologram just adds definition. Holo- Greek holos meaning whole or everything (like in holistic) and -gram Greek meaning written or recorded (as in telegram). This is why scientists (and classical Greek scholars) often object to anything vaguely 3D getting branded a hologram.
Step 5: How It Works

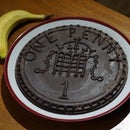
The image above is the interference pattern you get from light passing through a circular hole. Conversely, if you shine a laser through this pattern it constructively interferes in positions along its axis, because the circles map out positions of identical path length. At a certain distance all the rings work together to give a sharp edged spot. If you place the pattern off centre in the laser beam the spot is off centre relative to the main beam. The holograms we have been making are effectively lots of these circular ripple patterns added together to create a bright spot for each pixel. If you look carefully at the holograms you can see a rippling ‘echo’ of the shape of the projected pattern.
Step 6: Experimenting With Colour


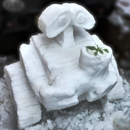
Once you have successfully projected your pattern with a red laser pointer, you’ll probably be wondering about other colours...
Because red’s wavelength is longest it will give you the sharpest results, but that is no reason to give up on the other colours. The hologram’s diffraction and therefore focus is altered by using a shorter wavelength, and the key effect this has is that the ‘focussed projection’ appears further away, so you’ll have to move back from the wall a bit.
As you can see the patterns do project just fine in other colours, even purple.
I hope you have enjoyed this instructable; if so please vote for me in the Optics Contest!

Participated in the
Optics Contest


