

Introduction: How to Edit the Arduino Start Up Screen


Have you ever been using the Arduino IDE and wanted to have some bit of code included with every blank sketch when it opens. Ever wonder how to do it. Here is a quick tutorial on how to do it. This works for Arduino IDE verison 1.8.19 and below.
Step 1: The How To:
First you are going to open file explorer in windows. I'm using windows 10 but for the most part the locations are the same for other windows versions.
Click on local disk, then program files(x86), then the Arduino folder, then the examples folder, then the basics folder, then the bareMinimum folder. Inside that folder there is a file bareMinimum.ino.
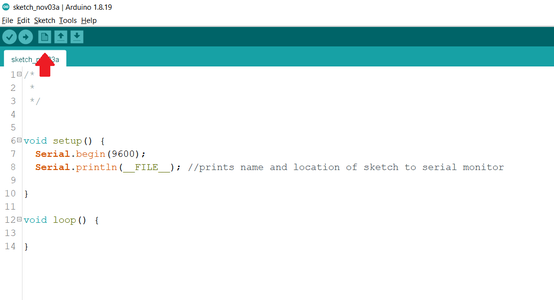
Double click on the file and it will open in the Arduino IDE.
Make any modifications to this that you want to have in every startup. This will effect only the new sketches that you open not any that have already been saved elsewhere.
Save this version of the sketch to the desktop without changing the name. If you just try to save it, you will get a warning that it is a read only file and you need to save it somewhere else.
Once you have saved, close the IDE and goto the desktop and open the folder that you just saved labeled bareMinimum. Right click on the file and select copy.
Go back to the original location of the bareMinimum folder :
local disk, then program files(x86), then the Arduino folder, then the examples folder, then the basics folder, then the bareMinimum folder.
Once you are there, right click and paste the file into the location. It will ask you if you wish to overwrite the existing file. Click yes.
Goto your desktop or task bar and open a new tab of the IDE and your modifications should show up in the blank screen.
After you are sure that your modifications are opening like they are supposed to then you can delete the file folder on your desktop.
The picture is the version that I have made for myself. The red arrow is the "open New" button that will give you a new blank sketch with your modifications.
easy squeazy
Cheers
amachinetech
Step 2:


