

Introduction: How to Control Motors With Arduino and RC Receiver in 10 Minutes


This is my second tutorial on controlling things with Arduino and R/C receivers. If you haven't looked at my first tutorial I suggest you look at that first, here: https://www.instructables.com/id/How-to-control-Ard... in this tutorial we will be looking at how to control motors as well using rc.
Step 1: Resources


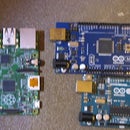
Arduino
H-bridge shield
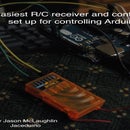
R/C receiver
R/C Transmitter
Step 2: Wiring

put the shield on top of the arduino
connect the motors to the shield
put the servo into 3.3v and gnd information line to pin 11
connect 3 wires from ch1 to pin 10, ch2 to 9 and ch3, to 8
and then 5v to batt/bind on receiver and gnd to gnd
(Click on picture for more detail and watch the other tutorial for even more info)
Step 3: Code
Here is the code please respect the time it took for this:
// RC PulseIn Serial Read out By: Nick Poole
//extended By Jason Mclaughlin
//2015
#include <Servo.h> // for servo in example
Servo myservo;//servo entity
int pos = 0; //position for servo
int ch1; // Here's where we'll keep our channel values //servo 2
int ch2; // motors
int ch3; // servo
const int channel_a_enable = 6;
const int channel_a_input_1 = 4;
const int channel_a_input_2 = 7;
const int channel_b_enable = 5;
const int channel_b_input_3 = 3;
const int channel_b_input_4 = 2;
void setup() {
pinMode( channel_a_enable, OUTPUT ); // Channel A enable
pinMode( channel_a_input_1, OUTPUT ); // Channel A input 1
pinMode( channel_a_input_2, OUTPUT ); // Channel A input 2
pinMode( channel_b_enable, OUTPUT ); // Channel B enable
pinMode( channel_b_input_3, OUTPUT ); // Channel B input 3
pinMode( channel_b_input_4, OUTPUT ); // Channel B input 4
myservo.attach(11);
pinMode(10, INPUT); // Set our input pins as such
pinMode(9, INPUT);
pinMode(8, INPUT);
Serial.begin(9600); // Pour a bowl of Serial
}
void loop() {
ch1 = pulseIn(10, HIGH, 25000); // Read the pulse width of
ch2 = pulseIn(9, HIGH, 25000); // each channel
ch3 = pulseIn(8, HIGH, 25000);
Serial.print("Channel 1:"); // Print the value of
Serial.println(ch1); // each channel
Serial.print("Channel 2:");
Serial.println(ch2);
Serial.print("Channel 3:");
Serial.println(ch3);
if ((ch3 >= 1500) && (ch3 <= 1600)){// the center postion for controller
Serial.println("between");
pos = 90;//set servo to center
myservo.write(pos); // set to pos which is 90
}
else if ((ch3 >= 1100) && (ch3 <= 1490)){
Serial.println("right");
pos = 180;
myservo.write(pos); // goes from 180 degrees to 0 degrees
// waits 15ms for the servo to reach the position
}
else{
Serial.println("Left");
(pos = 0); // goes from 0 degrees to 180 degrees
// in steps of 1 degree
myservo.write(pos);
// tell servo to go to position in variable 'pos'
}
// motor
if ((ch1 >= 1000) && (ch1 <= 1060)){
Serial.println("Motors off");
analogWrite( channel_a_enable, 125.5);
digitalWrite( channel_a_input_1, LOW);
digitalWrite( channel_a_input_2, LOW);
analogWrite( channel_b_enable, 125.5);
digitalWrite( channel_b_input_3, LOW);
digitalWrite( channel_b_input_4, LOW);
delay(50);
}
else if ((ch1 >= 1060) && (ch1 <= 1500)){
Serial.println("Motors Medium");
analogWrite( channel_a_enable, 50);
digitalWrite( channel_a_input_1, HIGH);
digitalWrite( channel_a_input_2, LOW);
analogWrite( channel_b_enable, 50);
digitalWrite( channel_b_input_3, HIGH);
digitalWrite( channel_b_input_4, LOW);
delay(50);
}
else {
Serial.println("Motors High");
analogWrite( channel_a_enable, 255);
digitalWrite( channel_a_input_1, HIGH);
digitalWrite( channel_a_input_2, LOW);
analogWrite( channel_b_enable, 255);
digitalWrite( channel_b_input_3, HIGH);
digitalWrite( channel_b_input_4, LOW);
delay(50);
}
delay(100); // I put this here just to make the terminal
// window happier
}
Step 4: Test
Test it and If it doesn't work contact me and ill try to help you. Here is a demo video from the first step if you didn't watch it.
:)


