

Introduction: How to Fix Your 12v Air Compressor


Lightning knocked out my computer so I will try this again.
I found a broken Campbell-Hausfield 12V air compressor while riding a motorcycle in the desert. I am financially impaired so when I find something, I take it home and try to fix it. I have been using this compressor for years, now. (About 7) and have used it for everything from patching and filling tubes to seating beads on my motorcycle.
It is getting a little worn out, requiring a shot of oil to get up to 40 PSI. God provides-I just received a broken "Maxx Power" air compressor!
I will show you the basic steps needed to get one going again.
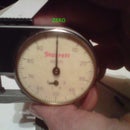
P.S. the main image is what the Campbell-Hausfield compressor looks like today, after 7 years of often hard use. If I had the ability to buy a (Good) new one I would! But they can last.
Step 1: First Off, Take It Apart (Phillips Head Screwdriver)

In the second picture I say to oil the bearings-wait until you remove the motor.
Inside is a very simple mechanical assembly.
A motor turns a gear that is connected to a crankshaft.
The crankshaft is supported by two bushings, and has a shaft that is connected to the connecting rod.
The connecting rod is connected to the piston, which moves up and down in a polished metal cylinder.
While the piston is traveling down, a one-way reed valve allows air to be drawn in through a small hole on top of the cylinder head.
While the piston is traveling upwards, the pressure closes the one-way reed valve, and pressure builds up until it is pushed through the one-way valve that is connected to the gauge, and output barb, travelling to the chuck.
9 times out of 10, with inexpensive 12V compressors, the entire assembly simply lifts out.
Step 2: Inspect, and Begin Taking It Apart!


All of the pictures I took were after I spent several minutes blowing out the caked-on dust inside and outside of the pump. There was so much dust it had clumped up into dust chunks the size of popcorn. It was filthy. I didn't even try to turn it on in that condition. It would have worn itself just by running for a few seconds.
9 times out of 10, the reason why it no longer works is because of dust and debris between the brushes and the commutator of the motor. Sounds complicated and hard to fix, but it is as easy as taking it apart and turning the gears by hand while the unit is unplugged.
The motor has enough torque to tear your finger open, so make sure it in unplugged.
Then, plug it in and it will suddenly work. This is because you forced the commutator to grind the dust away from the brushes and created a new electrical connection.
Anyway...
This particular pump has 3 cylinder head screws. Most inexpensive pumps only have 2, and some don't even have the cooling fins on the cylinder head. Right away I could tell this was a good pump.
Unfortunately, this design would not allow me to simply pop the large driven gear off. I had to pull the crankshaft out, then slide the gear out.
I accomplished this by putting 2 flathead screwdrivers under the large driven gear, while I pried on the crankshaft with another screwdriver, until the crankshaft popped out.
As I nearly find with everything I take apart, an appalling lack of lubrication for the bushings for the crankshaft. The greasing of many of your tools will make them last nearly forever, especially right after you buy them. I grease all of my angle grinders when I buy them, and they last a long time.
Once you get the crankshaft out, you are free to clean and lubricate the crankcase. If you do not have a flavor injector, you can use a Q-tip, but it will not do as good of a job.
If you are like me and maintain your equipment, a sub $5 flavor injector from Wal-Mart packed with good quality synthetic grease (I use Mobile-1 general purpose full synthetic red grease, it has served me very well) will allow you to inject grease into areas where it would be impossible any other way.
Step 3: Piston and Cylinder Head


If your pump had its hose broken off, simply purchase some good automotive hose that can handle up to 100 PSI (Try fuel injection line). Or, cut the end of the hose flush, and simply use a small hose clamp to secure the hose to the barb.
To remove the factory hose, simply insert a small flathead screwdriver into the collar between the collar and the hose. Do this several places until the collar splits in half. Simply remove the collar and pull the broken hose off of the barb. This frees you to put the good hose back on.
On my CH compressor, the one-way reed valve broke off. I cut a similar sized and shaped one from a soda can (Super Chill Lemon Lime soda [Albertsons]). I drilled out the rivet holding the tab in, ran a tiny tap (A tap makes threads) down the hole, and screwed a small screw to hold the tab down. I had to machine the head of the screw flat so that the piston would not interfere with it.
At this point, make sure everything is lubricated. The wrist pin, both ends of the connecting rod, the main bearings in the crankcase, the crankshaft, the lower end rod bearing, the cylinder, the piston and piston crown, the gears, and the bushings in the motor. To lubricated the bushings on the motor simply apply a lightweight oil (I used Break Free CLP) to each end of the motor. Make sure it goes under the gear and hits the shaft, where it will seep down and get inside the bushing.
Replace the motor, if you have removed it. (Make sure you lubricated the bushings on the motor before replacing it!)
Re insert the crankshaft into the crankcase, and press it back into the driven gear. Be sure the driven gear is facing the right way so that the wear pattern of the teeth isn't altered.
A word to the wise: Don't bother putting the piston and connecting rod assembly back onto the crankshaft until you have inserted the piston into the cylinder first. The rubber crown on the piston will only allow it to go in one way!
Grease up the cylinder, and the crown of the piston. The piston goes up and down very quickly and a lot of heat is generated. A good amount of grease here will increase the pressure output, the life of the piston, and inflate tires much quicker.
Look at the wear pattern in the cylinder. If you can see an area that isn't worn, that area goes toward the crankcase. The piston travels all the way to the top of the cylinder.
Slip the connecting rod through the top of the cylinder, and push the piston in. Keep the piston inside the cylinder, and then angle the connecting rod slightly to get it into the crankcase and onto the lower end rod bearing sticking out of the crankshaft. It's easier than it sounds.
Replace the cylinder head screws (The long ones).
There will probably be rubber vibration isolating pieces that go around the mechanical assembly, they only go in one way. Make sure they are the right way.
Everything will go together in less than a few minutes. It is a very simple assembly.


