

Introduction: How to Repair and Make Reliable the Diaphragm in a Chinese Tankless Water Heater


Hello,
Unfortunately I have to start by saying that this information is provided for education purposes only, and that I, nor anyone I am affiliated with is responsible in any way for any injuries, or damage as a result of anyone attempting these repairs for any reason.
The diaphragm is responsible for cutting off the fuel supply when the water supply is shut off. If it malfunctions it can fill your house with explosive gas with lethal results. You must have a good working knowledge of Oring and compressions sealing techniques.
That said,
I was given a small Chinese water heater made by a company that has a difficult time providing parts for it. I am a self reliant person and feel that many people are finding repairing their own devices increasingly difficult.
My water heater has frozen several times, and I have had to repair the diaphragm cover by resoldering the pieces several times.
In my heater, a thin rubber diaphragm is pushed by a plunger that is activated by water flow, into a small metal rod that opens up a gas port, and activates a micro switch that activates the microcontroller and high voltage output.
It sounds complicated friends, but rest assured, it really is not.
The good thing is that virtually every part on this heater can be fabricated or repaired. There is no need to trash your heater if it freezes and cracks.
So here we go.
If you are willing to make two small holes in the vent on the right hand of the heater you can use a long phillips screwdriver to access the two deep screws to remove the diaphragm cover without having to remove the entire assembly.
There are two small brass tubes that are attached to the diaphragm, be careful not to lose these. The heater will not work without them.
Firstly, I took a screw with a large head and cut the threaded part off, flush with the bottom of the head of the screw.
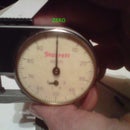
I used a micrometer to measure the diameter of the plunger shaft that contacts the diaphragm. Then, I used a Dremel tool to round out the screw as such:
Step 1: Check for Fit

Check to make sure the screw head fits snugly on the shaft. If it is a little loose, secure it with RTV silicone, but make sure it won't just drop off. Mine was a good interference fit. It is a good idea not to solder it onto the shaft, because the heat will damage the Oring used to seal the diaphragm hosing.
Next, I measured the diameter of the small metal rod that is pushed, because my diaphragm had a hole in it from pushing on it (The metal rod has quite a bit of resistance).
Then, I used my Dremel tool to make a round hole in the slotted portion of the screw head.
Then, I cut the metal rod down enough to accommodate for the patches I put on the diphragm, and also the thickness of the screw head. However be careful, if you take too much off, you are going to be in trouble.
While I was cutting the rod short, I kept dousing it with water to keep it cool. This is because it is near an O-ring, that I have had to replace because it was worn out. It was easy to replace but I would rather not do it again.
I didn't bother tapering the end of the rod, because I wanted the fit on the screw head to be somewhat tight. In hindsight, it would have been prudent to use a small amount of RTV silicone between the rod and the screw head, to hold it in place. But it is OK.
Finally, I mated the screw head to the metal rod. It was a good fit. Digital calipers are extremely handy for this.
Step 2: Now, Repair the Diaphragm


I have tried several repairs on the rubber diaphragm. All have failed. They include super-gluing thin plastic, RTV sealing plastic, and just plain super glue and small plastic pieces.
I got serious, and using an abrasive bit with my Dremel, and took it all off, cleaned the diaphragm down to the pure rubber.
If you want, use a soft abrasive polishing bit to clean the rubber. It works very well. Next, I used Brake Cleaner, remember that, and a clean rag to clean the diaphragm to prepare it for the tire patch.
Friends, the secret to every good tube and tire patch, longevity, sealing ability, and a 100% sure repair is to use BRAKE CLEANER after the roughing, with a clean rag to prepare the surface for the rubber cement.
I will tell you why: Because the brake cleaner "melts" a small layer of the surface, softening it, and at the same time allowing all contaminants to be wiped away with the rag, creating an ultra-pure mating surface for the glue to adhere to. I have patched the tube on my 700 LB cruiser motorcycle MANY times with this method.
I have NEVER had a patch fail, on a bicycle, or motorcycle tire or tube when I used brake fluid to clean the surface with a rag before applying the glue and patch.
I don't mean to preach. Don't use carburetor cleaner, as it contains a small amount of petroleum, which makes for a terrible contaminant when mixed with glue. Brake Cleaner is good for all sorts of things, because it evaporates, and leaves no traces chemicals.
Back on track, now.
After removing the residue from former inferior fixes, and cleaning with the brake cleaner and a rag, I applied cement to one side, working it into the rubber with the snout of the cement tube. I made sure there were no "dry" spots, and that the surface was very shiny with wet glue. I use as thin of a layer as I could manage. Too much glue means you may slip the patch, which would be bad when it is drying.
The ears you see on the diaphragm are where those small brass tubes insert through.
I always use RTV silicone (For automotive applications. If you are ever in one of the wonderful 99c Only stores, grab a bunch of their RTV silicone sealant. I have personally used it in engines, and other things. It is good stuff.) to seal the assembly.
Always allow the RTV to "Set up" overnight.
I compressed the two patches with about 10 LBS of weight for 40 minutes, then I put it back together in the heater.
A word of warning, try not to get too much RTV around the small brass tubes, because it will compress into the tubes a tiny amount.
After it was all together, the heater has never lit faster, and works as better than it ever has. Plus, I do not have to worry about puncturing the diaphragm rubber again with the metal rod. The screw head displaces the pressure applied on the rubber over an area 20 times as large, reducing specific pressure by a factor of 20, eliminating the puncture risk.
1 year later, it is working perfectly. I have only had a handful of shutoffs, whereas before I had to reset the heater several times every shower which was really a bummer.


