

Introduction: Image Relief in Resin


This instructable is about machining into layers of resin, each a different shade, to reproduce a photograph a photograph. When you were a kid, did you ever crayon one color over another, and then scratch into it to reveal the first color? This process is along the same idea, but with several layers of color. By carving to different heights, different shades are revealed. If this is done carefully, a photographic image can be reproduced.
Materials:
- NuClear Epoxy Resin
- Black and white Mixol universal tints
- Wood (1x2’s, ¾” ply), to build the tray/frame
- DMS 5-axis router
- ArtCAM (DelCam)
Step 1: Choosing the Image

I chose an image of a cloud formation called a Kármán vortex street, taken from a Nasa satellite. Looking up at the stars can make you see pretty small. I think looking back at the Earth can do something similar. I wanted to highlight that there's a lot of crazy phenomenon happening nearby that we don't even know about because we lack the perspective. I also like the rhyming between the shape of the height map and the shape of the physical phenomenon. The black regions are the ocean, and are both the deepest part of the image relief and are physically the furthest from the vantage point.
I cropped the image tightly, to decrease the distance between the cloud formation and the viewer.
Step 2: The Resin Tray


I wanted to make this piece fairly large, about 33x47”. I chose to make it about 1.5 inches deep. This depth was a balance between the number of shades (the more shades, the more depth), and the height of the end mills I could use to cut it. I wanted a finishing pass with an eighth inch ball mill, so anything beyond and inch and a half would be difficult. Also in my consideration was the cost of the resin. A volume of 33x47x1.5” works out to about 9 gallons of resin.
I made the tray using a sheet of 3/4” ply wood and 1x2” pine boards. I scored the surface of the plywood to help ensure attachment between the wood and the resin, although I don’t know if this was necessary.
In doing some prototypes, I found that resin (like a lot of materials) wants to warp after machining, curling upwards from the center. To prevent this, I built a pretty rigid frame underneath the tray.
Before pouring, I attached the frame to a spoiler board, so I wouldn’t have to worry about this after adding 90 lbs. worth of resin.
Step 3: Pouring the Resin


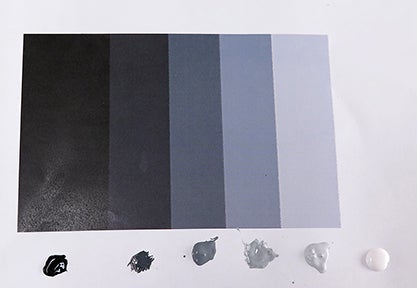
This was a time consuming process, as you must wait for the resin to cure after every pour. I went for 11 shades of gray, at 1/8” deep. To do this, I mixed 4 shades, trying for even intervals between black and white. Including pure black and white, this gave me 6 intervals along the gray scale.
The NuClear resin, at 1/8” can take about 24 hours to begin to cure (though this can depend on temperature and humidity). At this time, it is still a little soft – you can indent it with your fingernail. This is a good time to pour the next layer. Do not let the resin cure fully between pours! This can prevent one layer from adhering to the next, which will make your machining process terrifying. To avoid this happening, pour the next layer 24-48 hours after the previous. I suggest keeping a log of your pours, so you don’t mix up what color you’re mixing in, or letting the resin cure too long.
I mixed about 5 mL of dye per every 1/8" layer. This works about to about 1 drop per dye. I wanted to keep the resin fairly translucent, because I believed this would make for smoother transitions between shades.
Step 4: ArtCAM and Machining


ArtCAM is a pretty handy piece of software for this project. It will instantly turn your image into a relief, and has a pretty straightforward workflow for generating CAM operations. To create the relief, simply open the image in ArtCAM, and choose your dimensions. For the machining operations, I first tried a 1” end mill for roughing. However, with this end mill, in some places the layers of resin were being separated. Terrifying! I thought I might lose the whole giant block of resin. This was because when pouring two of the layers, I left the resin cure for too long. Luckily, I found that roughing with a 1” ball mill (with a pretty conservative stepdown/stepover) prevented the separation from happening. After the initial roughing, I did a first pass finishing with a 5/8” ball mill at .15” stepover, leaving a .04” allowance behind. Then I did two finishing passes, with 1/4" and 1/8” ball mills, at .06” stepovers. These two passes took about 11 hours and 16 hours of machining respectively. The total machining time was about 36 hours. Watch all that expensive resin fly!
Step 5: Finishing Touches

After machining, I used a rough brush to clear away most of the lingering swarf (it’s a word, really). Then I sprayed the whole thing down with Krylon Matte finish. I didn’t want the resin too reflective, which would conflict with the appreciation of the image. Next time I might try coating with one thin layer of resin, then applying the matte finish.


