

Introduction: LED HEATSINK FAB

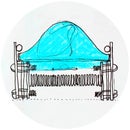


You are nonplussed. You have encountered many and have collected many of those narrow type heatsinks on the right. But, all you want to do is cool down your hot house flower LEDs. It's time to FAB just the right heatsink flavour for the job. That flavour is the heatsink on the left.
Step 1: CUT AND STITCH METHOD

Your new fancy pants LEDs will enjoy the smooth flat surface of the heatsink on the left. Whoa.
Step 2: SAVE THE HARDWARE FOR LATER

This box of hardware came from no other source than taking-things-apart. This handful of machine screws was holding down the transistors on the original heatsink.
Step 3: MEASURE AND CUT


I'm lucky to have a good saw. Use a blade with carbide teeth and you will be able to cut through the soft aluminum heatsink material easily. Wear eye protection, and, YIKES, sometimes those aluminum chips are hot (wear long sleeves).
Step 4: JOIN TWO HALVES


In this case, I've taken advantage of the slots in the heatsink prepared to receive self-tapping screws. I'm inserting a screw into one of these channels.
Step 5: TWIST HALVES TOGETHER


We don't need the head of the screw, so off it comes. The two halves are rotated together to form a block, but we can't use this method on the other side, so we'll insert a pin.
Step 6: INSERT PIN


Before the pin is inserted, I'm filling the channel with a small amount of that 680 sticky stuff (made to hold nuts, etc., in place). I had some welding rod that was just the right size to snugly fit in the channel, and cut a piece just shorter than the full length of the heatsink.
Step 7: EXAMINE BLOCK


Here I have two heatsink blocks each made using this method. To increase thermal flow through the heatsink, you could additionally add some (typically white silicone-based) heatsink compound between the blocks. Now to see if our fancy pants (hot-house-flower) LEDs will be happy...
Step 8: DRILL AND TAP


Run to your Tap Drill Chart and get the right size drill for your tap. In this case, a number 6 machine screw will be small enough to fit through the mounting holes on your LED. A number 6 machine screw more likely has 32 Threads Per Inch. (You can check this with a thread pitch gauge.) Since we're making holes in aluminum, we require a #36 Drill Size with a diameter of 0.1065 inches. If you're savvy, you know this is close enough to 7/64 inches, and is included in most drill kits. Use that one.
Step 9: MOUNT LED AND STAY COOL


Here we have two number 6 screws holding down our CREE CXA2011 1000 mA LED with a layer of heatsink compound in between.
!! The heatsink compound is important !! This maximizes the heat transfer from your hot-house-flower LED to the heatsink and surrounding air.
Mounting the LED across the gap between the heatsink sections also helps stitch it together.
Our constant current supply is offering no more than 700 mA at 40 volts to this blinding point source of light. The question is, will it stay cool? We plug it in for a few minutes, and it's clear to see that this LED will need a major chunk of aluminum. So, what's the point of this charming heatsink shape for use with high power LEDs? It should work well for a central cluster of two or three 3-watt devices, but you knew that...


