

Introduction: Managing Configurations on Your ESP8266 Using WiFiManager


Hello everyone!
In a previous Instructable, I talked about Avoiding hard-coding WiFi credentials on your ESP8266 using the great WifiManager Library.
You can also use the library to manage your Arduino sketch's configurations and in this instructable I'm going to show you how. There is a little more setup steps than the WiFi Credentials Instructable, but it's still very straight forward.
Check out the video or continue reading here to find out how to add it and how it works.
Step 1: What's the Advantage of This?

Especially with the addition of networking capabilities, sketches contain a lot of configuration values such as API keys or server addresses.
Normally you would need to re-program your device to change these values, but using WiFiManager you can configure them easily.
It also makes your sketches more shareable, as you really don't want to be checking in your API Keys, like I have many many times!
Step 2: What Your Sketch Needs


You sketch will need a couple of things to achieve this setup.
In normal behaviour, WiFiManager will launch config mode if it fails to connect to the WiFi network, which is fine for just WiFi Credentials, but if you are managing other configurations as well you will need to be able to launch the WiFiManager config mode on demand. The easiest way to do this is with a button.
The other thing your sketch will need is the ability to persist your configurations across restarts of your device, I think the best way of doing is using SPIFFS. The code in the example in the final step has methods for reading and saving your configurations to SPIFFS, but if you want to learn more about it Andreas Spiess (the guy with the Swiss accent) has a really good video on it.
Step 3: How It Looks With Configurations


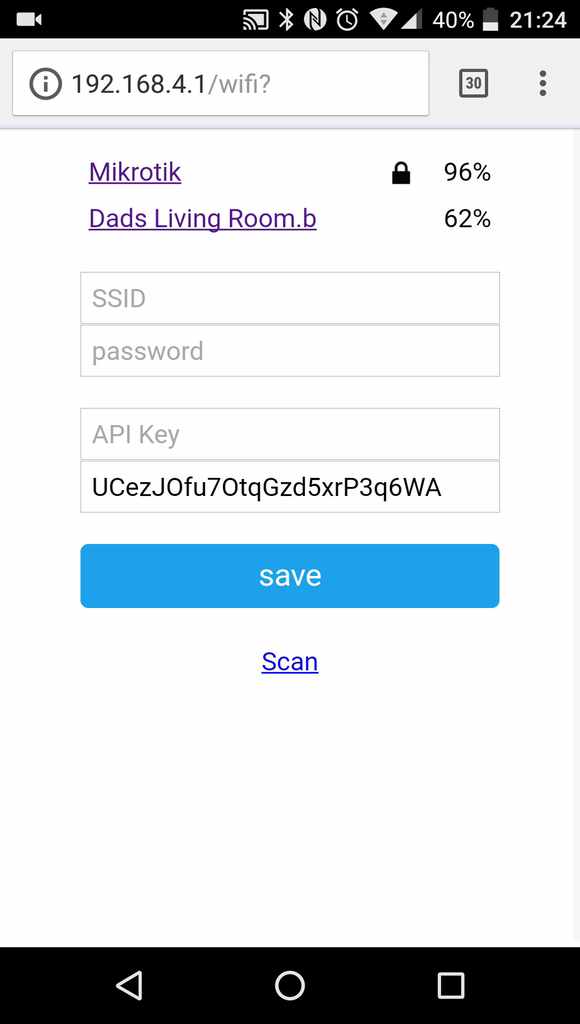
When config mode is activated on the device, either by failing to connect to the previously known network or by the user pressing the button, it will create an adhoc network that you will connect to.
After you connect any requests on your browser will automatically redirect to the devices config portal.
From here you can enter the details of the WiFi Network you want to connect to, and also set the configurations.
Step 4: Adding the Additional Configurations to WiFiManager


Now all that's left to do is to show you add these additional configurations to the WiFiManager portal. I'm going to use an example from my Arduino-YouTube-Api library to show it working.
I'm not going to through all the sketch, but if you have any questions please do ask in the comments!
Note: Each step here corresponds with one of the images from above.
- The first thing you'll see is the "setSaveConfigCallback" which basically is just a method that sets the flag that lets the sketch know it needs to save the config.
- The second thing is WiFiManagerParameters, you need to initialize one for each additional configuration you want. These take 4 inputs:
- ID (not overly important, just make it unique)
- Placeholder (example shown in image 3)
- Default value (as shown in Image 4)
- Max Length (limits the length of the value the user can enter)
- You then can read the values from the WiFiManagerParameters using the "getValue()" method.
- The autoConnect line is where you set the name of the adhoc access point that you want config mode to broadcast, I've also added a password to it for additional security.
Hopefully you find this useful and as always if you have any questions please ask!
Thanks,
Brian

![Tim's Mechanical Spider Leg [LU9685-20CU]](https://content.instructables.com/FFB/5R4I/LVKZ6G6R/FFB5R4ILVKZ6G6R.png?auto=webp&crop=1.2%3A1&frame=1&width=306)


