

Introduction: Mini Ramp (Mini Half Pipe)


This instructable will walk you through everything you need to know in order to design and build your very own miniramp for skateboarding, rollerskating, etc.
Supplies


Depending on the size that you decide to build, materials will vary. In this case, I wanted to create on that would fit a space at the back of my yard, giving me an area of 10 ft. wide by 26 ft. long. When building a miniramp, best practice is to divide any ramp width by two if it exceeds 8-10 feet (for example if you want to build a miniramp that is 12 feet wide you would make two 6 foot wide and connect them together) to maintain rigidity. Being 10 feet wide and bracing in the middle I decided to use one section rather than two. 3/4 inch plywood will be used for the sides (you can get 2 transition pieces from a single 4x8 ply so if you only have one section you will need 2 pieces). Lumber should be acquired according to your specifications. I ended up buying bulk 14 ft. 2x4 treated lumber because it was cheaper and I have use for the 4 ft. sections that would be leftover after cutting to size. 3/8 inch plywood is used to cover the surface and 2 layers should be added for structural stability and durability as well as an optional top surface. In my case I decided to use 2 layers, followed by a coating of weatherproofing stain as well as weatherproofing paint that made the ramp smooth enough as would have been if using a masonite or other final surface. Coping is up to you on material but I would recommend using fence posts as a cost-effective option although there are several more expensive steel options out there. Concrete blocks are also useful for levelling a surface if you are building on dirt or grass. You will also need several hundred wood screws that should be long enough to penetrate the 2x4 as well as the plywood
Step 1: Skeleton Assembly


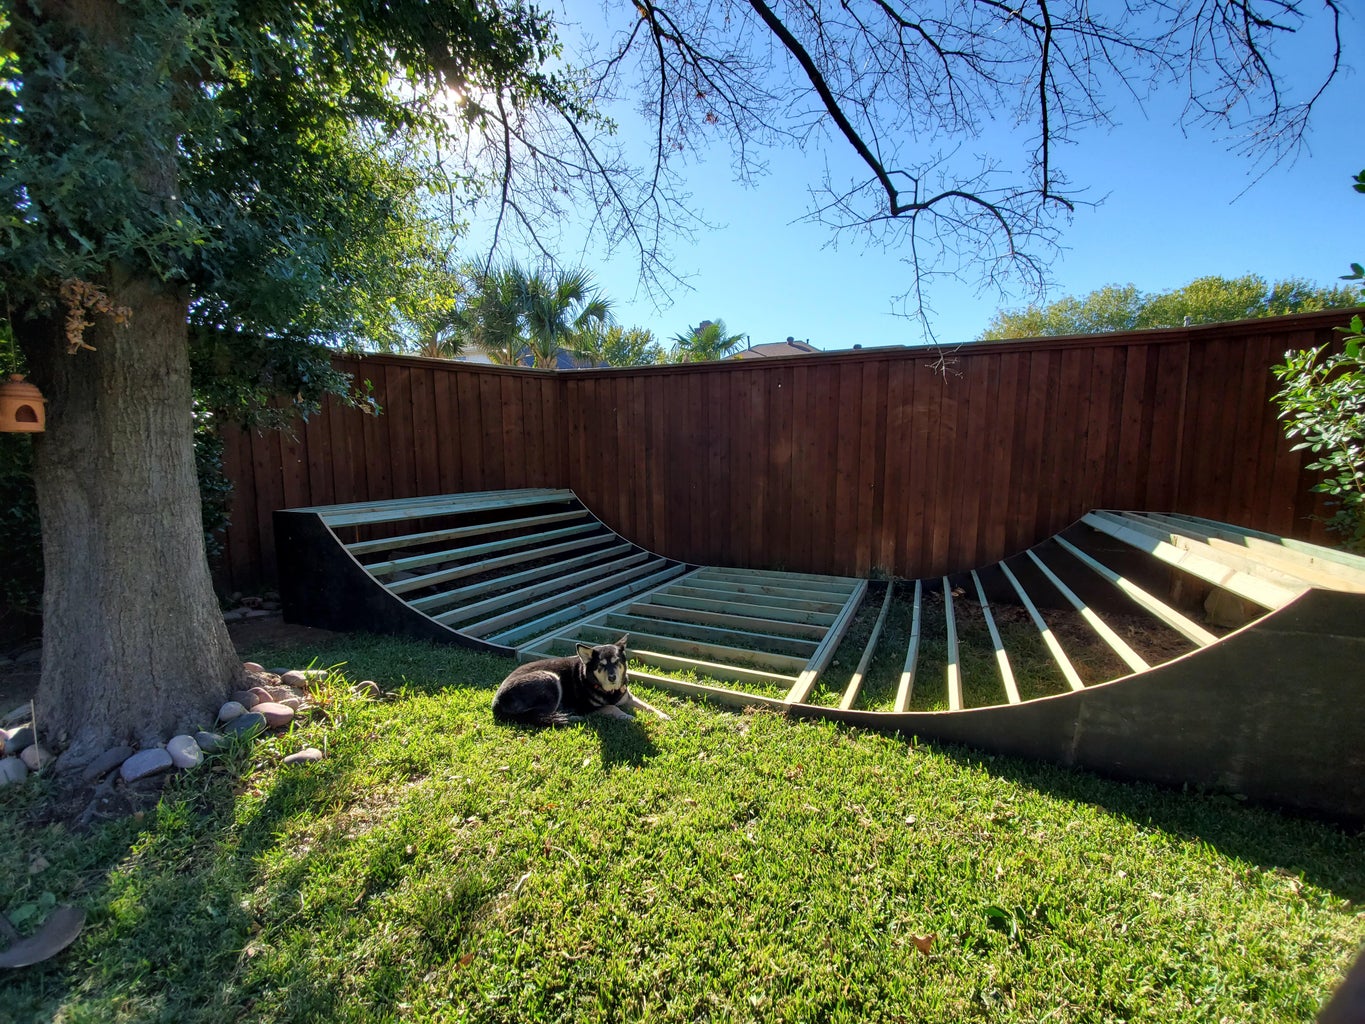

There are plenty of tutorials out there for drawing and cutting your transition pieces so I wont focus on that. Using 2 or 3 people, create your first quarter pipe and duplicate. You can mark out sections where you want the 2x4 to sit and have someone hold it in place while they are screwed in. Once the corners have been attached it should be fairly easy to wedge in the rest. I would recommend spacing of 8-12 inches. The center piece should be long enough for time to transition between tricks and is recommended for supporting 2x4 pieces to flow the opposite way as the quarter transition. Once the skeleton is assembled or during, set in place on top of concrete blocks and ensure that the surface is level.
Step 2: Plywood Covering


Again, with help, and going with the natural bend of the 3/8 plywood, have one person hold the plywood in place while the other screws in, several inches apart, to the 2x4. A chalk line can be used to ensure that the screws are going into the 2x4. *Use 3/4 inch plywood for the deck surface as it should be stronger where people will be standing
Use an alternating pattern as shown in the first image and most importantly, measure twice, cut once. Be sure to leave space for the coping to sit at the top.
Step 3: Surfacing
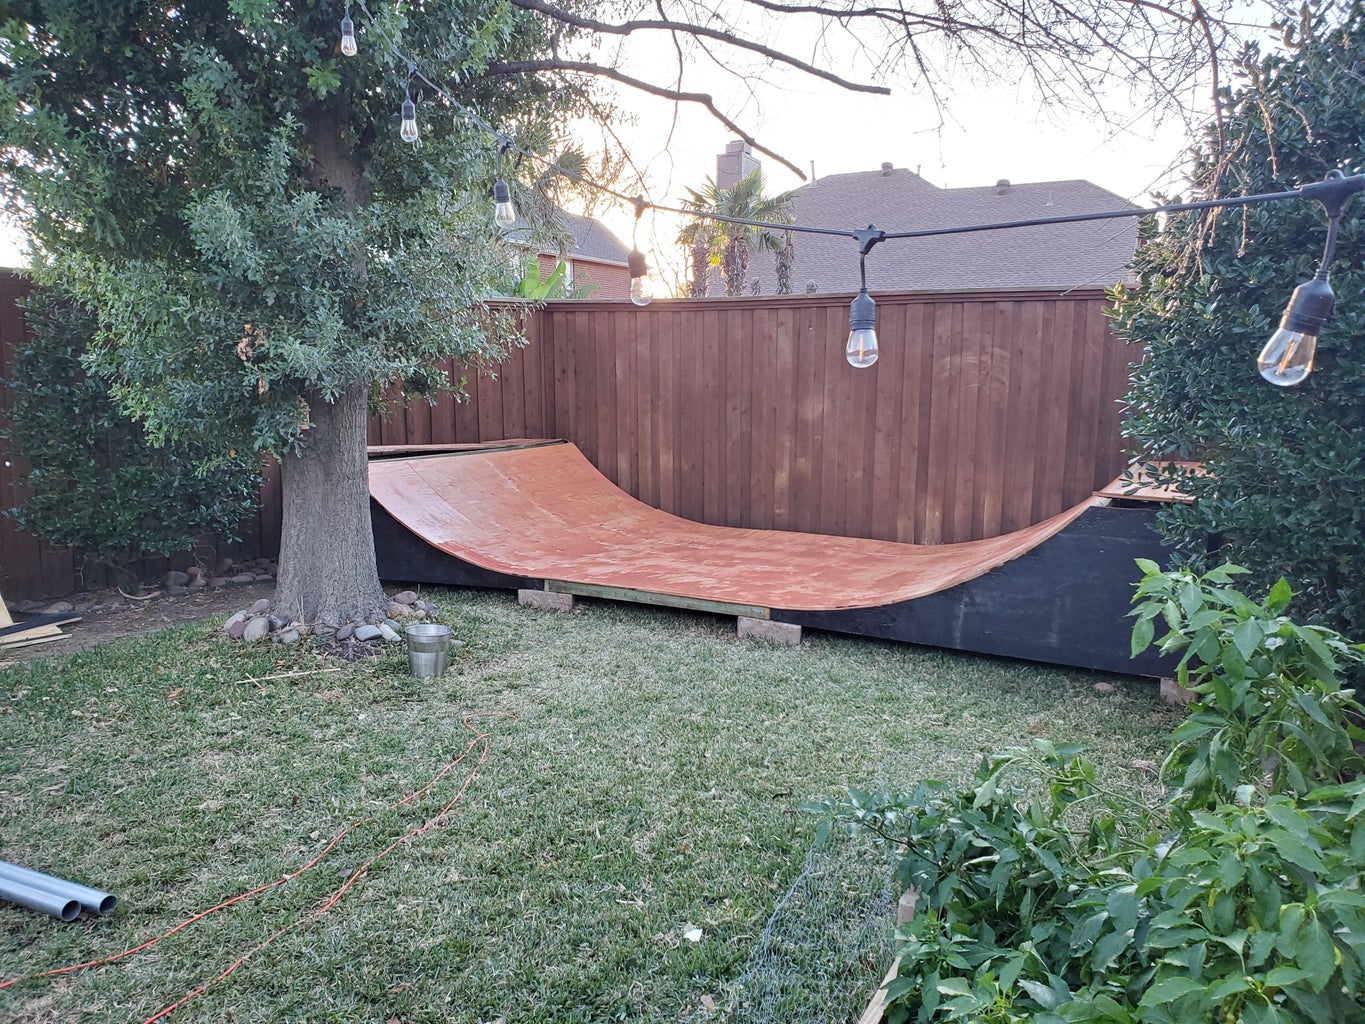


Since this is an investment, make sure to protect it as best as you can to ensure it's longevity. If not using a dedicated surface like skatelite as the top surface, I would recommend an initial weatherproofing stain (which should be let dry completely before painting) and a top coat of thick paint meant for outdoors. I used concrete&wood paint that provides both a protective layer as well as a surface feel that mimics the smoothness that would be provided by an extra top layer.
Step 4: Railings


Railing are optional but a good idea if people are going to be standing on the decks - they can be freehanded to fit the location/depth and painted/decorated to whatever extent you'd like. I chose to mount some old decks to one end as well as wind string lights around them for a better atmosphere when skating at night.
Step 5: Enjoy :)


Participated in the
Plywood Contest


