

Introduction: Model Light House


This lighthouse is 6 ft tall and has a main frame of steel rebar. The sides are sheet aluminum.this model has a working light and provides all of the functions of a normal light house.
To replicate this project you will need:
welder
angle grinder(flap wheel,cutting disk)
45 sq ft of 14 gauge aluminum (sides)
45 ft of rebar construction material.
Spinning light or lamp
Step 1: Steel Frame


The steel frame is a very easy structure to construct. first you make a hexagon as the bas for the lighthouse. I made mine 15 across on all sides. The top was about 6 in across.Once you have both hexagons cut and welded I cut my side lengths of rebar to 5.5 ft. I wanted the lighthouse to be 6ft tall so i wanted to leave some room for the top.Once the entire frame is complete it should look like the pictures above. once you are ready you can move on to the next step.I am sorry i didn't have better pictures of the frame. It was hard because I was the one welding. The picture you see above are screenshots of my own time lapse video of building.It roughly took 25-30 hours to build -Enjoy!
Step 2: Aluminum Siding

The sides of the lighthouse are one of the most important parts and must be precisely done. when I cut the sheets I was lucky enough to have a friend who happened to have press break , which could snap off the aluminum like giant scissors. If you don't not have access to a machine like that , then an ordinary angle grinder will work fine.once the sides are cut i used little steel plates (about 1x2 in) to weld onto the steel frame. i them used sheet metal screws to secure the sides to the frame.I had to use the plates because you cannot weld steel to aluminum.Once the sides are on the lighthouse should be top less.since topless things aren't allowed on these types of websites i couldn't post a picture. But anyway the next step is to put on the top housing and light.Once you have your topless lighthouse you can move on to the next step.
Step 3: Finishing Touches


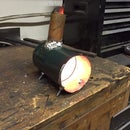
This step includes putting on the light and top housing. First i recommend you start by making the square windows first.The lighthouse top will start to look like this . Notice i didn't have teh sided on at this time i didthis after the top. the order doesn't really matter it's just the way things happened for me. But if i were to do it again i would do the sides first.I purchased a red siren light and took the guts out. the inside components fit perfectly in the top are.Be sure to grind any sharp material.I then wired the light into an extension cord(optional).I welded on 7in rebar pieces to ask as a roof. the lighthouse is complete. it can be customized to any specs you want. it is a pretty easy project hope you enjoy!

Participated in the
Full Spectrum Laser Contest 2016

Participated in the
Homemade Gifts Contest 2015

Participated in the
Rainy Day Challenge


