

Introduction: Scale Model Oil Platform


For materials list and equipment list visit step 1. This is a large model of an oil platform. It is modeled after many you will see in the the gulf of mexico.This is a replica that even flares out the side just like they do during drilling.This project took me about 2 weeks to construct and a total of 40-50 hours.But let me tell you, it as total worth it. this oil rig is a very good conversation piece. no, you will not have it in you living room but its cool yard decor. Everyone who has ever soon mine has asked me to turn it on.Once people see that it produces flames just like the real ones they were all amazed. If i where asked if I would do it again, I would say yes. It was not only fun building it , its a great pleasure playing with it once the build its over. I don't recommend painting it only because i feel it ruins the industrial look.If it is going to be an outside piece they sell clear coat paint at your local hardware store.
Step 1: The Video Has Pictures of the Build, Working Replica of a Offshore Oil Rig.
To make this oil rig you will need:
welder
angle grinder(flap wheel,cutting disk)
Blow torch
20 sq ft of 18 gauge steel (platform)
20 ft of 1/4 in rod
20 ft of 1/8 in rod
16ft of Rebar construction material
copper brake line(optional)
1in diameter copper pipe(optional)
1lb propane tank
propane valve, hose and hookup.
2 ,1/in cast iron 90 degree elbow
1,1/in cast iron nipple connector
5 in diameter steel pipe, 5 ft
caution: this indestructible is to be done under adult supervisions and extreme caution, welders can reach 2500+ degrees and can cause third degree burns.There is also a live propane tank 2 ft away from a flame, it is housed in a steel pipe for added protection from flame.I just ask you be safe during this build.
Step 2: Constructing the Base.

To construct the base you will take 9 square feet of the sheet steel and weld on you four 5in tubes. Then after that is finished you can weld on (8) supports running from the sheet to the tubes. Now add in rebar on top of the first layer ( 3 on each side) . once the rebar is welded on you can now add another 9 sqft of the sheet steel on top. once everything is welded , secure, and ground to a smooth surface you can move on.
Step 3: Adding in the Gas System

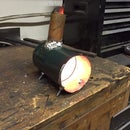
A 1lb cylinder of propane will fit in the in diameter tubes.I used a hole saw to drill threw both layers of sheet steel.On hole for hose other for valve .I used a valve/ hose system of a old colman grill. Then cut the grill adapter off and put it into a copper pipe. the gas cylinder will be secured by screwing on the valve on the other side of the bottom hole. this will hold up you gas canister. you will want to feed the hose up the second hole.The i cut a hole in the bottom of square tube.Use tape to mock everything up ,to make sure it looks right. then weld . once you do weld its done there no going back. I fallow by feeding the hose threw the top two holes.Then you can create a nozzle for the gas to come out of . I used some cast iron angles to create a tight bore nozzle which kept the flame in a tight grouping.The smaller the end hole the bigger the flame will come out because of the increased pressure.Once the gas system is done you can move on to the next step. VIDEO:The video is what you gas system should look like before moving on.
Attachments

Step 4: Drill Tower, Flare Tower.
I do now have picture of me building the two trussed towers because they didn't take much time at all. These towers consisted of 1/4 rod as the main frame then its 1/8 in rod as the truss supports..Make sure the smaller tower is wide enough to fit you flame tube threw the inside.There are no real exact measurement you have to fall , unless you make all you angle the time. Just stick to a three X pattern on each side.Once both towers are fully complete you can move on to the next step.
Step 5: Assemble


Once you have the important parts done you can start mocking up the parts ,to make sure everything look good.Now you weld all the pieces together so you get a secure ,study oilrig.You rig should look like the second image in this step. (no sides,no helipad)You can use you flap wheel disk on the angle grinder to smooth the welds. It give the oilrig a clean look. The grinding is totally optional and up to you if you are proud of you welds and want to see them ,then leave them.Once that is complete then you can move on to the final step.
Step 6: Final Steps


Now that the base of the oilrig is finished it's all cosmetics from here. You can use (optional) some of the sheet metal scraps to use as walls on the square tube. I thought it just finished it a little.I added in some 1/4 in rod I had left over just to finish the platform floors, the trusses on the outside of the rig. It helps support the weight and makes it look a lot better.If you are clear coating it now is a good time. You can add a helipad like I did it make it look more realistic but is completely up to you. Now you oilrig should look like mine and flare out the side. Thank you for your time, i hope you enjoy!

Participated in the
Rainy Day Challenge

Participated in the
Full Spectrum Laser Contest 2016

Participated in the
Before and After Contest 2016


