

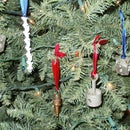
Introduction: Piston Business Card Holders


The most common form of advertising is a business card. When your looking for a customer to put faith in the fact you can do the best job the every detail in your business should stand out including your business card holders. And most of the card holders look the same. Give your mechanical minded friend something unique that says something about him or her.
I started out with this project envisioning a single design that was both anodized and etched. However during the anodizing my power supply blew out the fuse and apparently the bridge rectifier. Now while these can be fixed I decided to proceed with modifying the project to work without both processes. I honestly think this was a good thing as after completion and I really liked the embossed look that I could never have gotten with my original idea.
For this project you will need:
A small engine piston (I used one from a 4hp quantum engine)
Soap and Wire Brush if you use a used piston
A Dremel Tool
A file
Ecrafter or Exacto Knife
Tape or in my case adhesive backed vinyl
Paint
Step 1: Clean the Piston

I started with 3 pistons from small engines that I had tore apart after they were junked(I came up with the idea when we were sorting metal for recycling). First off I had to clean the pistons as these were used items. I put the pistons in the ultrasonic cleaner and then wire brushed them as you can see in the picture. The cleaner the piece is the better it will look after painted.
Step 2: Cut the Slots for the Cards


I cut 2 slots to hold the cards in the pistons with a dremel tool and filed down the edges so that they were not sharp. It shows pride in your work to have smooth edges and I guess it would be possible to get a metal splinter from where the Dremel cut the pieces out. If you don't have a dremel, then use a hacksaw or better yet a mill if you have one :)
Step 3: Apply the Decoration

I applied flames to sides of the card holder here for a little decoration. The flames were done in Inkscape. I can send you the file if you would like. I took the easy way out and used an ecraft my girlfriend happened to have to cut them out but I also could have cut them out of tape with an exacto knife. If you have a laser cutter then you can also engrave the image with that.
Step 4: Paint and Finnish the Card Holder


The first one is a bronze one that looked so nice with the embossed look I did not tear off the stickers and go for the engraved image. The 2nd one has 3 coats of paint before I removed the sticker then a 4th coat after making it look like it was engraved without the work or tools necessary to do this. The silver one in the 3rd picture is just one that was painted without the decals applied. I had planed to apply them after I was finished but so far I have not, as I kind of liked that each one was different.
In the end, the one I liked the best was the farthest from my original idea. This minor hickup in my plan worked out in my favor this time and I will be sure to try to remain flexable on my next project. Maybe it will lead me to a new destination as this one did.

Participated in the
4th Epilog Challenge

Participated in the
Make It Stick Contest 2


