

Introduction: Smart WATER BUBBLES LAMP


In this tutorial I'm going to show you how to make an amazing Smart water bubbles lamp.
I focused on creating this light decoration mainly using PIXEL LEDs and water bubbles. We can be displayed million of colors and 100+ light patterns from this decoration and we can control easily this by simple mobile application via WiFi.
This project is mainly control by Arduino platform. don't worry if you haven't any knowledge about Arduino because I have simply explained step by step how to make this. So having no knowledge about Arduino will not affect to make this. After you referring this article , you can make it easily by yourself.
enjoy..................
Supplies


Items that we need
- 5mm thickness plain glasses
- 3 feet long aquarium air pipe.
- Bubble release air stones (1 inch)
- WS2812B pixel LED( 144 LED per 1 meter )
- one outlet aquarium air pump.
- silicone sealant glass glue.
- rubber band.
- ESP8266 Node MCU Module
- Arduino Pro mini board.
- some wire & soldering wire
Tools that we need
- Hot glue gun
- soldering iron
- 3D printer
- saw
3D printed parts
You will also need to 3D print a few parts for this project. You can print them by using PLA with 20% infill rate and suitable layer height. ( make sure your 3D printer prints to the very correct dimensions.)
Attachments


Step 1: Build the Glass Frame( Part 01)


- First you need to cut the glass according to the given scales.(Figure 01)
- Glue the two glasses on both sides of the base glass by using silicon sealant glass glue. ( This will be filled with water. So make sure sticks them very well so that water does not leak )
- Here I used 3D printed supports to ease the process of gluing the two glasses on both sides very accurately( 3D printed parts are given in above ) .
- Position them on all four corners of the glass as shown in the figure 02 and 03 and glue them together using a removable glue type so that they don't move .
Step 2: Build the Glass Frame ( Part 02)


- Glue the two small pieces of glass on the base glass as shown in the Figure 01.
- Leave this frame for about 12~24 hours until it dries very well.( you can speed up this drying process by using a fan or heat lamp. You can also use a blow dryer to really speed up the process )
- Remove all supports after drying well.
You can also watch this video part to get more clear idea about Building The Glass Frame
Step 3: Creating the Water Bubbles Generating Mechanism ( Part 01 )


- Insert the rubber tube into the WL008 3D printed part as shown in the figure 01, 02
- fix the aquarium air pump with the bubble release air stone ( Figure 03, 04 )
- Now we want to fix above part( air pump with bubble release air stone) with the glass frame. For it remove the extra dried glass glue on the glasses as shown in the figure 6 and 7 (you can use paper cutter for removing them)
Step 4: Creating the Water Bubbles Generating Mechanism ( Part 02 )


- Fix the above part with glass frame by using hot glue( actually hot glue is not a suitable glue type for this task. if you have another glue type, use it).( apply hot glue only where the glass frame and the above part contact together.) ( Figure 01,02)
- Now apply silicone sealant glass glue to seal that area well.( apply glass glue as shown in the picture. but don't apply glue too high near the rubber tube ) ( Figure 03, 04, 05,06 )
- take a 1m long thread and tie it at bottom of the bubble release air stone using super glue ( Figure 07, 08 )
Step 5: Creating the Water Bubbles Generating Mechanism ( Part 03 )


- Take the WL004 3D printed part and send the thread through it as shown in the figure 01.
- Glue that part on the left side wall of the glass frame using a suitable type of gum as shown in the figure 02 ( here I used hot glue. but I realized that they were not very appropriate so I secondary used glass glue)
- Now take a rubber band and attach it with the WL007 3D printed part as shown in the figure 03
- Then cut the rubber band around 4.5 centimeters far from the WL007 part and tie another piece of thread at the end of the cut rubber band.( figure 04 )
- now tie the other end of the thread at bottom of the air stone as shown in the figure 05.
- Fix the WL007 part on the right side of the glass frame as in the figure 07, 08, 09 and 10 ( Be carful ! : You need to make all these fastenings so that when the WL007 part is attached to the glass frame as shown in the figure 08, the bubble release air stone will be positioned as shown in the figure 10. Also the rubber band should not be too tight in this position. )
- Now, stick the WL003 part using glass glue just like in the figure 11. ( This is for avoiding the contact of glass with the bubble stone )
You can also watch this video part to get more clear idea about Creating The Water Bubbles Generating Mechanism
Step 6: Fix the Top Glass


- First, wipe the surface of the base of created glass frame for If there is dust or any stain on the glass clean all of them
- Now, apply glass glue on all the edges like in the figure 02,03,04 and 05 . ( This frame will be filled with water. So make sure to stick them well, so that , water does not leak )
- Fix the glass perfectly and accurately in the balance position and let it dry for around 24 hours.
Step 7: Add LEDs


- Fix the WL005 with the glass frame according to figure 01
- Take a Pixel LED strip( 144 pixel per meter) and cut it into two pieces of 37 pixels each ( Figure 02 )
- Cut 3 wire pieces each in 28cm length. ( 2 wires should be able to conduct 3A current in each) ( Figure 03 )
- Connect the wire connections as in figure 04
- Now stick the LED strip on the left side of the glass frame as in figure 06 ( pay attention to what is mentioned in figure 07)
Step 8: Connect the Esp8266 Module


- Take a ESP8266 module.( make sure to buy an original module. because this uses wi-fi signals. So it may be harmful to you )
- Then upload the WLED software to it. ( you can learn how to upload this software using this video )
- As you can see in figure 04 cover the blue LED on ESP module so that light of the LED doesn't comes out using black tapes
- Now by using a suitable glue type fix the ESP module on the frame as in figure 05
- Now paste the remaining LED strip on the right side of the glass frame as in figure 07
- Connect all the wires to ESP8266 module according to figure 08
Step 9: Connect the Server Motor


- Take a SG90 servo motor and cut its right side supporter.(as in figure 01, 02, 03)
- Now fix a non-flexible metal wire to the longest arm of the servo motor as in figure 04
- Now let's attach WL006 part to the servo motor as in the figure 05 and 06
- Now, when the servo motor is at the 0 degree position , connect the other end of the thread with the servo motor. ( IMPORTANT : Here, The piece of thread should be connected to the servo motor after the servo motor is connected to the glass frame( Figure 09 ), so that the bubble stone is in the position shown in figure 08. Do this accurately with high attention )
- Now using a suitable glue type fix the servo motor to the glass frame ( figure 09 )
You can also watch this video part to get more clear idea aboutfixing the servo motor
Step 10: Connect the Arduino Pro Mini


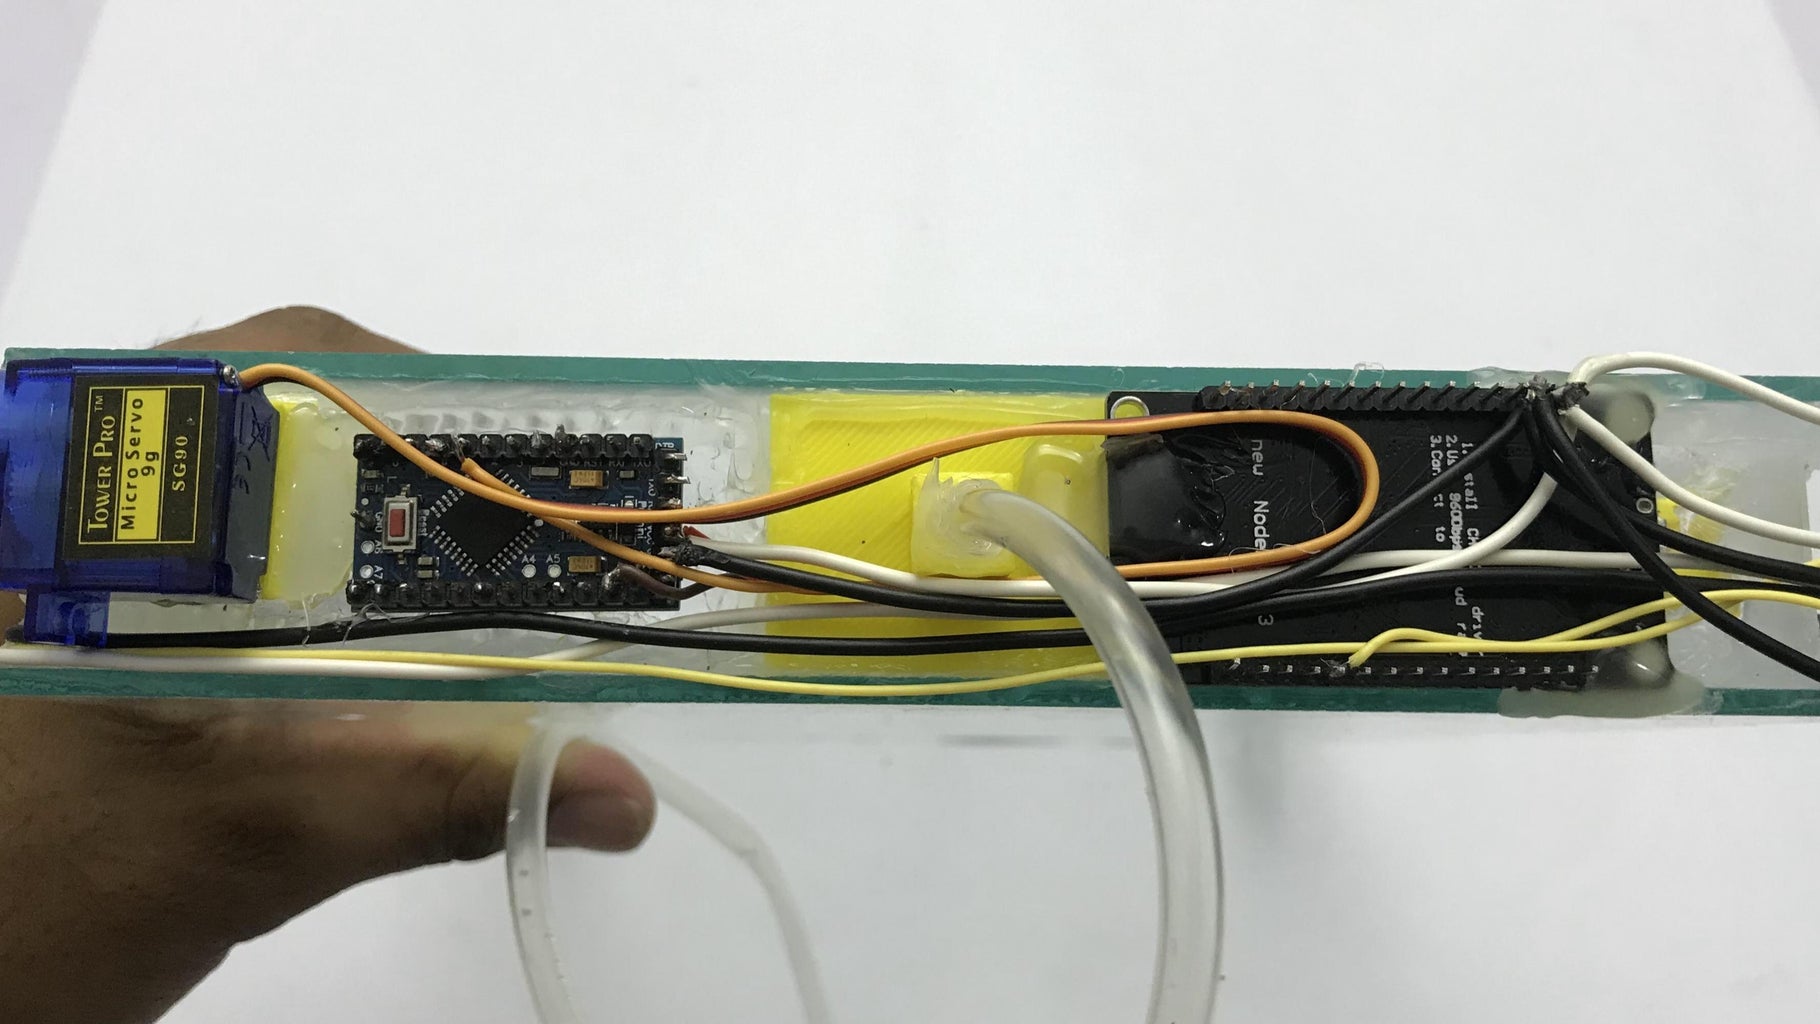
- Take a Arduino pro mini board and upload the code given below.
#include <Servo.h>
Servo MVB;


void setup(){
  MVB.attach(5); // the pin which servo motor attached

  }


 void loop(){
  for(int i=0;i<160;i++){    // the angle at which the motor should rotate ( 0 degrees to X degrees. you can adjust this X value according to your creation )
    MVB.write(i);
    delay(10);
    }
    delay(3000); // the time duration that the motor should stay at X degree postion before rotating the next position

   for(int i=159;i>-1;i--){   // the angle which the motor should rotate X degrees to 0 degrees
    MVB.write(i);
    delay(10);
    }
  delay(3000); // the time duration that the motor should stay at X degree postion before rotating the previous position
2. Now make the circuit as in figure 02
3.Now fix the Arduino pro mini board on the glass frame by using a suitable glue type.
Step 11: Final Step 01 of the Water Lamp


- As in figure 01,02,03,04 and 05 cover the left and right sides of the glass frame with thick cardboard strips
- Now paste black stickers ( each one's dimensions are : 8*20 centimeters ) as in figure 06,07 and 08
- Now we need to stand the glass frame vertically. For that we need to attached the part WL009 to the base of the glass frame as in figure 09,10,11,12 and 13
Step 12: Final Step 02 of the Water Lamp


- Let's paste black stickers which are 3*34 centimeters as in figure 01 and 02
- Now let's build a wood box/cover( you can make it also using 3D printing ) to cover the base of the water lamp as in figure 03, 04 and 05
- Then let's finish the wooden frame by covering it with black stickers ( figure 06, 07, 08, 09 and 10 )
Step 13: Final Step 03 of the Water Lamp


- Let's build a cover to the top of the water lamp as shown in the figure 01,02 and 03
- Now fix the the rubber tube which comes from the water lamp to one outlet aquarium air pump. (Try to use a soundproof air pump for this )
- Now fill water to the finished water lamp.
- Then provide a 5V voltage and around 5A current.
Step 14: Let's Check the Final Output

First Prize in the
Colors of the Rainbow Contest

![Tim's Mechanical Spider Leg [LU9685-20CU]](https://content.instructables.com/FFB/5R4I/LVKZ6G6R/FFB5R4ILVKZ6G6R.png?auto=webp&crop=1.2%3A1&frame=1&width=306)


