

Introduction: How to Cover a Cake With Fondant


Covering a cake in fondant is not difficult. My best advice is to take your time and stay focused. Like anything, the more you work with fondant the easier it will become to achieve a smooth finish. Don't worry if you have a few folds and creases. Especially if this is your very first try. You will eventually find a rhythm and technique that works for you.
This instructable is assuming you have a baked cake at a stage ready to cover with fondant. If you don't have this complete yet, please refer to my Cake Decorating 101 collection for all the previous steps you need! In the collection you will find many useful tips and tricks for cake decorating!
Step 1: Rolling Fondant

In order to cover a 6-inch cake (that is 4-inches tall) you will need:
- approximately 12 ounces of fondant (I am using white fondant for this cake but feel free to choose your own unique color palette!)
- rolling mat
- rolling pin
- needle or sharp knife
HOW TO ROLL FONDANT
1. Knead your fondant into a pliable ball and place your fondant (colored or not) on a silicone pastry mat. If you do not have a silicone mat you will need to spread a thin layer of vegetable shortening on a clean work surface and roll your fondant on that. There are a lot of bakers that use cornstarch or powdered sugar to roll out their fondant. I find that it dries out the fondant and makes it more prone to cracking. If you are a beginner I recommend shortening!
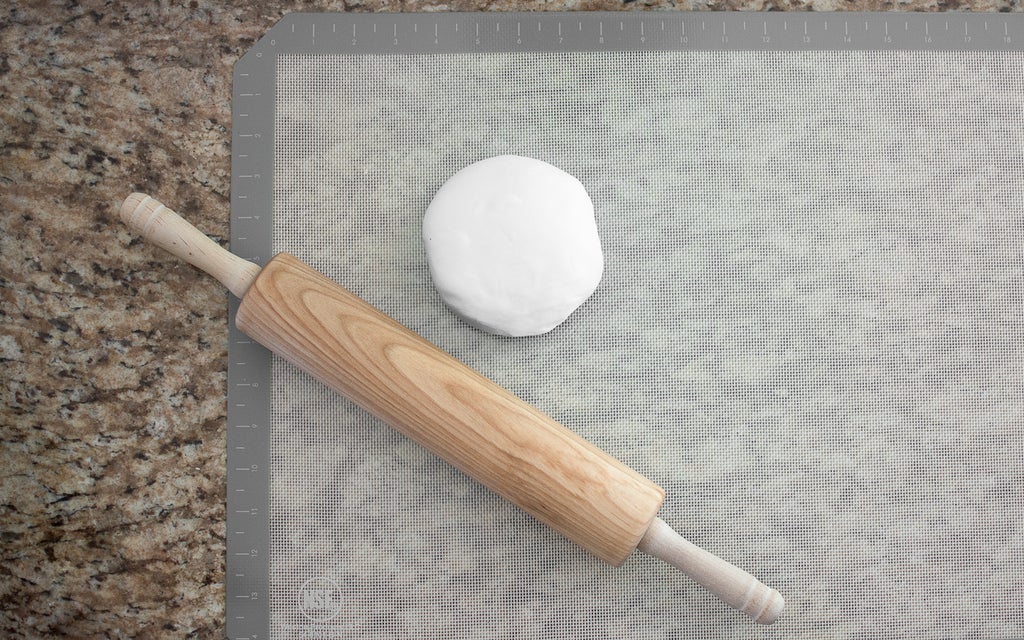
2. Press the fondant into a thick disc shape.
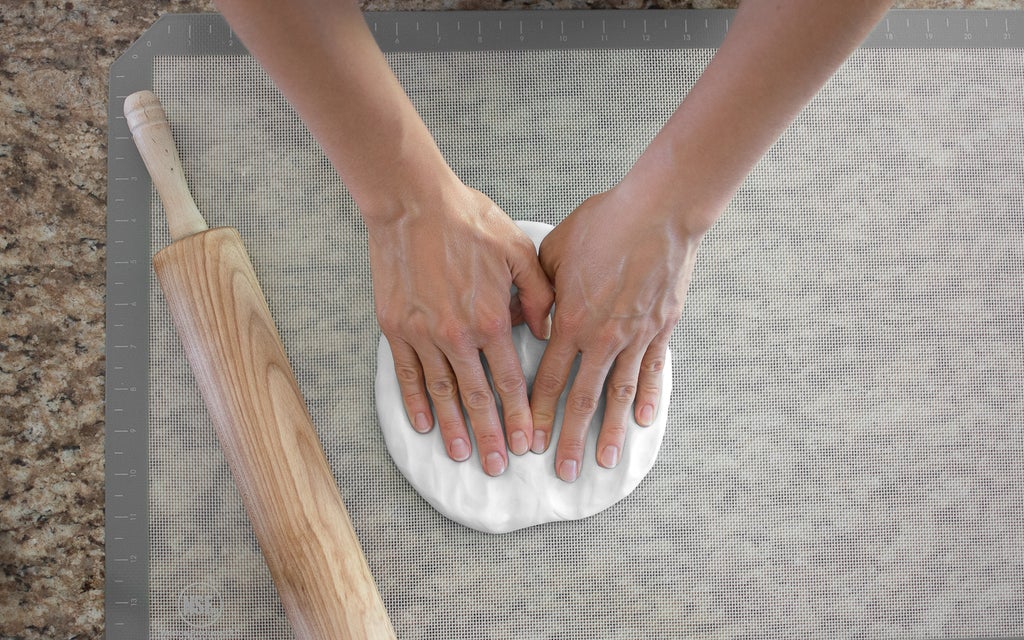
3. Using a rolling pin, roll the fondant making sure to keep the shape somewhat circular.
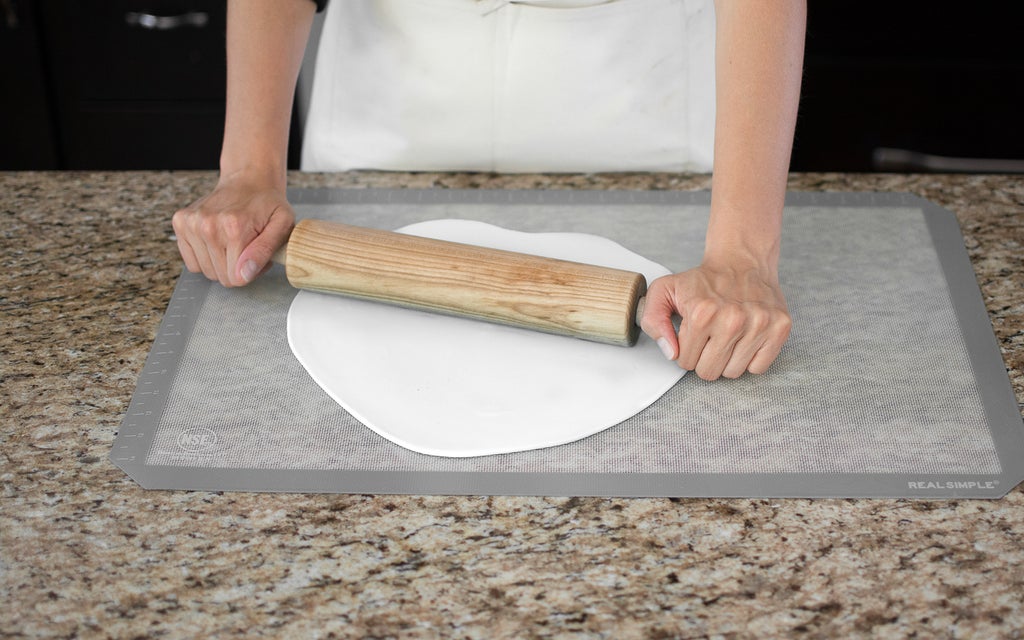
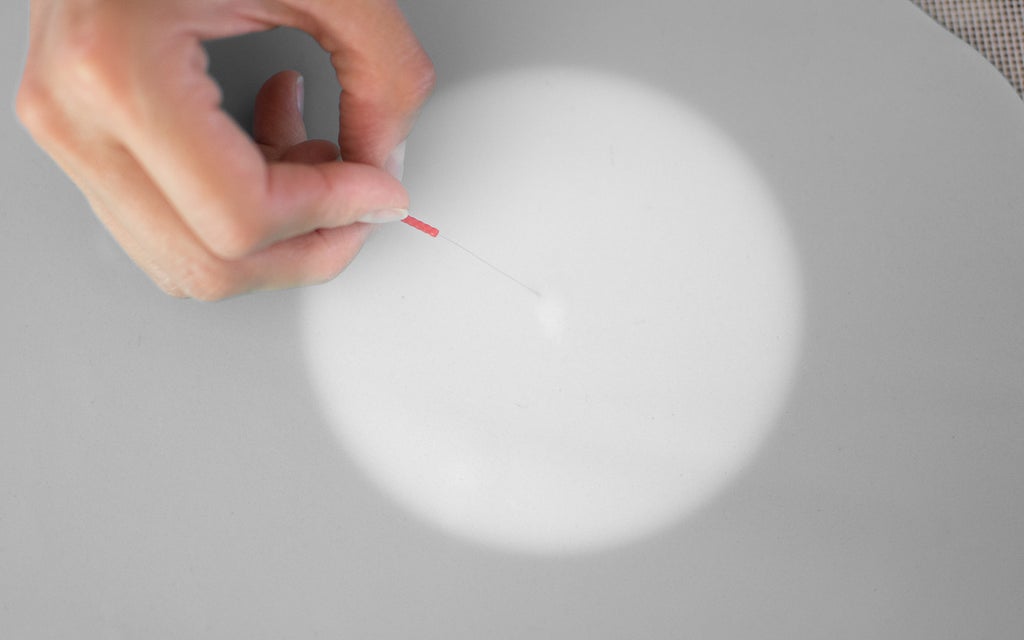
4. Unless you completely luck out you will start to notice bubbles in the surface. These will need to be popped. I use a very thin acupuncture needle to pop bubbles, however, a sharp knife tip or a clean straight pin will do nicely. Smooth the bubble with your fingertip. Keep rolling and popping until the fondant is about 1/8 of an inch
thick. If you roll any thinner the fondant will have a tendency to tear
or crack as you work with it.
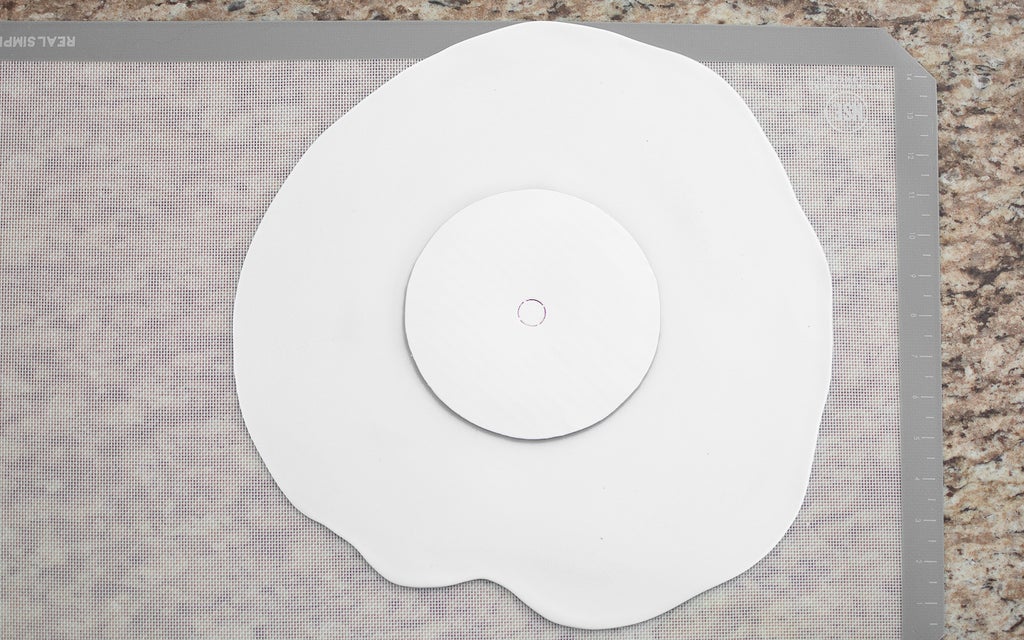
5. Place a cake board in the center of the rolled fondant. If you have at least four inches all around the cake board you have rolled the fondant large enough. If you don't, keep rolling until you do!
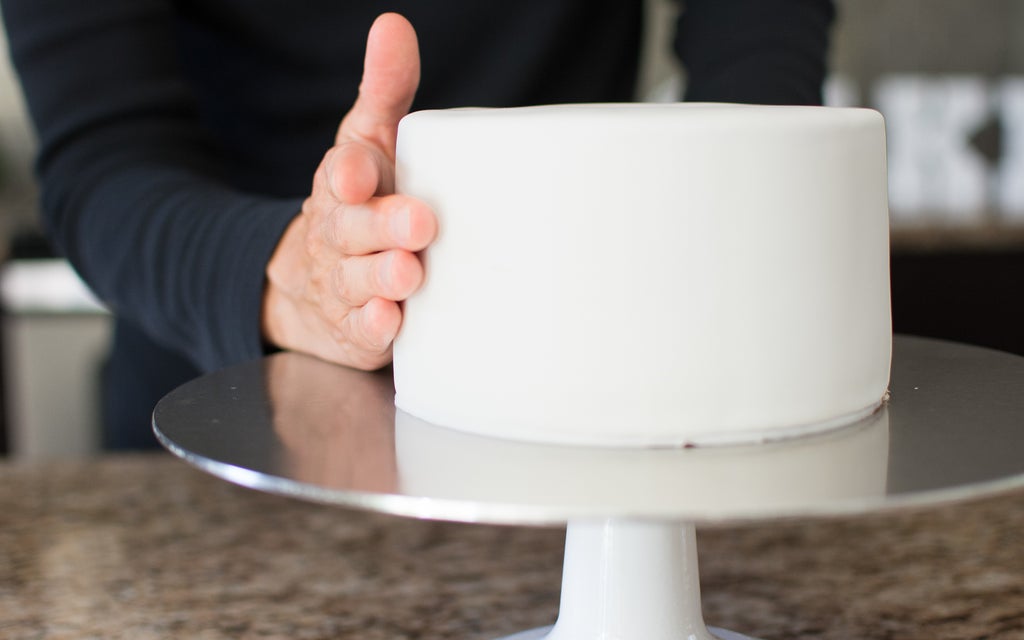
Step 2: Covering a Cake in Fondant

I highly recommend having between five and ten minutes of uninterrupted time to complete this step. The last thing you want is for the fondant to dry out before you can apply it properly.
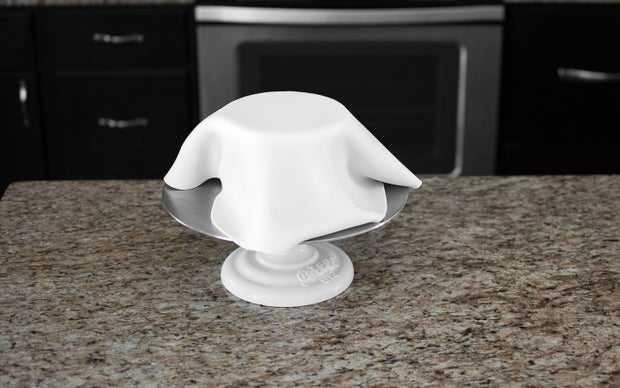
Once you have the correct size and thickness move your ganached cake close to the fondant. You want the least amount of travel distance as possible.
HOW TO APPLY FONDANT
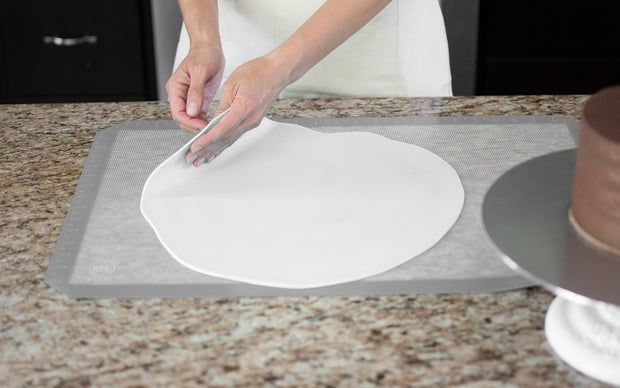
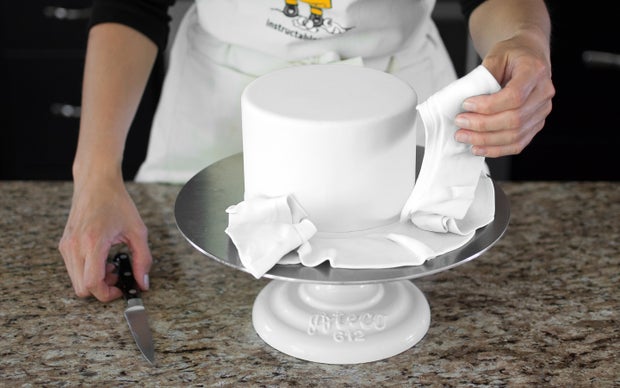
1. Gently lift one edge of the fondant and place one clean hand and forearm under the fondant. Lift it high enough to get your other arm underneath.
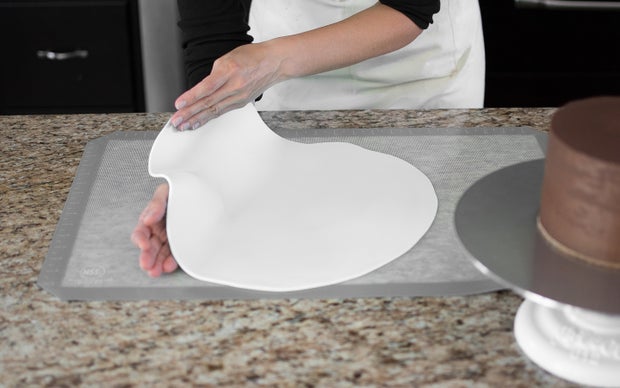
2. Lift and center the fondant over the cake and gently lower it down. Do not pull or stretch the fondant. If you see a place where the fondant is not long enough and isn't completely covering a side it's okay! Gravity (and working with the fondant) will ultimately stretch it downward anyway!
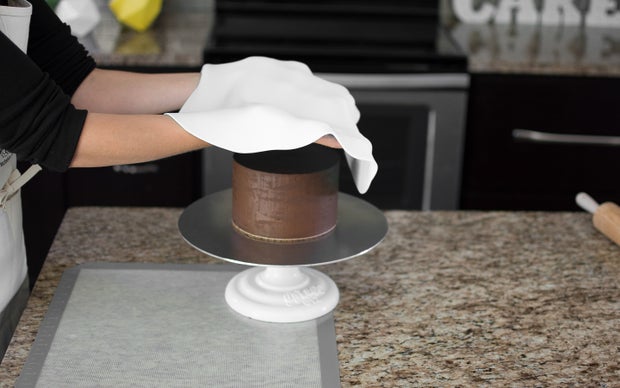
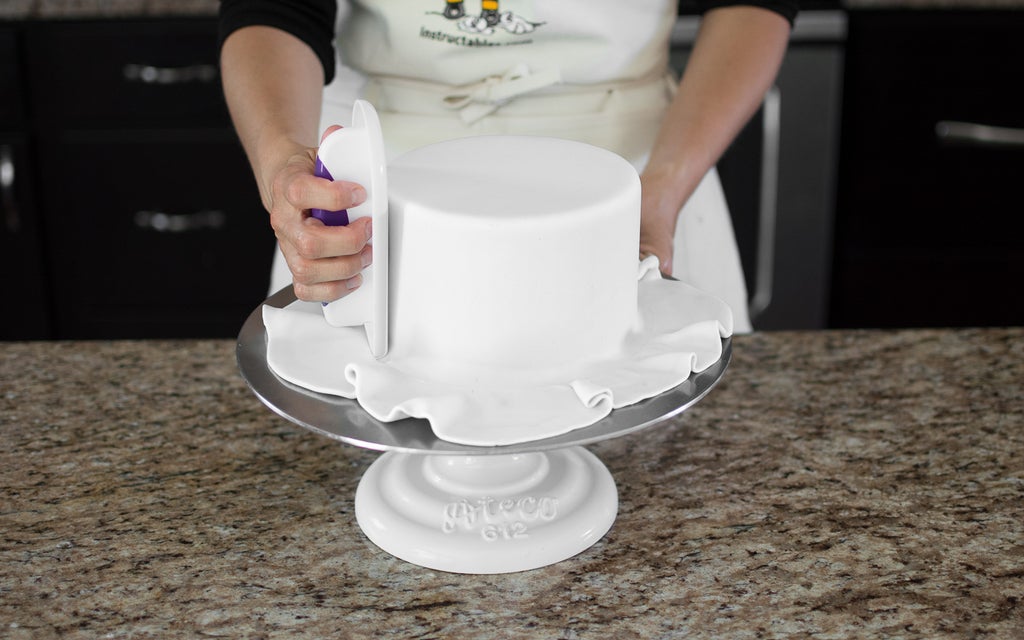
3. Gently slide a fondant smoother all over the top of the cake to remove any air bubbles that might be under it. You can also use your hand for this step, however, you are more likely to make dents in the fondant.
4. Now that the top is smooth start working the top half of the cake. Smooth the fondant all around with your hands by lightly pulling on the bottom edge of the fondant while pressing in a downward motion with your other hand. Continue this process until the fondant is smooth all around the cake and no wrinkles or folds are present.
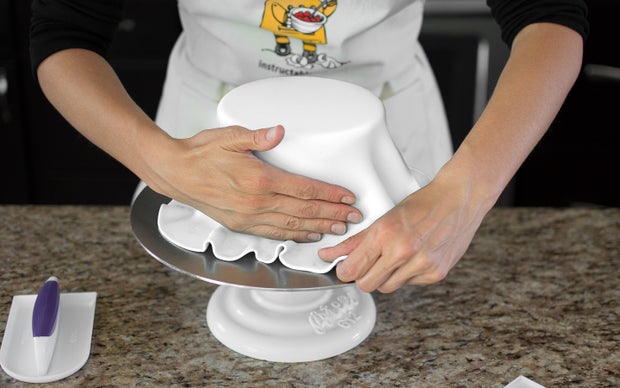

5. Smooth all sides with the fondant smoother. You can press relatively hard for this step. If you notice any air bubbles in the sides you will need to pop them in the same way as we did when rolling the fondant.
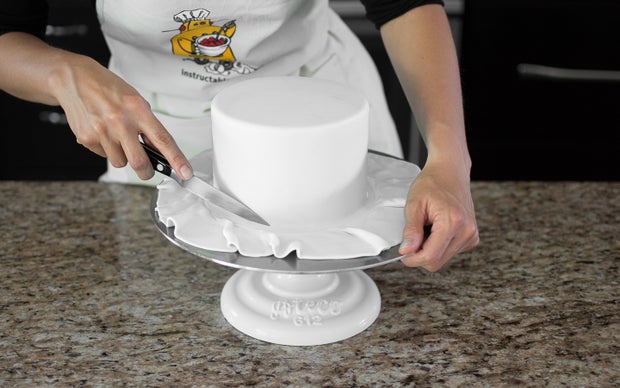
6. Using a sharp knife and holding it flat against the cake trim away the excess fondant. Knead the fondant back into a cohesive ball. Wrap the fondant and save for another cake!
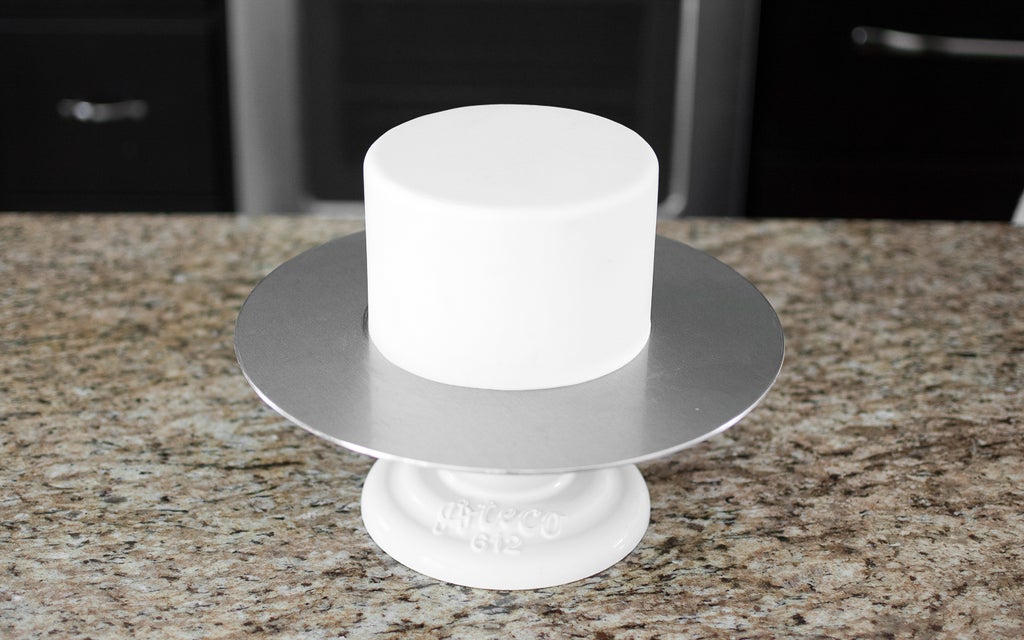
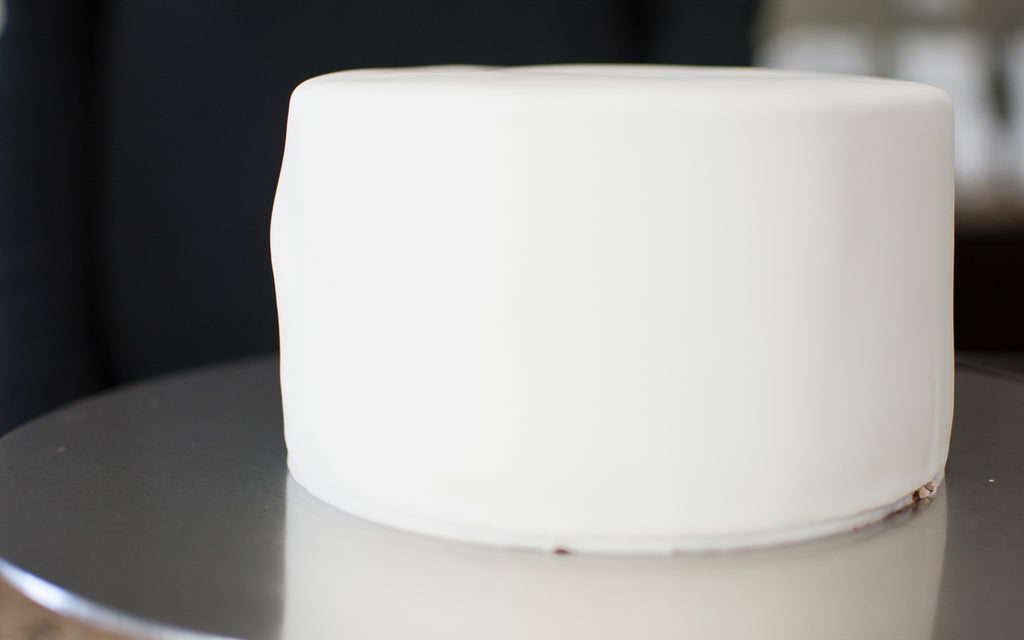
7. Your cake should look something like this!
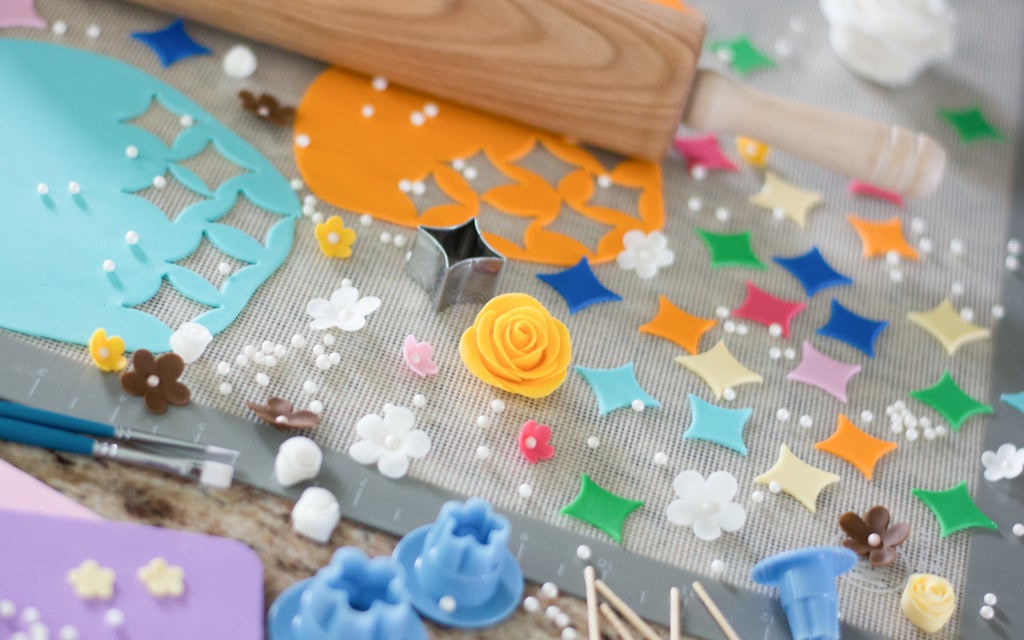
For more tips on decorating cakes with fonant, check out my Decorated Party Cake instructable!
Step 3: Troubleshooting Fondant Issues

There are a number of things that can potentially go wrong while working with fondant. I will address a few of the most common problems and offer suggestions as to how to solve them.
Dry Fondant
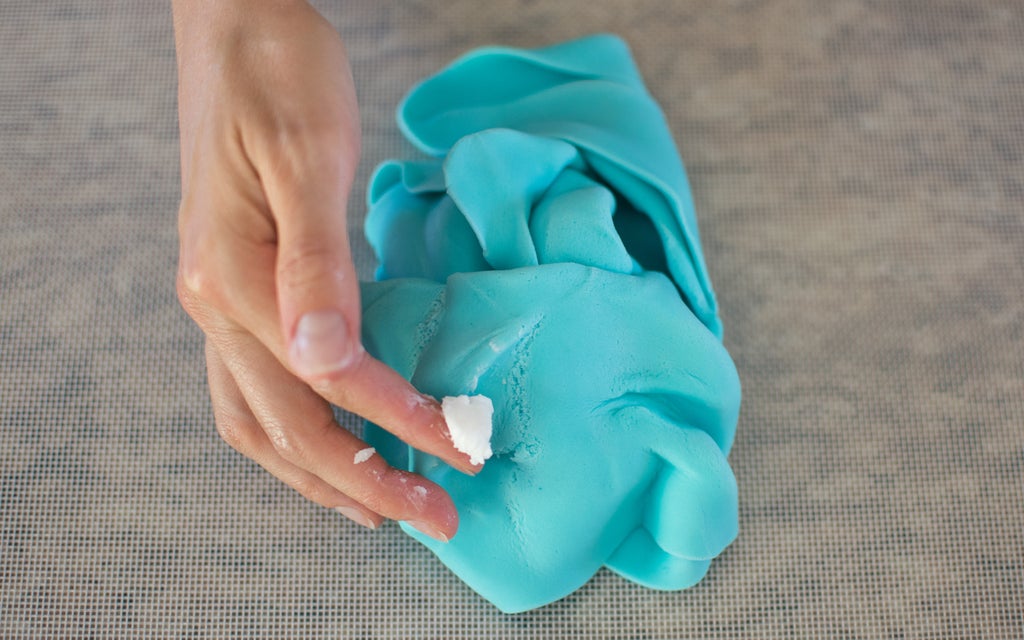
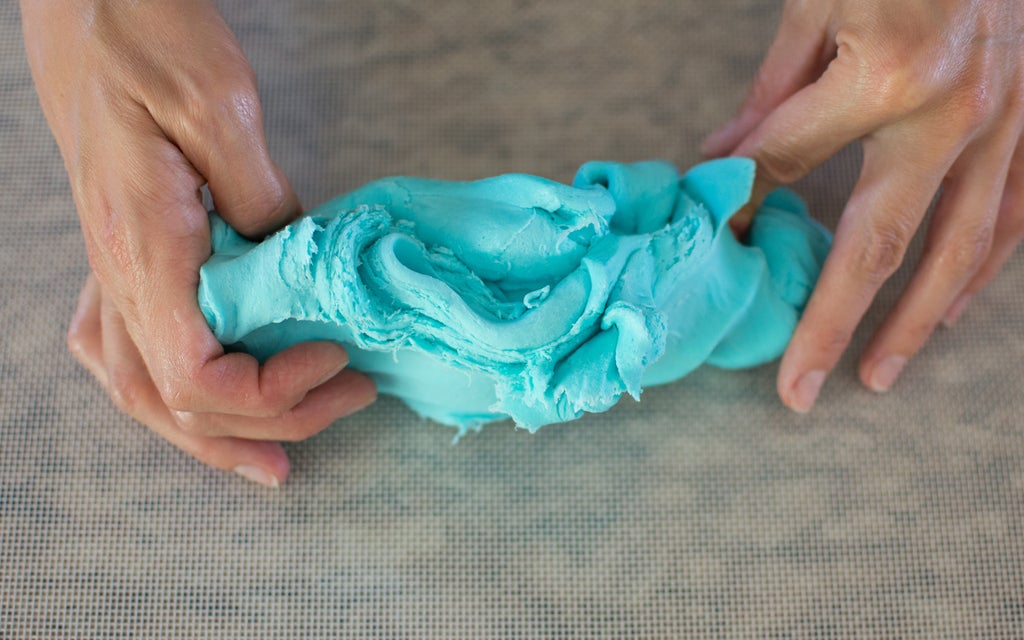
Fondant can dry out or look dry for two reasons: 1. Fondant has been left out in the open air for a number of hours. 2. A lot of food coloring has been mixed into the fondant. This is easily solved by adding vegetable shortening to the fondant and mixing thoroughly. Start with a small amount and keep adding until you have a soft pliable piece of fondant again.
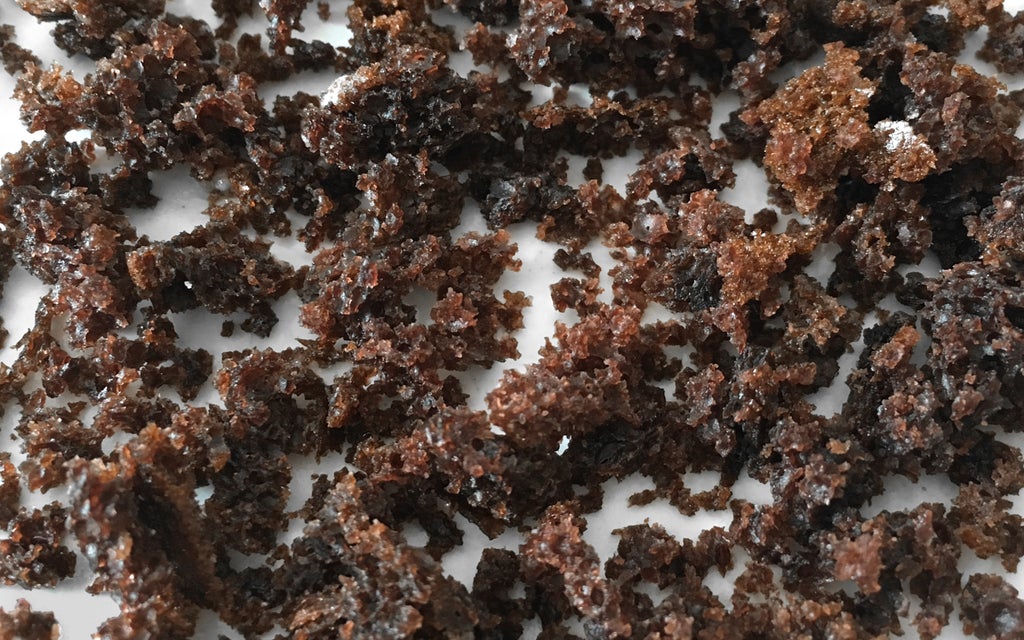
Cracks in Fondant
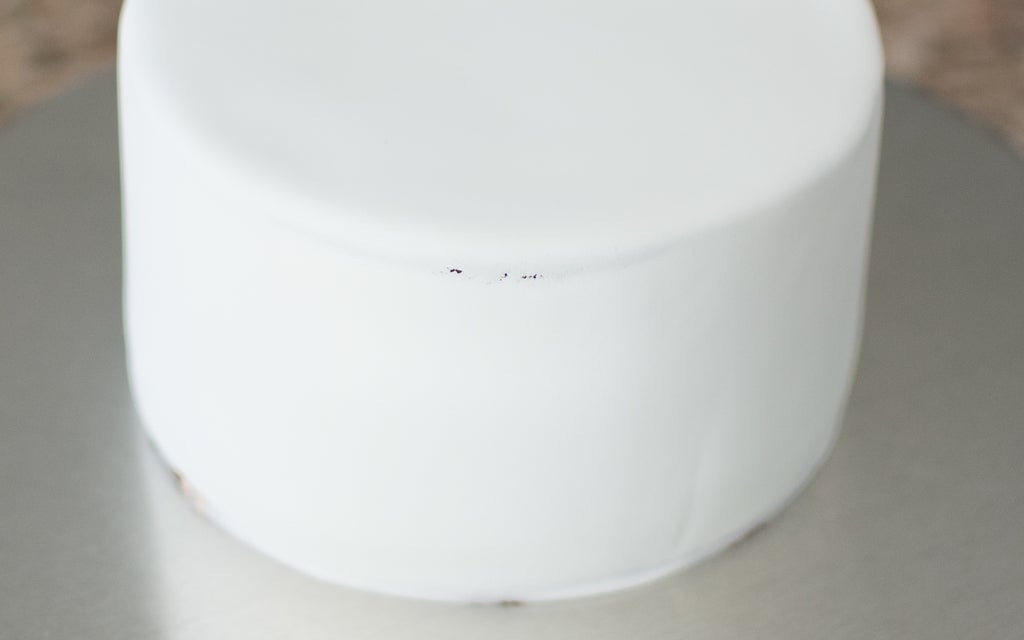
Cracking typically occurs when the fondant has been rolled too thin. When you try to work with it on the cake the thin part will start to pull apart and tear. If the crack is small like in the photo the easiest thing to do is either cover that part of the cake with a fondant decoration or turn the cracked side to the back! If the crack is large, you can mix a small amount (pea sized) of the same color fondant with a few drops of clear extract until you have a thinned mixture. You can then apply the mixture to the crack like spackle! You will be able to see where it has been patched but it will keep your fondant from falling off the cake if the crack is sizable.
Air Bubbles
Air bubbles also often occur when you are smoothing fondant on a cake. These can be popped in the same way as when rolling the fondant by poking the bubble with a thin needle and releasing the air by gently pressing on the bubble with your fingers. I recommend going over the cake several times to make sure all air bubbles are eliminated. If you have a small air bubble that you don't see it can grow larger and blow out an entire side of a cake! I have had this happen and it's not fun. Especially after all the hard work you have put into making a cake. I like to poke a hole in the top of the cake that goes clear down to the cake base somewhere that will eventually be covered with a decoration. This will allow air to escape the cake through the path of least resistance.
Cake Board Showing
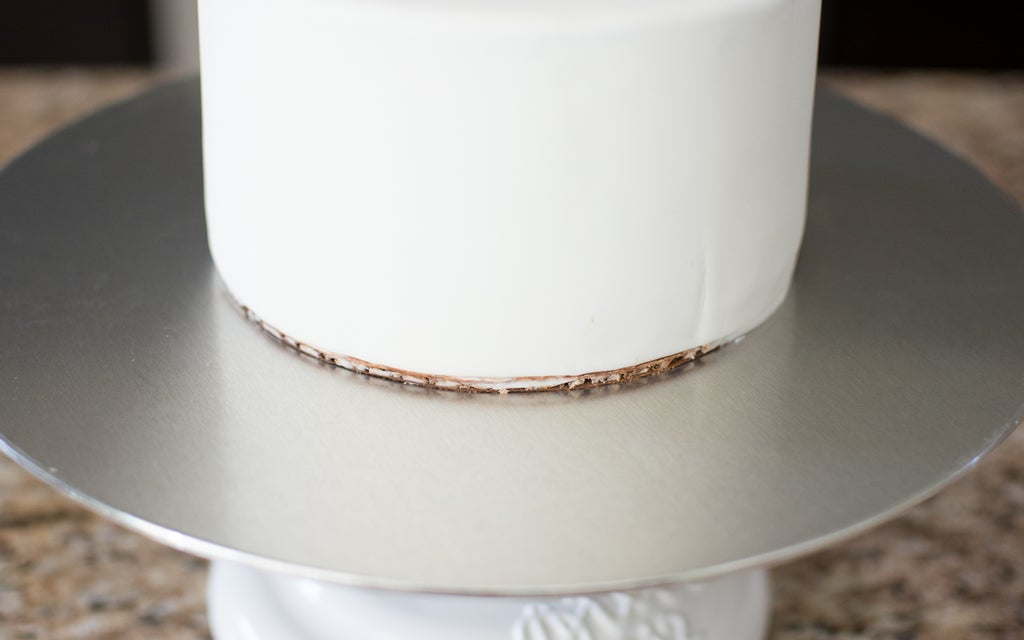
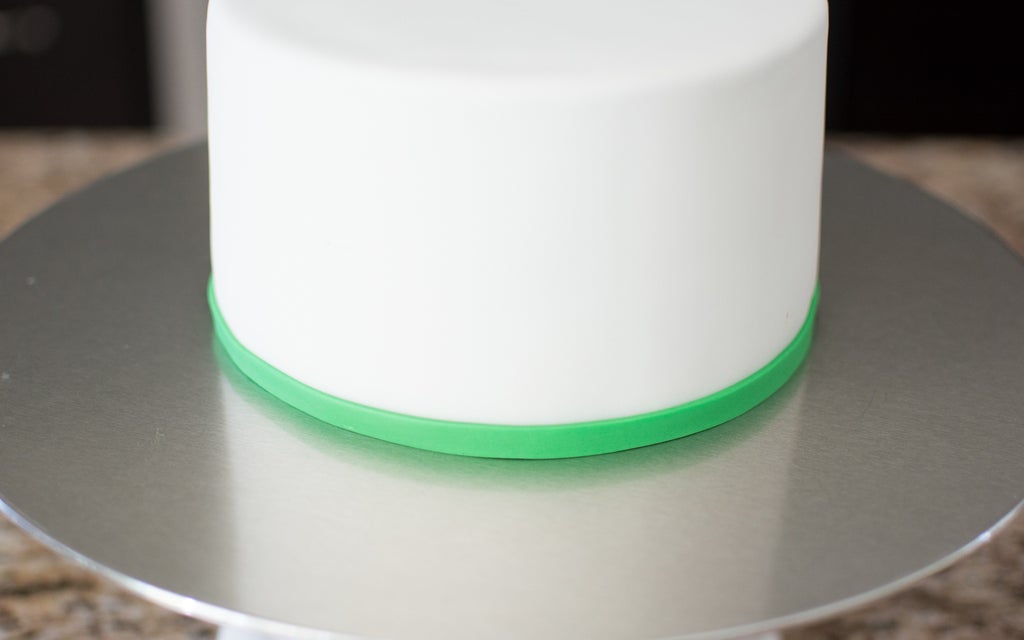
As you practice and get better at working with fondant this will happen less and less. This is a result of cutting the fondant too close to the board and is easily solved. Roll out a color of fondant that coordinates with the design of the cake and cut a strip about 1/4 to 1/2 inch wide. Adhere it to the cake with extract around the base covering the showing cake board. Cut the excess fondant at the back of the cake and line up the seam.
Lumpy Fondant
There are three main reasons fondant can look lumpy: 1. If buttercream is used to cover a cake instead of ganache it is much harder to smooth and often has a lumpy texture. 2. If your layer of ganache is too thin and as gravity settles your cake the buttercream filling can start to bulge the ganache between the cake layers. Definitely don't skimp on the ganache!! 3. Smoothing fondant with your hands make it more likely to get lumps.
Dry Cake
Dry cake doesn't exactly have anything to do with working with fondant, however, I thought I would just mention this as it's a common problem in baking. Cake can dry out from over baking and/or from being left out to the open air for too long. To remedy the dryness, you can make a simple syrup to drizzle on the leveled cake layers before you fill and stack them. This will moisten the cakes back to deliciousness! I would suggest two to three tablespoons of simple syrup per layer if your cake is super dry. Just make sure not to get the cakes too wet or filling and stacking will become difficult. I would recommend this Simple Syrup Recipe - it's quick and easy!
Other Problems
Decorations Falling Off — If you find that your fondant decorations are falling or sliding off the side of the cake
this is usually a result of either using too much extract or not
enough. If you get a ton of extract on a piece and try to stick it on
the cake it can easily slide off. Try using as little as possible for
the piece to stick. This can also be a result of the cake getting very
hot and collecting condensation.
Condensation — Fondant does not love to be stored in the refrigerator. If you place a cake in the fridge and later remove the cake it tends to get shiny and slimy. This situation gets worse when the weather is hot and/or humid. If you touch the cake in this state you will fingerprint it like crazy! This is why I don't recommend using a perishable filling that needs refrigeration if you are also decorating the cake.


