

Introduction: Advanced 3D Drawing in PowerPoint

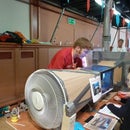
Yes, Thomas above^ is made of 3D shapes in PowerPoint!
I have spent a lot of time trying to get my point across in PowerPoint. Often I have to explain complicated 3D mechanism concepts long before they are properly designed, and 3D diagrams are the clearest way to illustrate these concepts. I call it PowerPoint CAD, and you can get surprisingly good results very quickly once you have had a little practice.
This instructable is aimed at anyone who is familiar with PowerPoint but hadn't realised its 3D illustration potential.
Word of warning: Open Office and other similar applications don't cut the mustard, alas it must be Microsoft PowerPoint 2007 onwards to work as described.
Also note I do not own the trademark of Thomas the Tank Engine or have any affiliation with those that do, I use his likeness as an iconic 3D shape most are familiar with (at least in the UK anyway). I hope no one objects.
Step 1: Setting Up PowerPoint for Drawing
There are some very powerful tools hidden in the depths of PowerPoint that Microsoft appear to have buried for no particular reason. Lets add them to the quick access toolbar so we can work with ease.
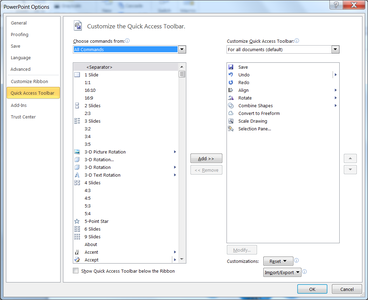
Go to the file menu and click options. Then on the Quick Access Toolbar tab under Choose commands from select All Commands. The picture shows some I have selected at the moment. Merge Shapes is the key one here so add that (note in older versions of Office this was called Combine Shapes as pictured, but now the group has been renamed to Merge Shapes, and the new Combine Shapes is just the least useful action in this group, giving something like a union minus the intersect... sort of). I also recommend adding Align, Rotate and Selection Pane...
Step 2: Introducing the Basics of 3D


Start by drawing a shape. In the example I used a circle.
If you haven't noticed before, to get a nice round circle hold shift as you draw it. Holding control draws from the centre.
Lets round the end of the shape to a hemisphere...
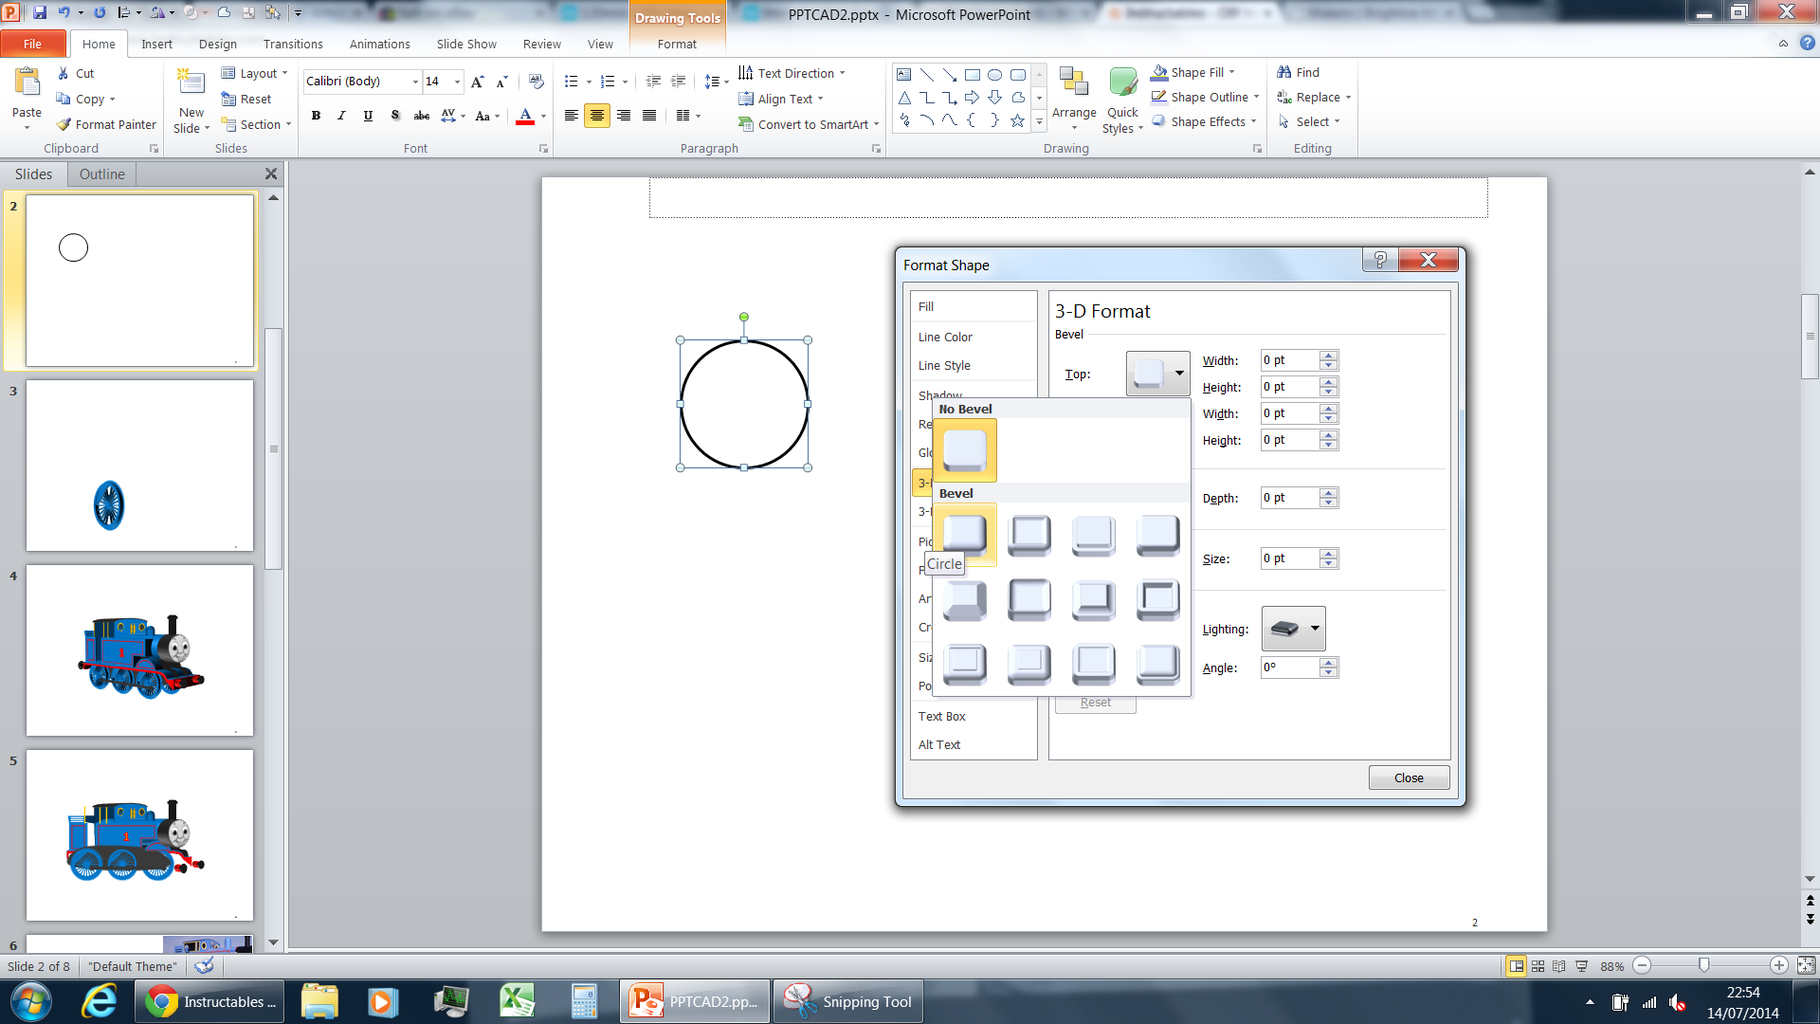
Right click it > Hit Format Shape... > 3D Format > open the top bevel drop down and select Circle
This adds a round bevel to the edge of the circle, and by increasing the width and height (and keeping them equal) the bevel meets in the middle, making a hemisphere. Fill the circle with a decent colour to make the 3D effect more visible. You can add some depth to the shape to add a cylindrical section.
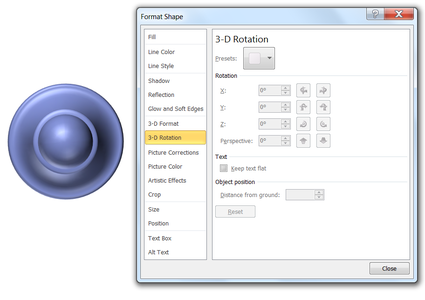
In the 3D rotation tab select a preset from the drop down or move the rotation controls to view your shape in 3D
Note: you have to select a perspective preset before you can add perspective angle to your shape. Annoying huh?
Note the sides look weird and black... The outline is being stretched over the sides. Set the outline to no line and it looks much better.
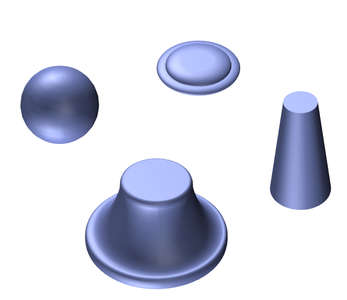
Have a play with different bevels and sizes to see what effects you can get.
Step 3: Building a Shape - Basic


Simple shapes are all well and good but to make most things you need to stack multiple shapes together. You already know enough to start making such 3D shapes
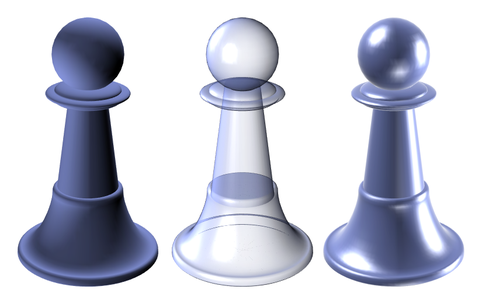
This Pawn is made using 4 circles with different bevels
Piling them in the right order (using either send to front, etc. or the arrows in selection pane) and you quickly have a chess piece to fear if you are sitting diagonally from it in the canteen.
But beware, trying to rotate the piece to different views is a pain. All the parts behave separately...
Step 4: Building Rotatable Group Shape
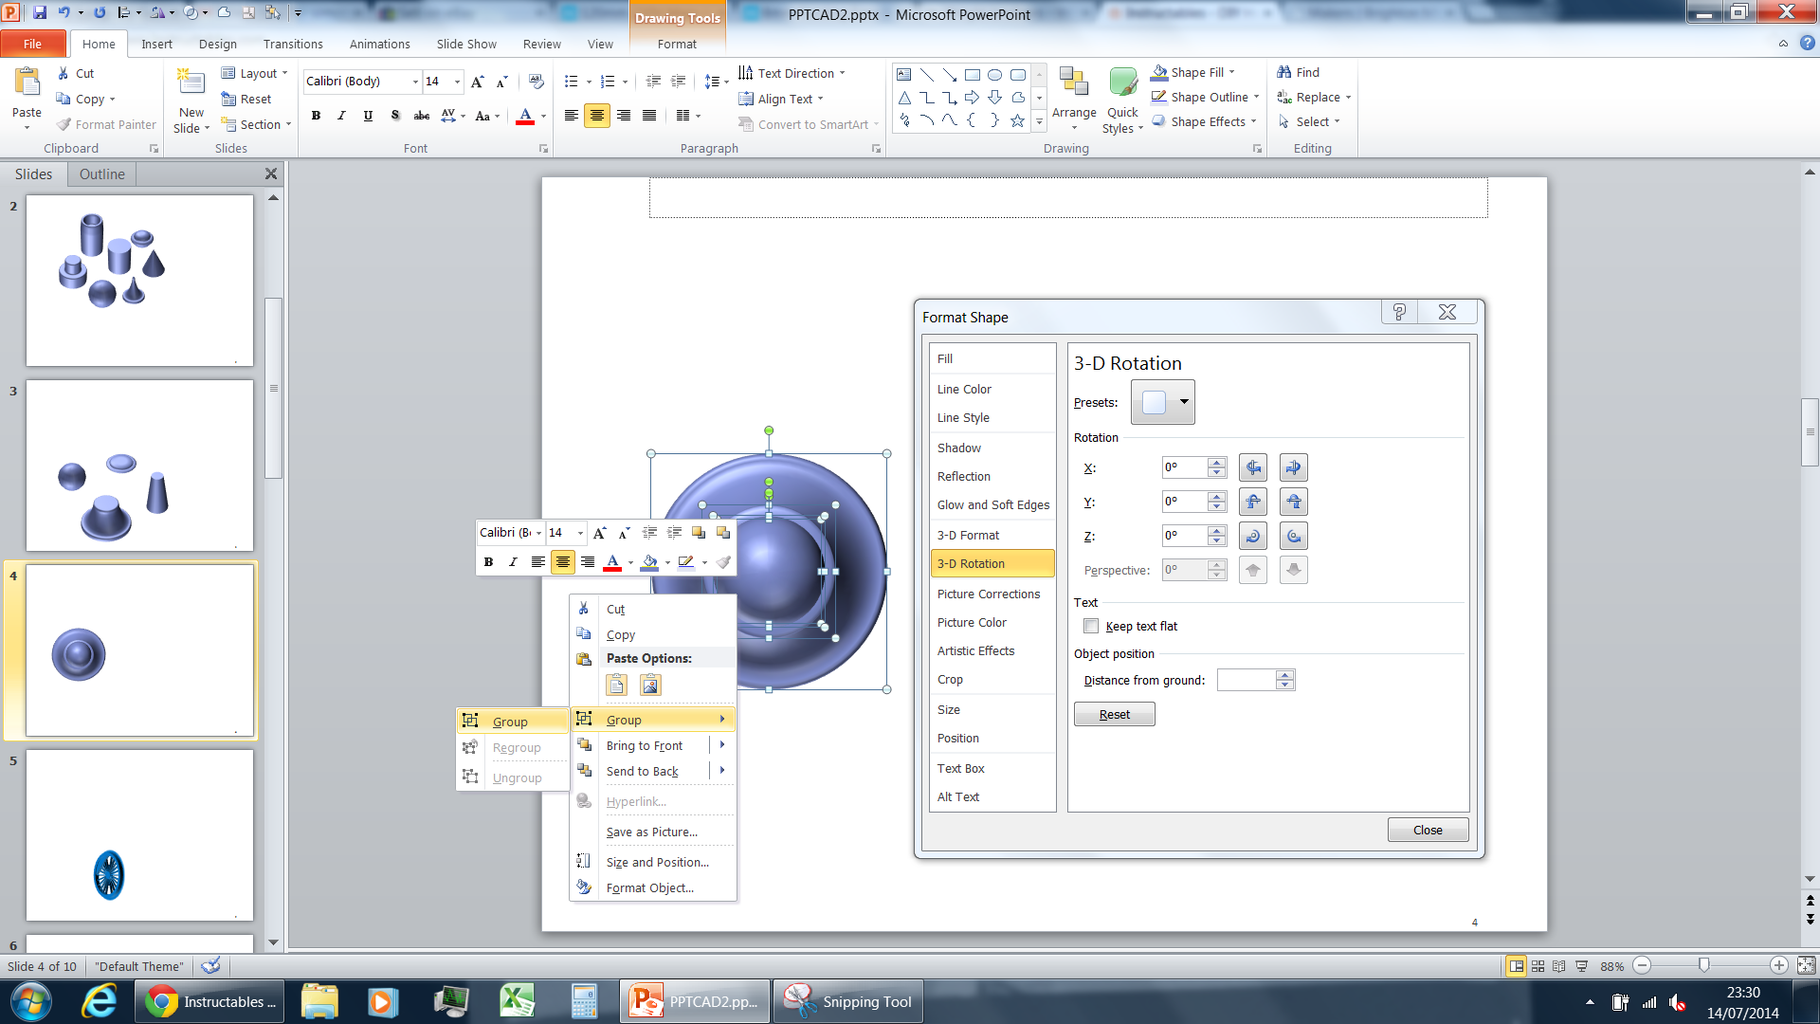


For a shape that is easier to handle long term, it may be worth making a rotatable group shape.
Get your 4 parts and remove all the rotation (the top preset).
Use Align Middle and Align Centre to line them all up as if viewed from above.
Group the parts and rotate them as before. They will all be in a heap.
In the 3D Rotation tab there is a Distance from ground control. Use this to raise the higher parts of the piece back into position. When finished this will rotate to any angle you want without falling to pieces.
This is a powerful tool that simplifies more complex shape assemblies and has other benefits I will explain later. The only down side is the parts all have to face the same way and cannot be resized without first removing the rotation.
Step 5: Materials and Fills

Now have a play with the settings. In the 3D Format tab you will find you can change the material and lighting effects. Experiment to see what you can do.
You can also us special fills from the Fill tab to achieve effects. You can fill with:
- Transparency (allthough this doesn't always render well)
- Gradients (Which can also be used to make stripes, e.g. for illustrating screw threads)
- Combining gradients with transparency can make part of the shape invisible if required
- Pictures - Thomas' face will be made by filling a circle with a picture of Thomas' face
Step 6: Arranging Shapes in 3D - Advanced


To simplify things it is worth trying to make all the shapes face the same way in 3D.
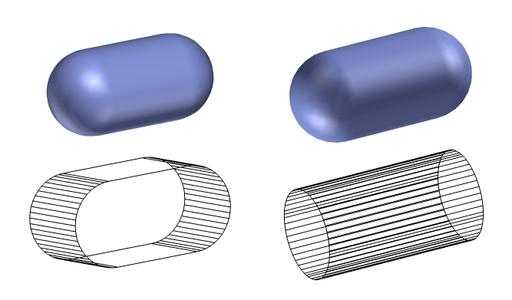
Cubes, Cuboids, Spheres and even sausages can be made in multiple directions (see wireframe versions). Think which is best as you make your illustration!
I hinted that there was more to rotatable group shapes earlier... Powerpoint renders the intersections; this can help give professional looks quickly.
Take the example with the 5 point star and circle. When extended into 3D as a group only the tips of the star protrude, giving rudimentary rocket fins in this case. This is used later where Thomas' side tanks meet his cylindrical boiler.
Step 7: The Hidden Gem - Merge Shapes
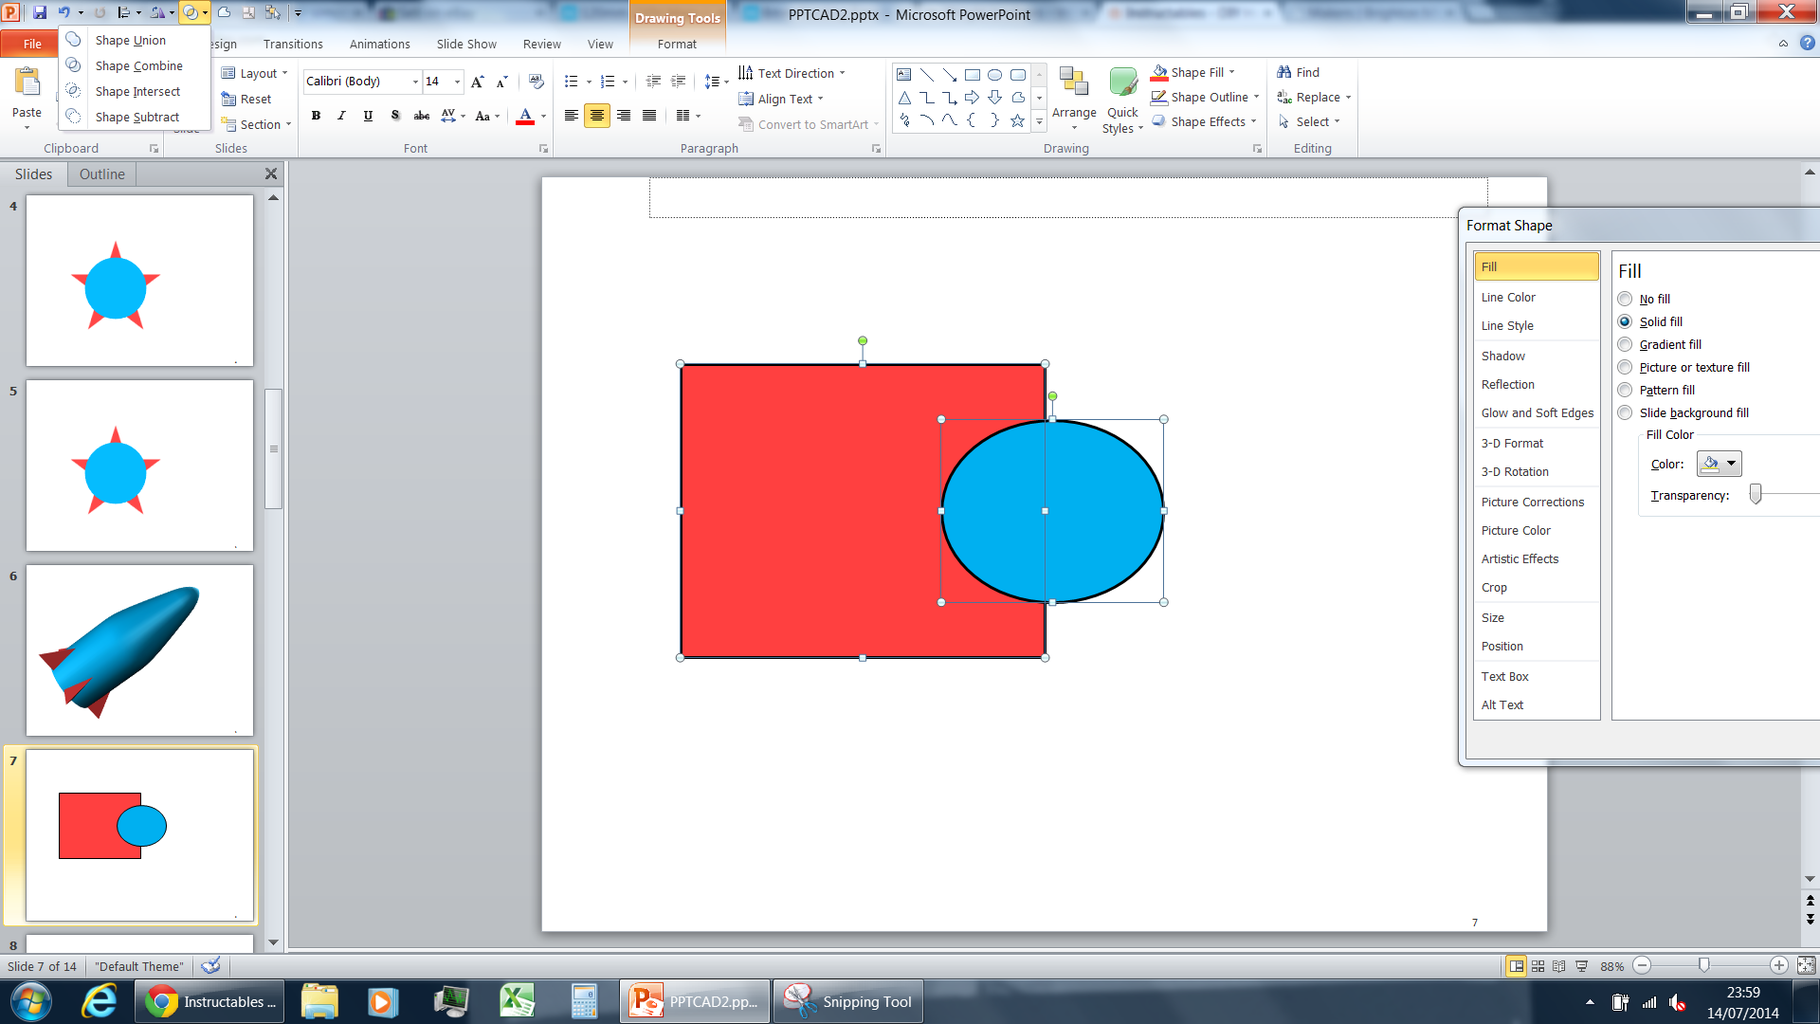


That Merge Shapes button we added earlier is a beauty...
(it is the one that looks like a Venn diagram) Called Combine shapes in older versions
What at first seems pretty simple suddenly unlocks pretty much any shape you can imagine. No more need to use edit points in 9 out of 10 cases (found by right clicking the shape if you really have to, mostly useful for curving lines). Make complex shapes by adding, subtracting and intersecting simpler shapes
The five* options are simple:
- Union merges the two shapes into a single shape
- Intersect keeps only the overlapping regions of a shape
- Combine keeps areas where non-overlapping regions exist. This tends not to be very useful except rare circumstances.
- Subtract takes the first selected shape and removes any areas that overlap with subsequently selected shapes.
Fragment* breaks the separate regions of shapes and overlap into separate parts. I haven't used this much but it might be handy on occasion.
*Fragment is only available in newer versions of PowerPoint (2013+ or 365),
A few points on using Merge Shapes:
It won't allow you to use this feature if any shapes are grouped, or if there is text in any of the shapes. Annoying, but there it is.
The order you select the shapes is important. Subtract removes all subsequent shapes from the first one selected. For all options the resultant shape after combining takes the properties of the first one selected, including styling such as line, fill, etc. but also order (whether it overlaps on top/underneath other shapes) and rotation (if the first shape is upside down the merged shape will be upside down too.
This last point gives a neat trick if you want to put level text in a rotated shape (an angled arrow for instance); draw a small rectangle completely inside the rotated shape, select this first, then the rotated shape and union them. Because the rectangle is completely contained the shape is unaffected, but now behaves as if it were the right way up. Text and image fill will be upright, and aligning to other shapes works properly. This also makes 3D rotation work better in some circumstances.
The illustrations give simple examples of use.
Step 8: Applying These Methods - Wheel Example


Taking Thomas' wheel as an example I'll quickly walk through the process.
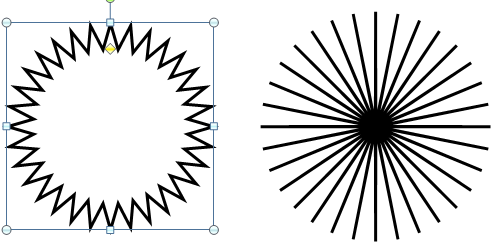
- Draw a 32 Point star - when selected there is a little yellow diamond that you can drag to adjust the spikeyness, move this nearly to the centre to make the spokes tapered but thin.
- Draw a ring and align centre and middle with the star; use the yellow diamond on the ring to adjust the inner diameter to truncate the ends of the spokes so they aren't too pointy
- Combine shapes - subtract the ring from the star (selecting the star first)
- Draw another ring and add a freeform shape as shown to create the counter weight
- Draw another ring and a circle to act as the flange and hub respectively
- Stack the lot on top of each other and size them appropriately (you can use the selection pane to select shapes behind other shapes rather than having to send to back temporarily)
- Group the parts and rotate them so you can see depth
- Set the appearance (fill, line, material and lighting) as required
- Add depth and Angle bevel to all these parts and size the heights and widths to look right
- In conjunction you will need to set distance from ground for each shape
Ten steps that after some practice will take under 2 minutes to get right. Have a go...
Step 9: Building Thomas Piece by Piece

I won't step through the entire Thomas build as it would be very dry reading, but the same methods are used throughout the build. Here are some top level pointers for you to see how to approach this task:
1. Thomas is too complicated to build entirely in shapes facing one way.
The illustration would need to be deeply compromised, so as shown in the first image I did as much as possible side on and finished the illustration with some other sundries at other angles (whistles, dome and funnel face upwards, the rest forwards)
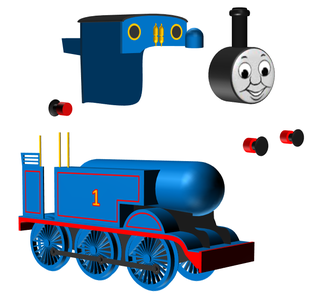
2. The 2D arrangements are actually quite natural
Most of the drawing is actually just a side on view. Repeated shapes such as wheels need copy/pasting on top of themselves so you have 2 when you get to 3D. As you can see in the second image, it starts to look like a drawing as the parts come together. The lack of outline sometimes makes it hard to see the parts, and some are buried, so again selection pane is very useful here
3. I have cheated a little
I drew Thomas in a race to see who could draw Thomas best in one hour, so was happy to take compromises in order to get it looking good quickly. There are two shapes that are not 3D: the dark blue inside of the cab is a freeform shape, as is the dark grey region underneath Thomas (it looked weird to see across to the wheels opposite as there would be all sorts of seldom drawn suspension, brakes, chassis etc. here)
4. The face and number are surface detail
The number is easy, find an appropriate font (Calibri in this case), type it in. Adjust text box boarders in 'format shape' to position it, set text effect outline red text colour yellow. Boom.
The face I toyed with drawing but due to the time limit I copied the face from the Thomas The Tank Engine logo. Two options from here (I can't remember which I used this time) Option A) draw a circle and the selected Fill>Picture or texture fill>Insert picture from clipboard - or - Option B) Paste as image and Crop to shape> Circle.
Either way this circle can then be bevelled to a slight dome, and have depth added. The black outline gives the black sides to Thomas' smokebox.
Step 10: Finishing Up
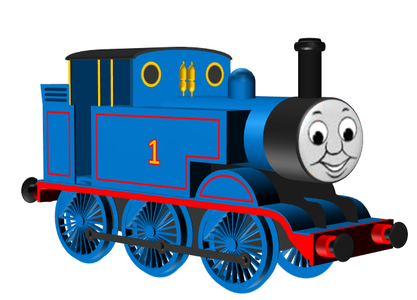

After a lot of nudging, tweaking distance from ground and rotating the different regions to look right together you have a Thomas The Tank Engine.
I particularly like the way you can wire frame the illustration, showing that it is all in 3D shapes!
I hope this is a useful guide. Add comments if there is anything I have missed and I will try to reply - though be warned I have a tendency to forget when I get busy:(
PS can you tell I went through this entire instructable unsure whether to refer to Thomas as him or it?
:)


