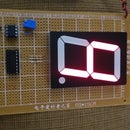
Introduction: Green Binary Counter
I have built a binary counter without using decoder. The diodes do the magic while the materials are: 1-7490 counter, 4-1N914 diodes, 1-555 timer, 2-4.7Kohm, 1-100uF capacitor, and 4-5mm LED's.
Step 1: Bill of Materials
1 IC7490
1 14-pin socket
1 8-pin socket
1 IC555
1 PCB Jameco 105100
4 5mm LED's any color
2 4.7K resistor
1 100uF capacitor
4 1N914 diode
Step 2: Schematic
This schematic is your guide so that you complete the project successfully. The negative side of each diode should be connected to the positive side of iits respective LED. Observe that the resistors are 4.7K while the capacitor is 100uF.
Step 3: Installing the Diodes
Once installed the pin sockets on the PCB, you can install the diodes and connect them to pin 12, 11, 9, and 8 from 7490 socket respectively. Note that you are leaving free the negative terminal of each diode with the black line.
Step 4: Installing the Positive Side of LED 1
When installing LED 1, you should connect it to the negative side of that diode pointed out.
Step 5: Installing the Positive Side of LED 2
When installing LED 2, you should connect it to the negative side of that diode pointed out.
Step 6: Installing the Positive Side of LED 3
When installing LED 3, you should connect it to the negative side of that diode pointed out.
Step 7: Installing the Positive Side of LED 4
When installing LED 4, you should connect it to the negative side of that diode pointed out. Note that the pin left free in each LED is its negative terminal.
Step 8: Do the Rest of Connections
For completing your project, do the rest of connections.
Step 9: Install the Integrated Circuits
Install the IC7490 & IC555 so that you can enjoy the project.

Participated in the
Microcontroller Contest 2017


