

Introduction: How to Change Chuck on Jet Lathe


This instructable will show you how to remove and reinstall a chuck on a Jet Lathe in case you would like to change between a three jaw chuck and a four jaw chuck. These instructions were written with the metal lathes at Techshop Detroit in mind....
Step 1: STEP 1: Loosen the Bolts on the Chuck


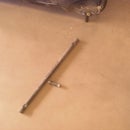
There are three markings next to these bolts, a straight line and two V's. These markings as well as the notch on the bolt are used to tell if the chuck is attached or not. As in the picture, when the notch is in between the two V's the chuck is correctly tightened. The notch can change exactly where it is between these two V's but as long as it is between them, the chuck is properly mounted. To loosen the bolts and remove the chuck you turn the bolt counter clockwise until the notch aligns with the straight line. When the notch on the bolt and the straight line are in alignment then the chuck can be removed from the lathe. Chucks are somewhat heavy and if you have any doubts that you might drop the chuck use something like a piece of wood to protect the ways or to have something to rest the chuck on when you remove it. Once you have protected the ways you can use a brass hammer to loosen the chuck and then pull it off.
Step 2: STEP 2: Remount Another Chuck


Remounting a chuck is almost the exact opposite of removing. Align the three mounting pins and slide the new chuck onto the lathe. Tighten all of the bolts until the bolt notches are all in alignment with the first V and then continue around tightening all of the bolts until they are hand tightened and the notches are all somewhere in between the two V's.
Step 3: STEP 3: Start Turning

Now you are ready to start turning!


