

Introduction: How to Make a Great Instructable


Every single Instructable has potential in my eyes, and in many of yours. And there are thousands of Instructables and thousands of members on this site. But as long as I have been on this site, I have seen both well delivered Instructables and, well, not so well delivered Instructables. So, here's my question: What makes a great Instructable?
A great Instructable has many characteristics. Those include...
•Clear, Original Photos
•Detailed Instructions
•Complete Sentences
•Various Sentence Structures
•Humor (We All Love a Good Laugh)
So in this Instructable, you will learn how to make a wonderful Instructable easy as pie!
Step 1: Photography 101


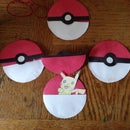
So here is the most important thing in an Instructable: Clear Pictures. So what should a clear photo provide? Well, it should be able to give the viewer a clear understanding of what you are doing. Not only should it provide those visual people with clear instructions, but it should also pertain to the subject. For instance, if you were making an Instructable on how to make a strawberry smoothie, than the cover picture should be a strawberry smoothie, not some cat or dog.
Next, let's learn the basics of photography. Take a look at the pictures above. There are a few good ones and a few bad ones. First, let's discuss the good ones. As you can see, the wooden angel is very clear and well lit. It's very easy to take a great picture like the first angel. This is how:
1) Get your camera (or phone) ready
2) Focus your camera on the object you're taking a picture of
3) Make sure your object is lightened up... Put it in direct sunlight or near a window!
4) Take multiple photos
So now let's talk about the bad pictures. In the second picture of the headphone charm, it's extremely fuzzy and a little hard to see. Here are the do nots of photo taking...
•No fluorescent light... It's makes the picture loom very odd
•No shaky hands... It makes the picture blurry
•No pictures in the dark... How is anyone supposed to see?
So now that you know how to take good pictures, let's move on!
Step 2: Detailed Instructions

Here is another important thing in a good Instructable... Your instructions should be precise and detailed. Your Instructable has to make sense for anyone to even understand what you're talking about! Let's look at a few scenarios...
•So you're looking at an Instructable on how to make a paper airplane and it's pictures are... ehh and it's instructions are... wait, what? What did you just read? Here is what is it: Take that corner and fold over and then do the same thing on the other part. What corner? The photos are too blurry to tell. Looks like you'll have to look for a better Instructable.
•You're looking at an Instructable on how to make your own shampoo. It's great! Everything is clear, even the pictures! And better yet, you were able to make it! Favorited!
Those were just two scenarios. But what the I'm saying is that your instructions need to be very clear, or else no one will be able to make your creation. And what's very important is no shortcuts.
Step 3: Grammar for Dummies

Boo, now it's time for learning. But it's about sentence type and conventions. Isn't that just your cup of tea? Yeah, no. Anyways, let's go over the appropriate language for Instructables:
•No texting language! That includes words like "ur, r, k, idk, ikr, lol"
•Use appropriate language! No profanity or inappropriate words. Remember, there are children on this site
•Try not to mispell words... Don't let autocorrect get the best of you!
Don't you hate it when someone misspells a word and you know what it's supposed to be? Probably not, but it's my pet peeve! Before you publish an Instructable, make sure that all of the words are spelt right and you have correct punctuation. And also, use different sentence types. Get out of that simple sentence habit and start varying your sentence structures. And don't forget to widen your vocabulary selection... Good and bad and things and stuff is not that detailed! So grammar may be boring, but it plays an important part in Instructables.
Step 4: Importance of Bold, Italic, and Underlining

On the site, you have a few different options for your text. You can leave it normal, like many people do, or you can add a little something to it to make it stand out. Those somethings are...
•BOLD
•Italic
•Underline
Using these settings emphasizes your instructions or points out important details. For example, you would use bold words to point out the things that are very important. You could also underline them, which is basically like highlighting a phrase or word. Italics can be used if you are trying to emphasize a point. Using these settings tells your viewers what is important.
Step 5: Collages


Sometimes you have multiple pictures in a step and you want the pictures together. I use an app to collage my pictures in most of my looming Instructables. He app is called Pixlr, and it's really neat because you can change the color of the background, the spacing, and the roundness. Another app that's great for collaging is InstaCollage, which gives you multiple options for collages including decor.
Step 6: Inserting Links
Trust me, I'm no computer expert, but I do know how to insert links. On your option bar, there will be a picture that looks like a chain link. The first box is your URL, and the second box is the text that will represent your URL. Click on the example below:
•Here is a great Instructable!
You can use links to add certain Instructables to yours. And you can also link pictures and other sites to your Instructable! It's important to do, especially if you need your viewer to be able to know something to accomplish the given task. It's very inportant
Step 7: Adding Titles


Something that I really like to do is to add titles to my pictures. If you have ever seen any of my Instructables, you will see that a lot of them have titles. Two apps I use for adding titles are Pixlr and Phonto. These apps are great for adding titles!
But remember, your texts should never cover up your picture. In the first picture of the geode rock, you can see that the text is covering up the picture. But in the picture of the second geode rock and the rocket ship, you can clearly see the picture and the text.
Step 8: Taking Time Into Consideration

Just because it may be 2:00 PM where you live could mean that it's 12:00 AM where someone else lives. So if you don't get the number of comments and views and hearts you expected to get, just be patient.
And when you publish your Instructable, there will be a little note on it that tells you that it may take up to 24 hours to actually get published. So you have to be patient when it comes to Instructables.
Step 9: Publishing, Responding, and Being Nice=)

Now that you have learned the basics to a good Instructables, it's time to make one! Remember, Instructables is a site for publishing how-to's, so anything from food to crafts to video games will do! All you have to do is follow these steps and publish! And when your Instructable is published, people will probably comment on it. Even though Instructables has a "Be Nice" policy for comments, be aware that many will break this rule.
But when someone does comment on your Instructable, and it's positive, you should reply and say "Thanks" or "I'm glad you liked it!". And remember, always be nice to others. It's the most important thing on Instructable, so remember it! And thank you for viewing this! I hope it helped!


