

Introduction: How to Make the Hammer of Thor


This Instructable is being entered into the 3rd Annual Make it Stick contest and the Halloween Props contest. Don't forget to vote... even if it's not for me. :(
My wife and I decided to dress up for the release of the Avengers movie earlier this year. Considering the fact that I had been growing my hair out and that I had a beard we thought it appropriate for me to go as Thor. I decided to start by making Thor's hammer, Mjolnir. After all, what's Thor without his powerful hammer?
(See the rest of the costume here)
Step 1: Supplies
For this project I used:
-Foam Blocks
-Masking tape (wide)
-Glue
-Wooden Dowel
-Leather scraps
-Cardboard
-Silver paint
-A serrated knife
-A file
-A few other odds and ends
Step 2: Sledge


The first thing I did was figure out what size I wanted the main body of the hammer. You may want to size it somewhat appropriately to yourself or you might want to try and keep it accurate to Thor. I ended up making it about a foot long, and about six inches tall and six inches wide. I used some thick insulation foam that I happened to have, but you can use floral foam or regular foam from the craft store. I used a serrated knife to shape it. First I made sure my block was the right size. The foam I had wasn't thick enough so I used two pieces. I cut the edges off to make it a sort of oblong octagon. Then I cut the corners off to give it that geometrical-semi-rounded look that it has.
After getting it the right shape I used my file to smooth it out. If the foam you use doesn't seem to need this then you can skip it, but the stuff I used got really rough when I cut it. I've heard using an electric knife (the kind used to carve turkeys) helps alleviate this problem but I don't have one so I had to just cut it as smooth as possible and file it the rest of the way.
Once I was happy with the shape I covered it with masking tape. I used a wide roll so I'd get good coverage. I'm not by any means going to pretend like this is the best method, but it was cheap and easy. If you do it this way make sure you keep the tape fairly straight and very smooth.
I drilled a hole into the bottom using a hand crank drill. You could probably use a regular drill you just have to be very careful because of how soft the foam is. Make sure you don't make the hole too big. You'll want the handle to be a snug fit.
Step 3: Topper


For the disc on the top of hammer I just used my roll of masking tape as a template and cut out a piece of cardboard. Depending on the size of your hammer you might have to use a different template.
I taped the disc up to match the rest of the hammer and glued it to the top. To make sure it adhered well I put it upside down on the table and put some heavy blocks on it.
Step 4: Paint

I gave both the sledge and the wooden dowel a couple good coats of grey and then a light dusting of silver.
Step 5: The Handle


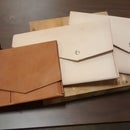
There are a lot of different variations on Thor's hammer so you can do the handle several different ways depending on the look you're going for. If you want to go the really simple route you could wrap it in strips of cloth but I wanted mine to be at least kind of similar to the movie so I decided to do a leather grip. I figured out how long each strip needed to be to go around the dowel and then cut them out in a sort of wavy pattern. Each strip was about an inch and a half in height. You can cut them out with a really strong pair of scissors or a good utility knife with a brand new blade.
After I had them all cut out I punched holes in them so I could sew them. I used a leather punch, but you can use an awl or a nail or really anything sharp. I sewed them on with a large needle and some waxed thread. I also put glue under them as I sewed them on to make sure they stayed in place.
For the final touch on the handle I attached a loop on the end. I cut a thin strip of leather and using really tiny nails I tacked each end of the strip to opposite sides of the dowel. Then I cut another strip of leather and wrapped it around the butt of the handle to cover where I had attached the loop. To attach it I used the same method I used for the rest of the grip.
I put rubber bands around each strip of leather as the glue dried.
Step 6: Finish


The last step is simply to glue the handle into the hole you made in the sledge. If you find the hole is slightly too big you can wrap tape around the dowel rod until it fits tighter. Then just cover the dowel with glue and put it in the sledge. Make sure you cover it really well with glue. Also, when you put the handle in make sure it stays straight until the glue is totally dry. You don't want to turn your back and find that it dried crooked.
Now you're ready to save the world!

Participated in the
3rd Annual Make It Stick Contest

Participated in the
Halloween Props Contest


