

Introduction: LED Tin Can Lantern


In this instructables we update the old tin can candle lantern, to the new improved Way-Cool LED Tin Can Lantern. The LED tin can lantern is a neat way to light up your backyard or camp ground with interesting patterns of brilliant LED lights. You too can make your own LED Tin Can Lantern just like this one; it is easy and fun to build to bring the night into the LED light.
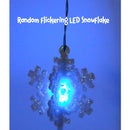
Summary: The Blue LED shine through the small holes punched out from a quart size tin paint can. It is neat how the bright LED light shines the punched out pattern on the ground around it.
Draw inspiration from the pictures and the idea to get your creative juices flowing in what you can do with this unique technique in LED lighting. Enjoy
Step 1: Design and Materials

Find a neat and interesting pattern on the internet or make up your own. For some ideas to get your creative juices flowing try Googling “Tin Can Lantern”, ” Tin Can Light”. I used two leaf patterns and a tree pattern. At the hardware store go to the paint department and buy a metal quart size paint can for making the LED tin can lantern. You can also use any tin can from beans or soup etc, but you need a lid.
Materials list:
1. Tin can with lid. Quart size is good
2. Printed out paper pattern or design
3. Tape
4. Hammer
5. Awl or Ice pick (smaller tips work the best)
6. Wire for tin can handle (metal hanger or 16 gauge or type wire)
7. LED light circuit with batteries for illumination
8. Cotton towel (keeps can from rolling while punching holes)
9. Water
10. Freezer (prevents the tin can from denting during hole punching)
Step 2: Punching Holes in Tin Can


Take the printed out pattern or design and securely tape it to the tin can. Remember the lid is the top (up) position for pattern layout.
Fill the tin can with cold tap water leaving about 1/4 inch from the top and put in the freezer for 24 hours.
With the tin can frozen you can punch-out the pattern.
Lay down a towel on a hard surface like concrete will work the best in punching the holes in the tin can. If the paper is getting to wet due to condensation then put the tin can back in the freezer for refreezing.
Punching the holes with an awl or ice pick rather than drilling is best. Drilling make the holes all uniform in diameter but punching the holes makes light different hole diameters thus give the tin can a more unique way it lights up. The LED will shine through the holes in the lantern.
Handle:
The handle for hanging your LED tin can lantern can be made from a metal hanger or 18-16 gauge solid type wire. Punch two holes in the tin can for support. See the picture for reference.
Step 3: LED Light


The LED tin can lantern is using a Blue 1W Luxeon HB LED. (High-Brightness) The LED is driven by a 300ma (max current) LED driver circuit that works with 12V. I used two battery packs of 4 each for at total of 8 AA reachable NiMH batteries to power the light. The LED driver can be made or bought from eBay search for “LED driver” they are cost around one dollar. You can use 5mm LED's to illuminate the tin can lantern. It is best to shine the light downward from top of the lid I found.
The LED is mounted to the inside top of the lid with plastic screws and nuts.
Step 4: Let It LED Shine

See the LED Tin Can Lantern movie to see it in action.
I hope you like the LED Tin Can Lantern.
Attachments

Finalist in the
LED Contest
Participated in the
Back to School Contest

Participated in the
DIY Wedding Contest


